
OxygenOS 14.0 User Manual

1
Contents
User Manual
.........................................................................................................................
5
Notes before reading
.......................................................................................................
5
Get started
............................................................................................................................
5
System navigation
............................................................................................................
5
Clone Phone assistant
.....................................................................................................
8
Screen lock and unlock
.................................................................................................
10
Always-On Display
..........................................................................................................
12
Viewing recent tasks
.....................................................................................................
18
Entering text
......................................................................................................................
19
Home screen and Shelf
................................................................................................
20
Home screen folders
.....................................................................................................
25
Global Search
....................................................................................................................
26
Screenshot
.........................................................................................................................
27
Special features
................................................................................................................
31
Screen switching
.............................................................................................................
31
File Dock
..............................................................................................................................
37
Smart Sidebar
...................................................................................................................
39
Split View
............................................................................................................................
41
Flexible Window
..............................................................................................................
43
Quick Launch
....................................................................................................................
47
Fluid Cloud
.........................................................................................................................
48
Simple mode
.....................................................................................................................
50

2
Photos and videos
............................................................................................................
51
Photo taking
.......................................................................................................................
51
Editing images and videos
.........................................................................................
66
Photos
..................................................................................................................................
69
Albums
.................................................................................................................................
72
Gaming on your phone
..................................................................................................
75
HyperBoost Gaming Engine
.......................................................................................
75
Turning on game performance modes
.................................................................
75
Game Assistant
...............................................................................................................
76
Quick startup
....................................................................................................................
77
Turning on Mistouch prevention in games
.........................................................
77
Turning on Championship mode
..............................................................................
78
Using Voice changer
.....................................................................................................
79
Turning on game filters
................................................................................................
79
Optimizing touch controls
...........................................................................................
80
Turning on 4D Vibration
...............................................................................................
81
Listening to music while gaming
..............................................................................
81
Turning on Smart dual channel network
.............................................................
82
Floating game window
.................................................................................................
82
Convenience services
...................................................................................................
83
Multi-device connection
................................................................................................
87
Multi-Screen Connect
....................................................................................................
87
Connecting your phone to your Windows PC
....................................................
96
Screencast
.........................................................................................................................
97
Connecting printers
.......................................................................................................
99
Privacy and security
.....................................................................................................
102

3
Privacy password
..........................................................................................................
102
Hide apps
.........................................................................................................................
102
Private space
..................................................................................................................
104
App Lock
...........................................................................................................................
105
System Cloner
................................................................................................................
107
Permission manager
.....................................................................................................
111
System security
..............................................................................................................
114
Frequently used apps
...................................................................................................
117
Contacts
............................................................................................................................
117
Clock
....................................................................................................................................
118
Compass
...........................................................................................................................
120
App management
.........................................................................................................
121
Notes
..................................................................................................................................
125
File management
..........................................................................................................
128
Weather
............................................................................................................................
130
Using the Calculator
.....................................................................................................
131
Recorder
............................................................................................................................
132
IR Remote
.........................................................................................................................
135
System settings
..............................................................................................................
136
The Search function in Settings
.............................................................................
136
Wi-Fi
....................................................................................................................................
136
Mobile network
..............................................................................................................
140
Bluetooth
..........................................................................................................................
144
Connection & sharing
.................................................................................................
145
Wallpapers & style
.......................................................................................................
148
Home screen and Lock screen
................................................................................
155

4
Display and brightness
..............................................................................................
157
Sounds and vibration
...................................................................................................
161
Notifications & status bar
.........................................................................................
166
Password and security
...............................................................................................
170
Safety and emergency
...............................................................................................
173
Battery
...............................................................................................................................
175
Digital Wellbeing & parental controls
..................................................................
180
Additional settings
.......................................................................................................
183
About device
...................................................................................................................
197
Users & accounts
.........................................................................................................
200

5
User Manual
Notes before reading
This manual will provide you with comprehensive instructions for using
OxygenOS.
Some of the apps or features described in this manual are not
available in all countries and models and features may vary by
country, region, or model. Please refer to the actual display on
your phone.
We will continue optimizing OxygenOS, so the usability of the
apps or features described in this manual may change. Please
refer to the actual display on your phone.
We will update this manual from time to time to provide the best
possible service. Thank you for your support and understanding.
Get started
System navigation
Using navigation gestures
Use gestures for navigation to enhance your mobile experience and

6
make the most out of your device.
★ Operation path
Go to "Settings > Additional settings > System navigation" and select
"Gestures".
How to use gestures:
Back to previous page
Swipe in from the lower-left or right side of the screen.
Back to the Home screen
Swipe up from the bottom of the screen.
Viewing recent tasks
Swipe up from the bottom of the screen and hold.
Switch to the previous app
Swipe in from the lower-left or right side of the screen and hold.
Setting up gestures
Go to "Settings > Additional settings > System navigation", select
"Gestures", and set the gestures you need.
Turn on "Hide gesture guide bar" to hide the gesture guide bar at
the bottom of the screen.
Turn on "Vibrate on back navigation" and the phone will vibrate
when you swipe inward from the left or right side of the screen to

7
go back to the previous page.
Turn on "Switch to previous app". Then you can swipe inward
from the left or right side of the screen and then hold to switch to
the previous app.
Turn on "Mistouch prevention" and then when you are using full
screen in landscape mode (for example, when you are playing
games or watching videos), gestures in certain apps need 2
swipes to take effect.
Navigation with buttons
You can also enable the button navigation function to use the Home
and Back buttons to operate your phone.
★ Operation path
1. Go to "Settings > More > System navigation", and select "Buttons".
2. You can choose your preferred layout of the buttons based on
your needs. Once this function is enabled, there will be three fixed
navigation buttons at the bottom of the screen.
○ Open recent tasks
○
Go back to the Home screen
○
Go back to the previous page

8
Clone Phone assistant
Clone Phone offers a quick and easy way to migrate data (such as
contacts, messages, call logs, apps, images, videos, preference settings,
and cards in your Wallet) from an old phone to your new phone, making
the transition seamless.
★ Operation path
Migrate from an Android device from another brand
1. On your new phone, open "Clone Phone". Tap "This is the new
device" and then "Other Android".

9
2. Follow the prompts to download and install "Clone Phone" on your
old device.
3. When the installation is complete, tap "Already installed on the
old device" on your new phone. Connect your old phone to your
new phone by scanning the QR code with Clone Phone or
connecting manually.
4. After both phones are connected, select the data you wish to
migrate on your old phone and tap "Migrate".
Migrate from an iPhone
1. On your new phone, open "Clone Phone". Tap "This is the new
device" and then "Import data from an iPhone".
2. Following the prompts, scan the QR code on your new phone with
the old phone to install the "Clone Phone" app.
3. Open "Clone Phone" on your old phone and tap "This is the old
phone". Select the data you wish to migrate and tap "OK".
4. Following the prompts, scan the QR code on your new phone with
the old phone and tap "Join".
5. After both phones are connected, select the data you wish to
migrate on your old phone and tap "Migrate". Wait for the cloning
to complete and then tap "Done".

10
Screen lock and unlock
Using the Lock screen password
Your phone will lock itself if you don't use it for a while.
Once you have lighted up the screen, swipe up to show the password
input panel. Enter the Lock screen password.
There are three types of Lock screen passwords.
Numeric password: Enter 4 to 16 digits to set your Lock screen
password.
Alphanumeric password: Enter a 4 – 16-digit password that
contains both numbers and letters.
Pattern password: Connect at least 4 dots to create a pattern as
your Lock screen password.
★
Operation path
Go to "Settings > Security & privacy > Device unlock > Screen lock".
Please ensure you do not forget your Lock screen password. If you
forget it, you will not be able to unlock your phone or export any of
the data stored on your phone.
Unlocking with face
Unlocking with face is fast and secure.

11
★ Operation path
1. Go to "Settings > Security & privacy > Device unlock > Face &
Fingerprint Unlock" and enter the Lock screen password.
2. Hold the phone 20 – 50 cm away from your face and tap
"Continue".
3. After the phone has collected your facial data, tap "Done". Once
your facial data is collected, you will be able to unlock your phone
with your face.
Avoid having your face in an overly bright or underlit environment
when adding your facial information.
Unlocking with fingerprint
This feature is only available on some models. Please refer to the
actual device for its final functions and features.
★ Operation path
1. Go to "Settings > Security & privacy > Device unlock > Face &
Fingerprint Unlock". Follow the prompts on your screen, and place
your finger in the fingerprint sensing area to add your fingerprint.
2. Press the fingerprint sensing area with your finger, and then your
phone will be unlocked.
3. After adding your fingerprint, you can also:

12
○ Tap the icon next to the fingerprint that has been added to
rename or delete the fingerprint; or
○
Tap "Add fingerprint" to add multiple fingerprints.
For fingerprint recognition accuracy, we recommend adding your
fingerprints again each time you change your screen protector.
Launching Snapchat from the Lock screen
You can quickly launch Snapchat from the lower-left corner of the Lock
screen.
★
Operation path
1. Go to "Settings > Home screen & Lock screen > Lock screen
shortcuts".
2. Select "Snapchat" so that you can quickly launch it by swiping on
the shortcut icon at the bottom of the Lock screen. You can also
assign the shortcut to other features like Lock Screen Magazine or
Flashlight.
Always-On Display
Setting Always-On Display
With Always-On Display, you can check the time, date, notifications, and
other information on the screen while the screen is off.

13
★ Operation path
1. Go to "Settings > Wallpapers & style > Always-On Display", and
turn on "Always-On Display".
2. On the "Always-On Display" page, tap "More display settings" to
set a display mode and information (date, battery level,
notifications, and more) to be displayed on the Always-On Display.
○ Tap "Display mode" to schedule when to turn on the Always-
On Display. You can set it to All day, Scheduled, or Power
saving.
○
Tap "Info" to select the information shown on the Always-On
Display. Choose from the time, date, battery level, and other
information.
○ Turn on "New notifications" to see new notifications on the
Always-On Display.
Always-On Display is turned off when the battery level drops
below 10% and the phone is not connected to a power charger.
Always-On Display requires hardware support. It is not available
on some models (such as models using an LCD screen).

14
Infinite Always-On Display, your one-of-a-kind
screen
The system offers a wide range of Always-On Display styles such as
text, images, analog clocks, Omoji, and Artist series.
You can also create your own personalized Always-On Display, or turn a
photo of your parent, child, or friend into a portrait silhouette on a
canvas and use it as your Always-On Display wallpaper.
Changing how long the screen stays on
When your phone is not used for a while, the screen will automatically
turn off to save power and protect your privacy. You can change how
long it takes your phone to automatically turn off the screen.
★
Operation path
Go to "Settings > Display & brightness > Auto screen off" and choose a
length of time.
Drawing an Always-On Display pattern
You can draw an Always-On Display pattern with your hand.
★ Operation path
1. Go to "Settings > Wallpapers & style > Always-On Display", and
tap "Custom patterns" in the "Personalized" section.

15
2. On the pop-up page, you can customize elements such as color,
brush, and shape. When you're done, tap in the upper right
corner.
Creating Always-On Display with text and image
In addition to text, you can use your favorite pictures to create your
Always-On Display. It can be of your loved one, family, pet, or favorite
celebrity, so that you can see them every time you glance at your phone.
★ Operation path
1. Go to "Settings > Wallpapers & style > Always-On Display". In the
"Personalized" section, tap "Text and image" .
2. Select and edit your favorite image.
3. Enter text below the image. You can adjust the text color, size,
and align the text.
4. Tap "Apply" to finish.
Creating personalized text on the Always-On
Display
You can display your favorite motto on your Always-On Display.
★
Operation path
1. Go to "Settings > Wallpapers & style > Always-On Display", and
tap "Text" in the "Personalized" section.

16
2. In the pop-up interface, enter the text content and personalize
the text by adjusting the color, font weight, layout, etc.
3. Tap "Apply".
Canvas
The system can turn a color portrait into portrait silhouette.
★ Operation path
1. Go to "Settings > Wallpapers & style > Always-On Display", and
tap "Canvas" in the "Personalized" section.
2. In the pop-up interface, select a photo you like by taking a photo
or selecting one from Photos.
3. Tap "Generate", and wait for the system to automatically
generate an Always-On Display draft.
4. Erase any unwanted lines and adjust the display style and color.
Tap "Next".
5. Adjust the size and position of the Canvas Always-On Display,
and tap in the upper right corner. After setting the text color,
tap "Apply".
Enable "Apply original image to Home and Lock screens" to set the
original photo that you turned into Canvas Always-On Display as
the Lock screen and Home screen wallpaper.

17
Viewing ride-hailing status on the Always-On
Display
View important information even when the screen is off. For example,
progress information of food deliveries, ride-hailing, and other services
can be seen at a glance even when the screen is off.
★ Operation path
1. Go to "Settings > Wallpapers & style > Always-On Display" and
turn on "Always-On Display".
2. Go to "Contextual info" and turn on "Smart suggestions". View the
progress of ride-hailing and food deliveries without waking the
screen.
Controlling music on Always-On Display
This feature allows you to control music on Always-On Display in a fast
and convenient manner without unlocking your phone.
★
Operation path
1. Go to "Settings > Wallpapers & style > Always-On Display" to turn
on "Always-On Display".
2. Tap "Contextual info" and turn on "Music playback" to add music
controls to the Always-On Display.

18
Viewing recent tasks
There are two ways to view recent tasks based on the navigation
method of the system.
When you are using gestures for system navigation, swipe up
from the bottom of the screen and hold, and then release to enter
the recent tasks screen. You can view your recent tasks by
swiping left or right.
When you are using buttons for system navigation, tap the
button to enter the recent tasks screen. You can view your recent
tasks by swiping left or right.
Clearing background apps
★
Operation path
1. When you're using navigation gestures, swipe up from the bottom
and hold for 1 second to enter the recent tasks screen.
When you are using buttons for navigation, tap on the bottom of the
screen to enter the recent tasks screen.
2. To clear an app, drag and swipe the app widget up.
3. Tap "Close all" below to clear all background apps with one tap.
4. If you see on the left side of an app, you need to tap to unlock
the app before clearing it.

19
Entering text
Switching input methods
★ Operation path
Go to "Settings > Additional settings > Keyboard & input method >
Manage keyboards" and then choose the input method you like.
Adjusting keyboard settings
★ Operation path
Go to "Settings > Additional settings > Keyboard & input method" to
change keyboard settings.
Tap "Keyboard location" and follow the prompts to make choices
based on your habits.
Turn on "Secure Keyboard for passwords" to protect your
password when you are entering it.
Turn on "Mistouch prevention" and "Use split keyboard in
landscape mode" to help you enter text with greater ease.
Turning on Secure keyboard for passwords
The secure keyboard is different from the normal keyboard you use for
entering text. It does not connect to the internet, show suggestions,
record your keystrokes, or collect and store your data, so you enter your

20
password without leaving a trace. By turning on the "Secure keyboard
for passwords", you can ensure that your passwords will not be leaked.
★ Operation path
Go to "Settings > Additional settings > Keyboard & input method" to
enable "Secure keyboard for passwords".
Home screen and Shelf
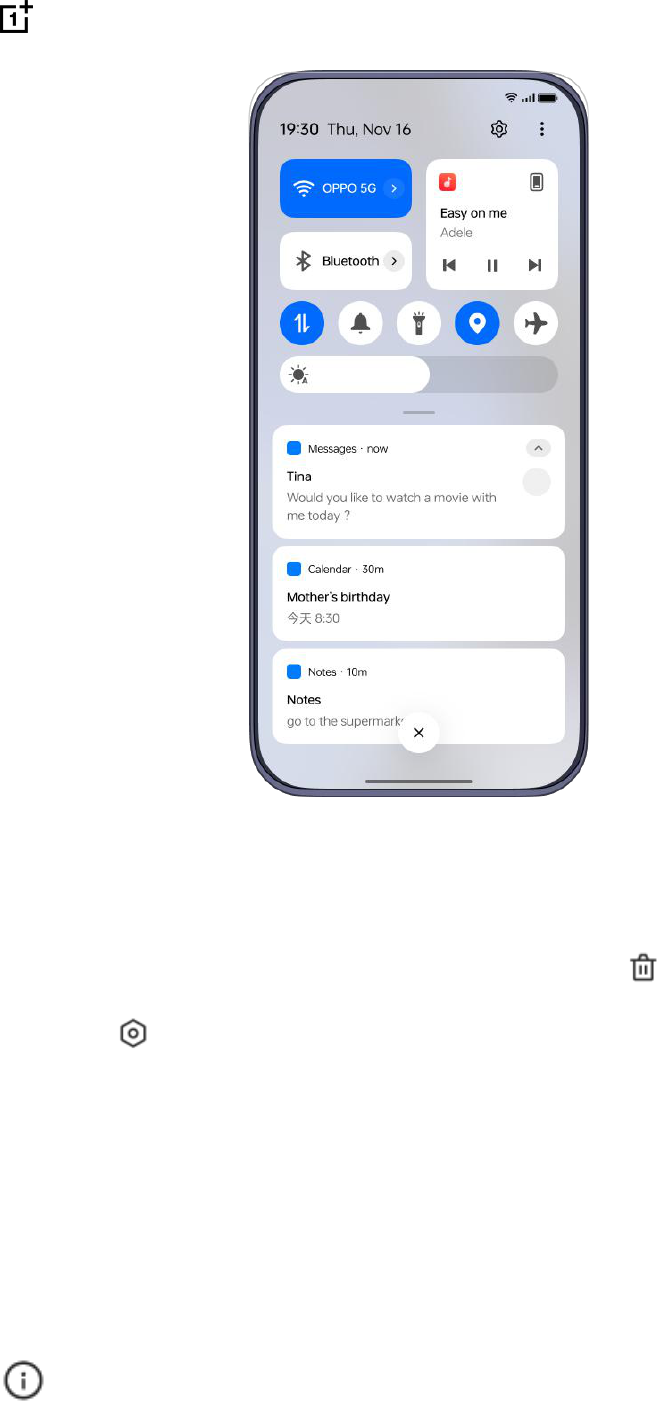
Viewing notifications
Swipe down from the status bar to view notifications. You can perform
the following actions.
21
Tap a notification message to open the corresponding app and
view details.
Swipe left on the notification message and tap to delete it, or
tap to choose "Set as silent" or "Turn off notifications".
Swipe right on the notification message to delete it.
When you receive an SMS verification code, a bubble will appear. Tap
the bubble, and the code will be automatically copied and pasted into
the corresponding area.
Some third-party apps that use privacy keyboards are unable to

22
access the clipboard or copy the code.
Quick Settings
Swipe down from the status bar to open Quick Settings (swipe down
again to expand it). You can view all the features in Quick Settings.
Drag the bar left and right to adjust the brightness.
Tap each icon to turn on or turn off the corresponding feature,
such as Flashlight, Airplane mode, Eye Comfort, and Do Not
Disturb.
Touch and hold each icon to enter the corresponding feature's
settings.
Tap " > Edit tiles" in the upper-right corner to delete or add
quick switches. Touch and hold the switch icon to drag it around.
Tap in the upper-right corner to switch users.
Tap in the upper-right corner to open settings.
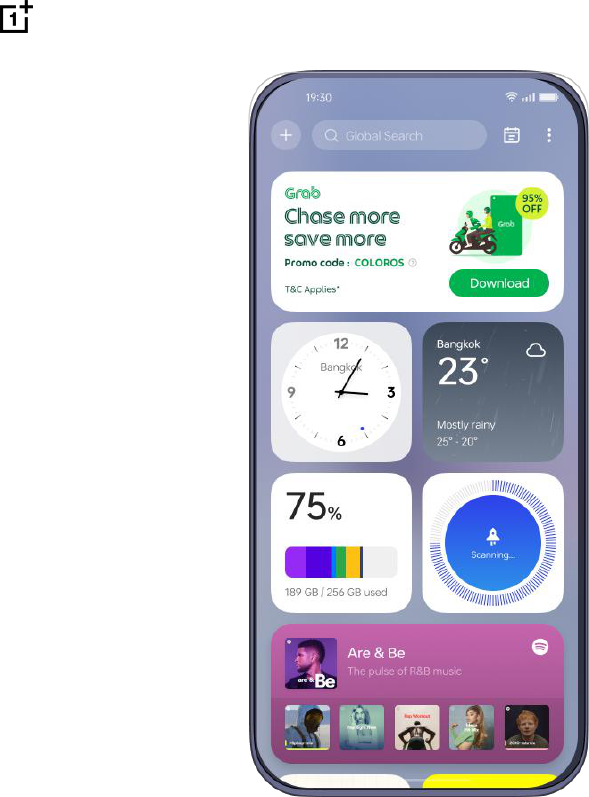
Entering Shelf
Shelf is an expansion of the capabilities of the Home screen. It allows
you to add various Shelf widgets to experience more features.
23
Phone Manager: This feature allows you to monitor your phone's
storage usage. Tap "Clean" to remove junk files for a smoother
experience.
Lifestyle: This feature provides airplane and train ticket
information and sends trip reminders.
Workouts and health: This feature counts your workout steps and
exercise time, so as to safeguard your health.
Package delivery services and local services: When your phone
detects certain apps, it will provide you with relevant information
about package logistics, delivery services, and product discounts.

24
Shelf will recommend additional personalized content based on your
subscriptions.
★ Operation path
Swipe down on the Home screen to enter Shelf.
Tap in the upper-left corner, select a widget, and then tap
"Add" to show it in Shelf.
Tap the widget to open the associated app.
Touch and hold the widget to delete it. Hold and drag this widget
to move it.
Widget management in Shelf
Based on your subscriptions, Shelf recommends more personalized
content to you to satisfy more of your needs.
★
Operation path
Swipe down on the Home screen to enter Shelf.
Tap in the upper-left corner and select the widget you are
interested in. Tap "Add" to add the widget to Shelf.
Tap a widget to enter its corresponding app.
Touch and hold a widget to delete or edit it.
Hold and drag a widget to move it to a new location.

25
Home screen folders
Creating a folder for apps
You can group apps into Home screen folders, so you can easily
manage or find them.
★ Operation path
On your phone's Home screen, touch and hold an app icon and
drag and drop it onto another app to create a folder.
Or you can touch and hold on any empty space on the Home
screen or pinch in to enter Editing mode, select multiple apps, and
then tap "Create folder" at the bottom.
After creating a Home screen folder, you can drag and drop other apps
into the folder.
Open the folder and tap the folder name to rename it.
Merging folders
You can just drag a folder to another to merge them.
★
Operation path
Drag a folder on the Home screen to another folder and hold, then
release to merge them.

26
Removing a folder
★ Operation path
Tap and hold a folder, and tap "Remove folder". All apps in the folder
will be moved to the Home screen.
Apps in the folder will be moved to the current screen if there is enough
space. If not, they will be moved to the last screen. Apps will be placed
in the same order they were in the folder.
Global Search
Don't know where to find a feature? Don't want to swipe across screens
to find an app? Open Global Search with a swipe, and enter keywords to
quickly find what you are looking for on your device and on the web.
On your device: apps, settings, files, contacts, calendar, notes,
messages, and more.
On the web: apps, webpages, and more.
★
Operation path
Swipe down on the Home screen to open Global Search.
From the Home screen, swipe to the Shelf screen and tap the
magnifying glass in the upper-left corner to open Global Search.

27
Screenshot
Taking a full screenshot
The phone provides a variety of methods for taking screenshots,
allowing you to take screenshots in any situation easily.
★ Operation path
3-finger screenshot
The 3-finger screenshot feature is turned on by default. You can swipe
down on the screen with your three fingers to take a screenshot.
If that doesn't work, go to "Settings > More > Screenshot", and check if
"3-finger swipe down" is turned on.
Using the shortcut to take screenshots
Press and hold the Power button and the Volume down button to take
a quick screenshot.
Taking a partial screenshot
You can use the partial screenshot feature to take a screenshot of only
part of the screen. You can take a partial screenshot in a rectangle,
ellipse, or any shape you like.
★ Operation path
1. The 3-finger screenshot feature is turned on by default. You can

28
touch and hold the screen with three fingers to take a screenshot
at any time. If it doesn't work, go to "Settings > Additional settings
> Screenshot" and turn on "3-finger touch and hold".
2. Take a screenshot, touch and hold on the screen with three
fingers and you will see a screenshot preview.
3. You can change the screenshot area.
4. You can choose to screenshot in different shapes: rectangle,
ellipse, or any shape you draw on the screen.
Taking a scrolling screenshot
To capture a chat, article, or other content that can't display in full on
the screen, you can take a scrolling screenshot.
★ Operation path
1. Take a screenshot and tap the Scroll button below the preview to
take a scrolling screenshot.
2. You can also drag the preview up or down to adjust the area you
want to capture. Tap the Done button to save the scrolling
screenshot.
Sharing and editing screenshots
You can edit or share a screenshot after you have taken it.
★ Operation path

29
1. Once you have taken a screenshot, a screenshot preview appears
with a Share button below it. Tap the Share button to share your
screenshot with your contacts using WeChat or Facebook.
2. After tapping the floating preview, you can doodle on the
screenshot, pixelate it, add text, rotate it, crop it, apply filters, or
delete it.
Recording screen
With the screen recording feature, you can record screen activities and
exciting gaming moments.
★
Operation path
1. Swipe down from the Quick Settings to open Control Center
(swipe it down again to expand it).
2. Find "Screen recording" and tap it. After a 3-minute countdown,
your recording will start.
3. While recording the screen, you can tap the floating window
to expand it. Tap to pause and tap again to resume.
4. Tap "Done" to stop recording and save the video to the Photos
app.
Recording screen with your commentaries
To add commentary to a video (such as game commentaries), you need

30
to turn on "Record microphone sound" before recording the screen to
add your voice.
★ Operation path
While recording the screen, you can tap the floating window to expand
it. Tap to record the microphone sound.
Tap to stop sound recording.
Adjusting screen recording definition
Before recording, change the screen recording definition as needed. You
can choose from three definition presets, or set a custom definition.
· High (1080p, 16 Mbps)
· Medium (720p, 8 Mbps)
· Low (480p, 4 Mbps)
· Custom (set you own recording definition and bitrate).
★
Operation path
Go to "Settings > Additional settings > Screen recording > Definition".
The maximum definition may vary. Please refer to the phone in use.

31
Special features
Screen switching
Switching apps to the cover screen
When you are using a foldable phone, the Screen switching feature
allows you to use an app on the cover screen after you fold your phone.
★
Operation path
Go to "Settings > Screen switching" to personalize your screen switching
after folding the phone. Choose from the three options:
Continue using: Fold your phone and continue using it on the
cover screen.
Swipe up to continue using: Fold your phone and swipe up on the
cover screen to continue using it, or wait 3 seconds for the screen
to lock.
Turn screen off: Your phone screen will turn off after you fold your
phone.
Only book-style foldables support this feature.

32
Setting an interactive pet wallpaper for the cover
screen
The system provides multiple sets of pet wallpapers preloaded on your
device. You can choose your favorite one and set it as a Home screen
wallpaper for the cover screen. At different times, the pet will appear in
different forms. You never know what your pet will be doing each time
you turn on the screen.
★ Operation path
1. Go to "Settings > Foldable features > Cover screen style >
Interactive pets".
2. Select your favorite pet wallpaper, set a text color, and then tap
"Apply".
Only flip-style foldables support this feature.
Viewing notifications on the cover screen
★
Operation path
Unlock the cover screen and swipe down to enter the notification
drawer, where you can take any of the following actions:
Swipe up and down to view multiple notification messages, or tap
a single message and unfold your phone to view notification
details.

33
Swipe left to view cover screen widgets. Swipe right to go back to
the previous page.
Tap the close icon at the bottom of the notification drawer to
clear all messages.
To turn off notifications for an app, go to "Settings > Notifications &
status bar" and turn off the switch beside the app.
Only flip-style foldables support this feature.
Quick reply on the cover screen
When it is inconvenient to take a call, tap "SMS reply" to choose a
message to reply. You can also add replies or sort them.
★
Operation path
1. Go to "Settings > Foldable features > Quick reply" and tap "Add
reply". Edit your quick reply and tap "Save" when you're done.
2. Touch and hold the quick reply content to move and reorder.
Only flip-style foldables support this feature.
Adding cover screen widgets
By adding cover screen widgets, you can easily use the feature by
taping the corresponding widget on the cover screen.
★ Operation path
34
Go to "Settings > Foldable features > Cover screen widgets" to perform
the following operations:
Add a widget: Next to the app that you want to add, tap to
add a cover screen widget.
Remove a widget: Next to the app that you want to delete, tap
to remove the app from the list.
Adjust the position: Touch and hold the widget and drag it to
change its position.
If you want to add more widgets to the cover screen, go to cover screen
widget settings, tap "Supported apps", and then tap next to an app
to add more widgets.
Only flip-style foldables support this feature.
One-Swipe Display
Until now, whenever you used a ticket or made a payment, you needed
to exit the app you were currently using and open the ticket or payment
app.
One-Swipe Display makes it simpler to handle all kinds of challenging
circumstances. Now, when you are in line for a payment or public
transport, you can swipe the payment QR code or the transport QR code
to the cover screen. You can continue using the main screen for other

35
apps because the two screens do not interfere with one another.
★ Operation path
The app you need will be pushed to the cover screen when you gently
swipe it up from the bottom of the screen. It will remain displayed on
the cover screen until you close it.
Currently, One-Swipe Display supports many apps, including
Touch 'n Go eWallet, Grab, and Shopee Malaysia.
Only flip-style foldables support this feature.
Split View
With the extra space that comes with the main screen, more apps can
fit comfortably in Split View. The layout is easier on the eyes, making
multi-tasking more efficient.
You can see multiple apps on the screen at the same time with Split
View, automatically scaled, zoomed, and arranged for the best
experience.
★ Operation path
1. Open your foldable phone.
2. Open an app and swipe down from the middle of the screen to
enter Split View. Then open another app.
3. To add one more app to Split View, bring up the Smart Sidebar

36
and drag and drop the app to the area that says "Drag here to
add to Split View".
When you split the view between 2 apps, you can lay them horizontally
or vertically. With 3 apps, the system automatically finds the best layout.
You can swap positions as needed.
Only book-style foldables support this feature.
Common Split View actions
After turning on Split View on a book-style foldable, you can move or
resize the windows or change the apps that are currently open.
★
Operation path
In Split View, touch and hold the handle on the top of an app
window and drag it over another window to swap positions.
Tap the handle to resize or close the window or to change the
app that is currently open.
Tap the window divider between two apps and select "Swap
sides" to swap the positions of the apps.
Bring up the Smart Sidebar to launch one more app via Flexible
Window.
Pinch in with 4 or 5 fingers to enter Full view mode. Spread out
the fingers to exit.

37
Only book-style foldables support this feature.
Dual Windows
Dual Windows can split your screen into two halves to display different
content of an app.
For example, the left screen shows app navigation and the right screen
shows content details. If you tap a title on the left, the right screen will
display the content under it, making it easier to operate your phone.
★
Operation path
1. Go to "Settings > Main screen > Dual Windows".
2. Select the apps for which you want to enable Dual Windows.
Only book-style foldables support this feature.
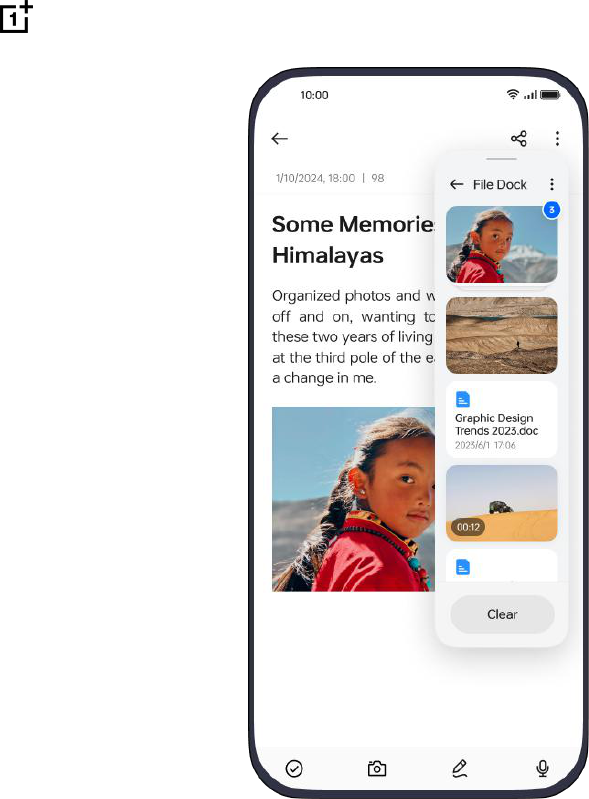
File Dock
File Dock, a quicker and easier way to gather and
share information
You can drag and drop text, images, and files from apps to File Dock for
temporary storage. Transfer content from File Dock to apps like Notes
and Mail to edit or to apps like My Files and Photos to save. You can also
share to WeChat and other messaging apps.
38
★ Operation path
1. Go to "Settings > Special features > Smart Sidebar > File Dock" to
confirm "File Dock" is on.
2. Touch and hold text, images, or files till they float up, and then
drag and drop them in the File Dock floating window.
3. Open another app and swipe the Smart Sidebar floating bar in to
expand it. Tap "File Dock" and drag and drop content from it to
the app to edit, save, or share.

39
Smart Sidebar
Turning on Smart Sidebar
Smart Sidebar is a convenient tool that can be opened by swiping from
the side of the screen. You can perform quick actions in different
scenarios. Smart Sidebar allows you to open apps or tools on any
interface. Some apps and tools can even be opened in floating windows.
Furthermore, Smart Sidebar can recognize different usage scenarios
and recommend the best tools for them.
★ Operation path
1. Go to "Settings > Special features > Smart Sidebar" to turn on
"Smart Sidebar".
2. You can also tap "Smart functions" to enable "Smart functions",
so the system can recommend tools and apps to you based on
your usage scenarios.
3. When you are not playing games, you can find the Smart Sidebar
floating bar and swipe inwards on it to show the Smart Sidebar.
Adjusting the position of the Smart Sidebar
When "Smart Sidebar" is turned on, you can adjust the position of the
Smart Sidebar and the transparency of its floating bar.
★ Operation path

40
1. Find the Smart Sidebar floating bar and swipe inwards on it to
expand it.
2. Touch and hold the top of the Smart Sidebar and drag it to the
desired position.
3. Go to "Settings > Special features > Smart Sidebar", and slide the
bar left and right to adjust the transparency of the floating bar.
Quick note for note-taking at any time
When you need to quickly take down the details of a conference or
video call, you can easily access Quick note via Smart Sidebar and by
tapping "Quick note" to bring up the floating Notes window.
Before using this feature, first turn on "Smart Sidebar". For details, refer
to Turning on Smart Sidebar 39.
★ Operation path
Find the Smart Sidebar floating bar, swipe inward on it to expand, and
then select "Quick note".
Editing and customizing the Smart Sidebar
The first time you launch Smart Sidebar, you will see the default display
of quick tools such as Screen translator, Screenshot, Screen recording,
and Quick note. You can customize which features are displayed
according to your preferences.

41
★ Operation path
1. Find the Smart Sidebar floating bar and swipe inwards on it to
expand it.
2. Tap "Edit" and then tap "+" or "-" next to an app to add or remove
that app from the sidebar.
Split View
Turning on Split View
Split View allows you to split your phone screen and display two apps
simultaneously.
The two apps can run independently of each other.
★ Operation path
Go to "Settings > Special features" to turn on "Split View".
The operation path may vary across different models. You can type
what you're looking for in the search box in Settings or on the Home
screen.
Enabling Split View
You can enter Split View using the following methods:
★ Operation path
On the recent tasks screen, tap in the upper-right corner of the

42
app that supports Split View, and then tap "Split View" in the
expanded list.
Alternatively, drag an app that supports Split View out of the
Smart Sidebar to enter Split View.
Resizing Split View
You can drag the divider between the views upward or downward to
enlarge or reduce the sizes of views.
Swapping split views
Touch and hold the divider between the views and drag it to the top of
the screen. This way the app in the lower part will be displayed in the
upper part.
Saving Split View app groups
Apps that you often use in Split View can be saved as a group to the
Home screen or recent tasks. Then you can open the apps in Split View
with just one tap.
★
Operation path
Large-screen device: In Split View, tap the divider between the
views, and select "Save as app group" in the pop-up menu. This
app group will be saved as an icon on the Home screen.
Regular device: In Split View, swipe up and hold from the bottom

43
of the screen or tap on the Recent button to enter the recent
tasks screen, where you can save this app group.
Opening a floating window in Split View
When the phone is in Split View, you can open one more app in a
floating window. This way you can use three apps at the same time.
★ Operation path
Alternatively, after the phone enters Split View, expand the Smart
Sidebar and tap the icon of an app that can be opened in a floating
window.
Exiting Split View
In a Split View with the top-bottom layout, drag the divider between the
views to the top or bottom to exit Split View.
Flexible Window
Turning on Flexible Window
Flexible Window lets you open multiple app windows at the same time
and switch between them.
You can also adjust how the windows are displayed. You can multitask
by playing games or watching videos while also replying to messages to
enhance your productivity.

44
★ Operation path
You can turn on Flexible Window in many ways.
Go to recent tasks, tap in the upper-right corner, and then tap
"Floating window".
In Smart Sidebar, tap the icon of an app that is supported by
Flexible Window to open it in a floating window.
In the app that supports Flexible Window, swipe up from the
bottom of the screen to display the app in a floating window.
Moving a floating window
When an app is displayed in a regular floating window, you can move
the window by dragging the handle located on the top of the window.
When it is displayed in a mini window, you can drag the window to
move it.
Resizing a floating window
When an app is displayed in a floating window, you can adjust the size
of the window.
Drag the lower-left or right corner of the floating window to resize
the window.
Drag the floating window to the left or right edge of the screen to
shrink the window to an icon.

45
When the floating window is in mini mode, tap it once to enlarge
it.
Setting Flexible Window
★ Operation path
Go to "Settings > Special features > Flexible Window" to configure the
functions of Flexible Window.
By enabling the "Button-free mode", the action buttons will be
hidden. You can close a window by tapping the handle on the top.
By enabling the "Quick-hide window in game" function, you can
tap outside the window in a game to hide it at the left or right
edge.
By enabling the "Share via floating window" function, when you
want to share files or content, you can open the corresponding
app in a floating window.
The operation path may vary across different models. You can type
what you're looking for in the search box in Settings or on the Home
screen.
Sharing images using Flexible Window
Flexible Window allows you to quickly share images through a floating
window.

46
★ Operation path
1. Open a chat window and expand the Smart Sidebar.
2. Open the album in the Smart Sidebar and select the image you
want to share.
3. Touch and hold the image you want to share until it floats, drag it
to the chat window, and release to send it.
In addition to sharing images by dragging and dropping, you can
also drag files from "My Files" and notes from "Notes" to the chat
window for sharing.
Flexible Window
According to your usage needs, you can switch an app to a floating
window.
★ Operation path
1. When Flexible Window is turned on, swipe up from the bottom of
the screen to enter the recent tasks screen.
2. Swipe to the app that needs to be switched to a floating window,
and tap in the upper-right corner. In the list menu, tap
"Flexible Window" to switch it to a floating window.
You can also expand the Smart Sidebar and tap on the app you want to
open in a floating window.

47
Closing a floating window
★ Operation path
Tap the close button in the upper-right corner of a floating
window to close it.
If there is no close button on the floating window, you can tap on
the top of the floating window and tap Close in the pop-up menu.
Quick Launch
Opening apps with fingerprint unlock
With Quick Launch turned on, you can quickly open Camera, Clock,
Calculator, and other tools or apps by swiping when unlocking your
phone with fingerprint.
★
Operation path
1. Go to "Settings > Security & privacy > Face & Fingerprint Unlock >
Fingerprint > Quick Launch" to turn on "Quick Launch".
2. You can view apps that are currently supported by Quick Launch,
or tap "Edit" to choose which apps can be opened in this way.
3. Once you have completed the editing, tap in the upper-right
corner.
4. When the screen is locked, touch and hold the fingerprint sensor

48
on the screen until an icon menu appears, then swipe your finger
to the target icon to open the app or tool.
This feature is only available on some models. Please refer to the
actual device for its final functions and features.
Fluid Cloud
Fluid Cloud is a feature that displays live activities of your top concern in
bubbles or cards in locations you can check at a glance so you always
keep important information in sight and take instant actions. Depending
on the importance of services and where you navigate to on your phone,
the notifications can appear in a bubble or card at the top of your
screen, or in a card in the notification drawer, on the Lock screen, or on
the Always-On Display.
For example, when using the timer feature, you can return to the
Home screen or navigate to other pages while keeping the
essential information of the timer visible in the status bar.
When using the audio recording feature, after you go back to the
Home screen or navigate to other pages, you can still see the
recording process in the status bar.
…
★
Operation path
Upgrade your phone's operating system to Oxygen 14.0 or a later

49
version to use Fluid Cloud.
Fluid Cloud is supported by Oxygen 14.0 and later versions. Some
models may not support this feature.
Using Fluid Cloud
Services supported by Fluid Cloud include:
Personal hotspot, timer, audio recording, screen recording,
screencast, Multi-Screen Connect, and other real-time activities.
★
Operation path
Tap on the Fluid Cloud bubble or card to enter the corresponding
app.
Touch and hold the bubble to expand it into a card. Touch and
hold the card to manage the current service.
Swipe up, left, or right on the card to collapse it.
Disabling Fluid Cloud
You can disable Fluid Cloud by following the steps below:
★
Operation path
Swipe down from the status bar to open the notification drawer,
find the card that you want to disable, swipe left on it, and tap
"Settings". On the pop-up panel, select "Turn off this reminder" to
dismiss the current notification, or select "Turn off reminders for

50
this service" to permanently disable notifications from this service.
Touch and hold an Fluid Cloud card to open a pop-up panel. Select
"Turn off this reminder" to dismiss the current notification, or
select "Turn off reminders for this service" to permanently disable
notifications from this service. For notifications displayed as
bubbles in the status bar, expand them into cards and then
perform relevant actions.
Unlike notifications, system activities such as timers, audio
recording, and screen recording cannot be disabled, but you can
simply stop them or wait for them to end.
Simple mode
The system provides Simple mode, in which the Home screen layout is
more concise, icons and fonts are larger, and your phone is simply
easier to use.
★ Operation path
Go to "Settings > Special features > Simple mode" to enter Simple mode.
In Simple mode, the Phone user guide widget is added to the
Home screen by default.
In Simple mode, go to "Settings" and tap "Exit Simple mode" to
return to the standard mode.
51
Photos and videos
Photo taking
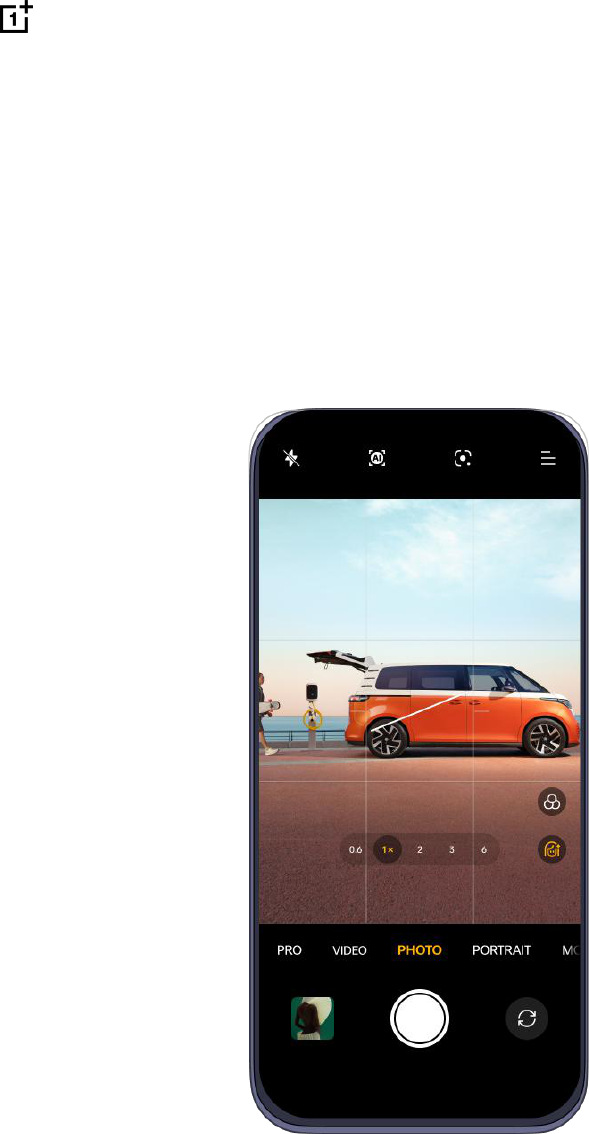
Taking photos
★ Operation path
1. Open the Camera app.
2. You can use the following features:
○
Lock the focus and exposure: Simply touch and hold the
52
subject to lock the focus and exposure.
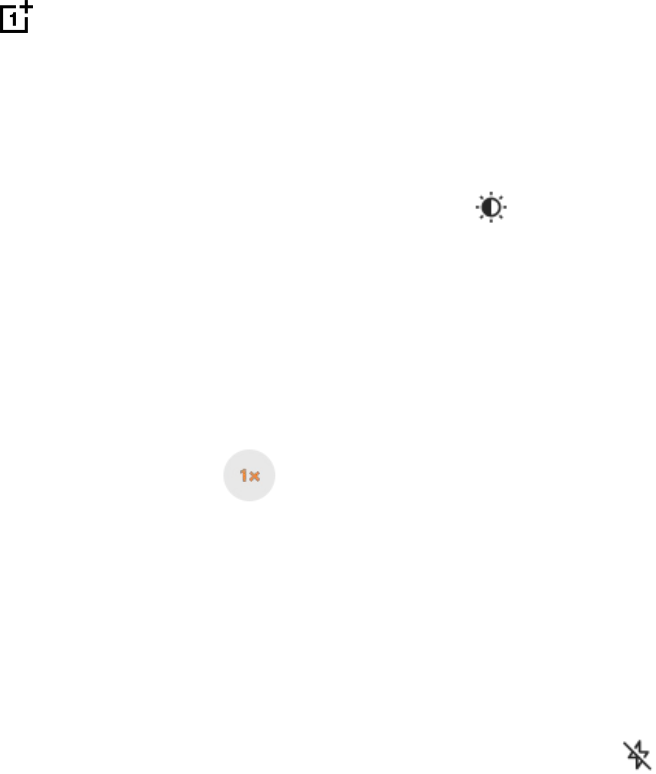
○ Set the exposure brightness: Touch the screen swipe up or
down. The brightness indicator next to the focus frame will
change as you move your finger.
○
Zoom in or out: Touch the screen with two fingers and pinch
out to zoom in, or pinch in to zoom out. Alternatively, touch
and hold to expand the zoom bar and slide it to zoom in
or out.
○ Select a camera mode: Slide left or right on Modes bar at the
bottom to choose a camera mode.
○ Turn the flash on or off: Tap the flash icon on the screen,
and you can choose to set it to "Off", "On", "Auto", or "Fill light".
In Auto mode, the camera will automatically use the flash
based on ambient light conditions. In Fill light mode, the flash
will be kept on to improve the lighting.
3. Tap the shutter button to take a photo.
Taking photos in Portrait mode
Portrait mode helps you take more beautiful and professional-looking
portrait photos.
★ Operation path

53
1. Go to "Camera > PORTRAIT".
2. When the "Portrait" mode is enabled, bokeh effect is
automatically turned on. You can tap "Retouch" and adjust the
intensity of the retouching effect, or tap "Filters" and choose from
various filter styles.
Taking photos in XPAN mode
XPAN mode adopts the classic 65:24 ratio of Hasselblad XPAN camera,
with black and white tone and colored tone. It recreates the retro film
feel of Hasselblad, helping you record your stories with photos.
★
Operation path
Go to "Camera > MORE", and select "XPAN" mode.
This feature is only available on some models. Please refer to the
actual device for its final functions and features.
Shooting videos
★
Operation path
1. Go to "Camera > VIDEO".
2. Tap the shutter button to start shooting.
3. Tap to pause recording; tap to resume, and tap the shutter
button to stop recording.
54
By default, videos are recorded at 1080p, 30 fps. Tap " > " to
choose from the other frame rates and resolutions. Higher frame rates
and resolutions result in larger video files.
You can tap to take a photo while recording. This will not
interrupt the video recording.
Ultra Steady
Ultra Steady combines algorithms and optical image stabilization to
help you shoot stable videos with ease. With Ultra Steady turned on,
you can easily shoot smooth and clear videos whether you are playing
with your kids, cycling through the city, or doing extreme sports in the
wilderness.
★ Operation path
Go to "Camera > VIDEO" and tap in the upper-left corner.
This feature is only available on some models. Please refer to the
actual device for its final functions and features.
Shooting night photos
You can use the Night mode when the ambient light is low. In the Night
mode, the camera takes several shots at different exposures in quick
succession and uses an algorithm to merge multiple frames to produce

55
a photo with vivid details.
★ Operation path
1. Go to "Camera > NIGHT".
2. Tap the shutter button or in the upper-left corner to turn on
Tripod mode to shoot. In Tripod mode, the quality of the photos
you take will significantly increase.
Shooting long exposure photos
Long exposure mode simulates the effect of a photo taken with slower
shutter effect. Long exposure is great for tracking moving subjects such
as night traffic, runners, and flowing water.
There are different long exposure templates for different scenarios.
Traffic: Capture the bright, moving lights of vehicles at night.
Moving clouds and flowing water: Make waterfalls and other
flowing water scenes look like beautiful oil paintings.
Light painting: Track glowing objects as they move in low light.
★ Operation path
1. Go to "Camera > MORE", and select "LONG EXPOSURE".
2. Tap the templates icon in the lower-left corner and choose the
right template for the scenario.
3. Tap the shutter button to take a photo.
56
This feature is only available on some models. Please refer to the
actual device for its final functions and features.
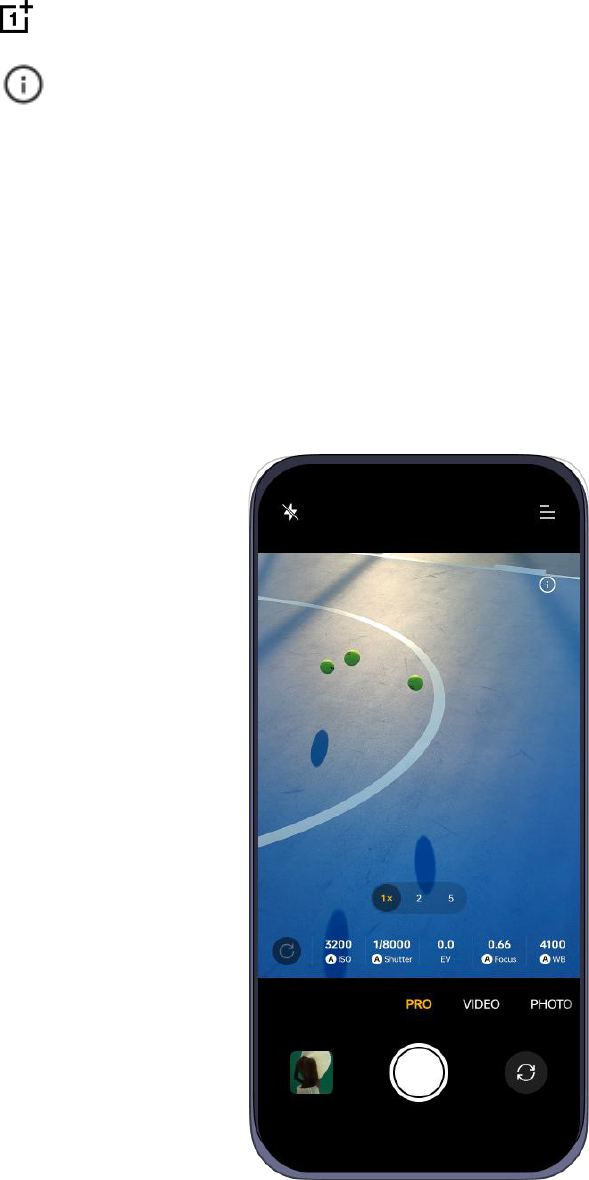
Turning on Pro mode
When shooting photos in Pro mode, you are able to adjust settings such
as ISO, shutter speed, and focus modes.
★ Operation path
1. Go to "Camera > MORE" and select "PRO".
2. In "PRO" mode, you can adjust the following settings:

57
ISO sensitivity: Tap "ISO" and slide the bar to adjust the sensitivity.
Increase the ISO sensitivity in low-light conditions and decrease it in
brighter lighting to prevent excessive noise in the photo.
Shutter speed: Tap "Shutter" and slide the bar to adjust the
shutter speed.
Shutter speed can affect the amount of light captured by the camera.
Use lower shutter speed when capturing still scenery and portraits; use
higher speed when capturing moving scenes or figures.
Exposure compensation: Tap "EV" and slide the bar to adjust the
EV.
Increase the EV in low light; lower it in bright light.
Focal distance: Tap "Focus (Auto/Manual focus)" and slide the bar
to adjust the focus distance manually.
Color tone: Tap "WB (white balance)" and slide the bar the adjust
the white balance.
File format: Pro mode offers a variety of image file formats. Tap
"JPG" at the top of the screen.
○ The photos will take up less storage if you choose the JPG
format.
○
If you choose the RAW format, the phone will automatically
save your photos in both JPG and DNG formats. Although the

58
DNG format preserves more details for post-processing, it
requires more storage space.
○ If you select RAW+, your phone will automatically only save
your photos in DNG format. Therefore, you need to make a
decision based on your needs.
This feature is only available on some models. Please refer to the
actual device for its final functions and features.
Editing photos and videos with Sticker
Sticker is a collection of intriguing and amusing face stickers and face
retouching filters that can be applied to any photo or video you take.
★
Operation path
1. Go to "Camera > MORE" and select "STICKER".
2. Tap on the left side to choose a sticker. Tap "Face retouching"
to retouch the photo. Tap "Filter" to choose from various filter
styles.
Taking a panoramic photo
Panorama mode provides a super-wide view, allowing you to take wide-
angle photos with room for anything and everything you want to fit in.
★ Operation path
1. Go to "Camera > MORE" and select "PANO".

59
2. An arrow and a horizontal line will appear in the middle of the
screen to guide you. You can tap the arrow to switch directions.
3. Tap the shutter button to start and slowly move the camera in the
direction of the arrow. Try to keep the arrow on the line. When
you are done, tap the shutter button again.
4. Once you have moved the camera as far as Panorama mode
allows, the photo will be taken automatically. Alternatively, you
can also tap the shutter button at any point to finish.
• To capture high-rise buildings, you can rotate the phone to
landscape orientation and slowly angle it upwards.
• Move the camera slowly to let it focus and capture a sharp and
clear photo that captures all the details. This way the photo won't
be blurry.
• When taking a panoramic photo, try to keep your movements as
steady as possible.
Shooting videos in Movie mode
Movie mode provides more control over video shooting, allowing you to
create videos with your own style.
★
Operation path
1. Go to "Camera > MORE", and select "MOVIE". The 21:9 movie
aspect ratio in landscape mode is set by default.

60
2. You can turn on the flashlight and stabilization (EIS), or activate
the grid on the left side.
3. You can expand the following professional parameters for
adjustment on the right side:
EV: Exposure compensation
WB: White balance
S: Shutter speed
ISO: ISO sensitivity
AF: Focus mode
The buttons at the bottom of the screen allow zooming between
0.6x ultra wide-angle, 1x wide-angle, and, on some models, 3x
telephoto lenses.
Ultra Night, Video HDR, and Ultra Steady functions are not available in
Movie mode.
This feature is only available on some models. Please refer to the
actual device for its final functions and features.
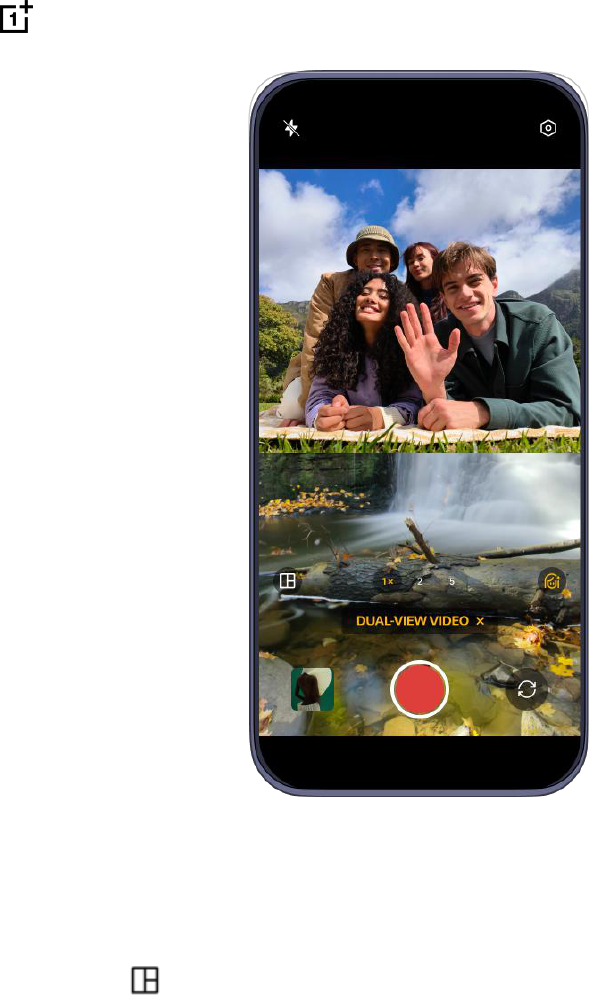
Double the fun with Dual-view videos
Dual-view refers to using the phone's front and back cameras
simultaneously to record videos. Use the Dual-view mode to make
video-filming more interesting.
61
★ Operation path
1. Go to "Camera > MORE" and select "DUAL-VIEW VIDEO".
2. Tap and choose one from the three screen layout options:
Split (top/bottom), Rectangle (PiP view), or Bubble (PiP view). You
can drag the bubble or rectangle anywhere on the screen.
3. To swap the two views, double-tap anywhere in a view or tap the
switch button in the lower-right corner.
4. To enable retouching for the front camera, tap the retouching
button in the lower-right corner.

62
Taking time-lapse videos
Time-lapse photography allows you to condense changes over a period
of time into short videos. When you see blooming flowers or moving
clouds, that's a perfect opportunity to take a time-lapse.
★ Operation path
1. Go to "Camera > MORE", and then select the "TIME-LAPSE" mode.
2. Position your phone where you wish to take a video. To minimize
shaking, use a tripod.
3. Tap the shutter button to start filming. Tap the shutter button
again to stop.
Shooting Slo-mo videos
You can use Slo-mo mode to capture all sorts of moments, such as
snowflakes or water droplets falling and people running, hitting balls,
and diving. Use Slo-mo mode to slow down your video clip and capture
fleeting moments in detail.
★
Operation path
1. Go to "Camera > MORE" and select "SLO-MO".
2. Tap the Frame rate button on the top to choose the frame rate
that best suits your needs, and then tap the shutter button to
start shooting.

63
3. Tap to pause recording, tap to resume, and tap the shutter
button to finish.
Text Scanner
Find it hard to note down all the information presented on a whiteboard
or presentation slides, try Text Scanner.
Use Camera's Text Scanner mode to snap a photo of the information
you need to record and extract the text to produce minutes, a
PowerPoint, or DOC document.
No matter the shooting angle or lighting condition, the document
correction and enhancement features can restore and optimize your
photo for a better text recognition and extraction.
★ Operation path
1. Go to "Camera > MORE", select the "TEXT SCANNER" mode, and
tap the shutter button.
2. Go to "Photos > Albums > Text Scanner", select a photo that you
want to convert into a document, and then tap in the lower-
right corner to enter the document adjustment interface.
3. In the document adjustment interface, you can stretch the photo,
choose "Color", "B&W", "Outline", or other modes to the text more
legible.
4. Tap "Export" to export the photo to a Word, PowerPoint, or Excel

64
file. The generated document will be opened in the WPS app,
where you can edit the document.
Camera settings
You can adjust basic camera settings, such as aspect ratio, timer, and
flash, in the Camera interface. There are also more advanced settings
that allow you to take photos and videos better.
★
Operation path
In "Camera", tap in the upper-right corner, and then tap to
access more options.
Watermark: You can create a customized watermark.
Gird and guides: Camera offers grid, diagonal, and golden spiral
lines to help you compose your photo.
Shutter sound: Capture every photo with a satisfying sound.
Mirror selfie: Mirror the selfie to make it an accurate depiction of
the real you.
Record location: Add location information to your photos and
videos as they are taken.
Shooting methods: Touch to shoot or use a gesture.
Volume button action: You can set different functions for the
volume keys, such as shutter or zoom.

65
This feature may vary across different models and versions. Please
refer to the actual device for its final functions and features.
Taking photos or video in FlexForm mode
When taking photos or videos with a foldable phone, you can fold your
phone in an L shape and place it on a level surface.
The top half of the screen shows the preview, and the bottom half
shows shooting modes, settings, and the shutter button.
★
Operation path
1. Unfold the phone and go to "Camera" app. Tap to switch to
the front camera.
2. Fold your phone in an L shape. The top half of screen will show
the preview, and the bottom half will show shooting modes,
settings, and the shutter button.
3. Tap the shutter button to take a photo or video.
Only large foldable phones support this feature.
Taking selfies with the rear camera
When the phone is opened, you can use the rear camera to shoot selfies
with higher image quality and preview the image on the cover screen.
★ Operation path
66
1. Unfold the phone and open the camera app on the main screen.
Tap to switch to the front camera.
2. Tap the "Hi-Res Selfies" button in the viewfinder and follow the
prompts to flip the phone around and use the cover screen, with
the rear camera pointing at the subject. You can preview the
image and switch modes on the cover screen.
3. Tap the shutter button.
This feature is only available on some models. Please refer to the
actual device for its final functions and features.
Editing images and videos
Identifying and blurring private information while
editing photos
Auto pixelation hides profile pictures and display names when you want
to share a screenshot of chat messages, keeping the private
information of everyone in the chat safe.
★ Operation path
1. Swipe down with 3 fingers on a chat to take a screenshot. Tap
the screenshot thumbnail in the lower-left corner to edit it.
2. Tap "Pixelate", select a style, and tap "Auto".

67
3. You can also tap any profile pictures or text on the screenshot to
pixelate or undo pixelation manually.
4. Tap .
When editing an image in Photos, you can also pixelate private
information automatically by tapping "Pixelate".
Editing photos
You can adjust the brightness, contrast ratio, or saturation of photo;
drawing or adding text or stickers; pixelate or retouch, adjust color and
tone, restore old photos, or perform other actions to make it look better.
★
Operation path
In "Photos", open the image you wish to edit and tap . Then you can
follow the instructions on the screen.
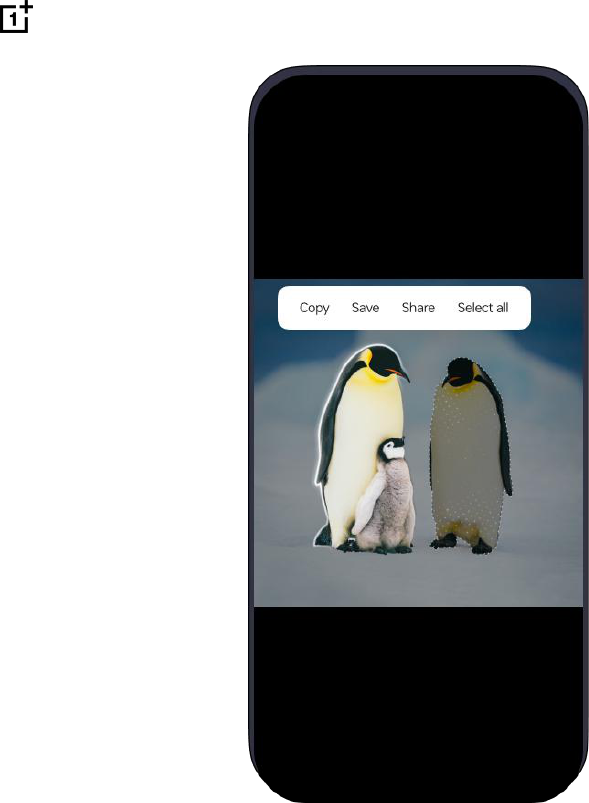
Cutting out the subject of a photo
The cutting out part of a photo feature can accurately identify the
subject of a photo (a person, a pet, a still object, an ID, etc.), so you can
quickly copy, save, or share it.
68
★ Operation path
1. Open "Photos" and tap the photo in which you wish to cut out the
subject. Touch and hold the subject for the system to scan the
photo, identify the subject, and extract it.
2. After the scan is complete, lift your finger and tap "Copy", "Save",
and "Share" to copy, save, and share the subject.
Editing videos
You can use the video editing features available in Photos to trim or
rotate a video. You can also add text, watermarks, filters, themes, music,

69
or special effects to the video to make it more fun.
★ Operation path
In "Photos", open the video you wish to edit and tap , and then
follow the instructions on the screen:
Tap "Trim" to cut the video by dragging the sliders at either end of
the frame viewer.
Tap "Crop & rotate" to select an aspect ratio or rotate the video.
Tap "Theme" to select a theme.
Photos
Browsing photos and videos
★
Operation path
Go to "Photos > Photos" to view all photos, videos, and screenshots.
You can also open the "Photos" page, pinch in to change the layout and
browse your photos and videos by year or month.
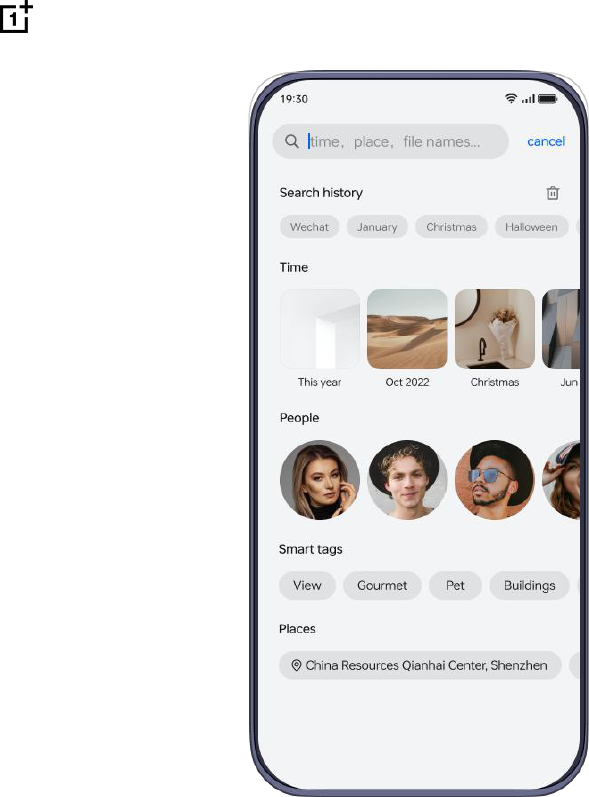
Finding photos quickly
You can search for photos by keywords in Photos. In the Photos search
box, type when or place where a photo is taken, text, scenes, names, or
other elements included in the photo, or other information related to the
photo to find it quickly.
70
★ Operation path
In the "Photos" app, enter keywords such as the time or the place of a
photo in the search box at the top to find the photo quickly.
Memories
This feature organizes photos based on events, time, and people to
create wonderful albums and videos, so you can relive the beautiful
moments.
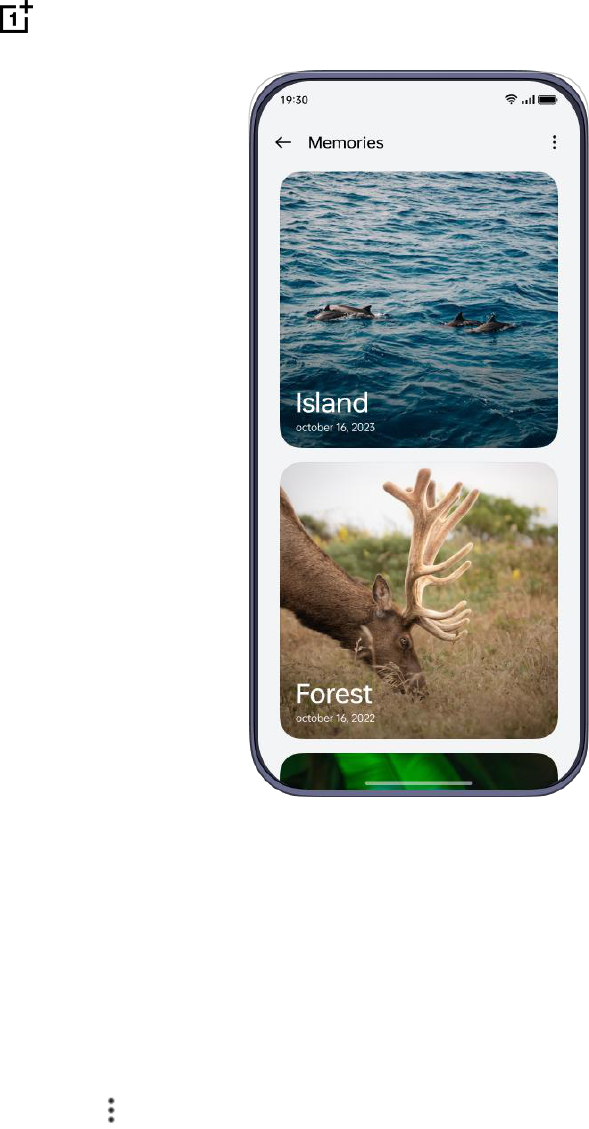
71
★ Operation path
1. Go to "Photos > Explore" and swipe up till you see your Memories.
2. Once you are in a memory, tap the play button to start playing
the photos in the memory automatically.
Go to " > Edit" in the upper-right corner to remove certain photos
from the memory.
Setting images as wallpapers and profile pictures
★
Operation path
In the "Photos" app, select an image that you want to use and then tap

72
in the lower-right corner, select "Set as wallpaper" or "Set as
contact avatar", and follow the prompts to complete.
When setting a wallpaper, you can also tap to create an inventive
wallpaper.
Sharing photos and videos
★
Operation path
In "Photos", tap a photo or video, or touch and hold to select multiple
photos and videos you wish to share, and tap in the lower-right
corner. Select a method for sharing and follow the prompts to complete.
You can also set to erase the location information and other properties
when sharing a photo or video to protect your privacy.
In "Photos", tap " > Settings > Privacy protection" in the upper-right
corner, and turn on "Remove location" and "Remove other properties".
Albums
Organizing your photos and videos into albums
Your phone can automatically organize your photos and videos by
source, type, or other attributes, making it easier to find and manage
them.

73
Creating memories automatically
The phone uses an algorithm to classify photos into albums. Some of
the automatically generated albums include People, Places, Landscape,
and Food.
★ Operation path
Go to "Photos > Explore".
Creating an album
You can categorize your photos and videos according to your own
preference. For example, you can create a "My best photos" album to
save your favorite photos.
★
Operation path
1. Go to "Photos > Albums". In the upper-right corner, tap " >
New album". Enter a name for the album and save it.
2. Select the photos or videos that you want to move to the album.
Once the album has been created, you can simply select photos or
videos in Photos, and tap to move them into the album.
Adding photos and videos to the Private album
You can save private photos and videos to the Private album to avoid
accidentally showing them to another person.

74
Files saved in the Private album do not appear in Photos or when you
select photos or videos for sharing.
★ Operation path
In "Photos", tap a photo or touch and hold to select multiple photos that
you want to hide, and go to " > Set as private" at the bottom.
Viewing photos and videos in the Private album
You can view hidden photos and videos in through any of the following
methods:
★ Operation path
In the "Photos" app, touch and hold anywhere on the bottom tabs
bar until a screen appears for you to enter the privacy password.
Then, enter the privacy password to view hidden photos and
videos.
In the "Photos" app, tap " > Settings", and turn on "Show
Private album". Then, at the bottom of the "Albums" page, you
can see the "Private" album. Tap it and enter the privacy
password.
Go to "Settings > Permissions & privacy > Privacy > Private Safe"
and then tap "Images and videos".

75
Restoring deleted photos and videos
Your phone keeps deleted photos and videos for 30 days after they are
deleted.
★ Operation path
Go to "Photos > Albums > Recently deleted", touch and hold to select
photos that you want to keep on the device, and tap "Restore".
Gaming on your phone
HyperBoost Gaming Engine
HyperBoost Gaming Engine utilizes technologies such as optimized
rendering, AI machine learning, performance-based smart regulation to
ensure stable frame rates in graphically-demanding games, bringing
you the best possible gaming experience.
Turning on game performance modes
There are three types of game performance modes available.
Pro Gamer mode: This mode enhances your gaming experience by
improving your phone's performance, in-game frame rates, and
touch response. Recommended for MOBA and competitive
shooter games. This mode will consume more power.
Balanced mode: This mode maintains a balance between
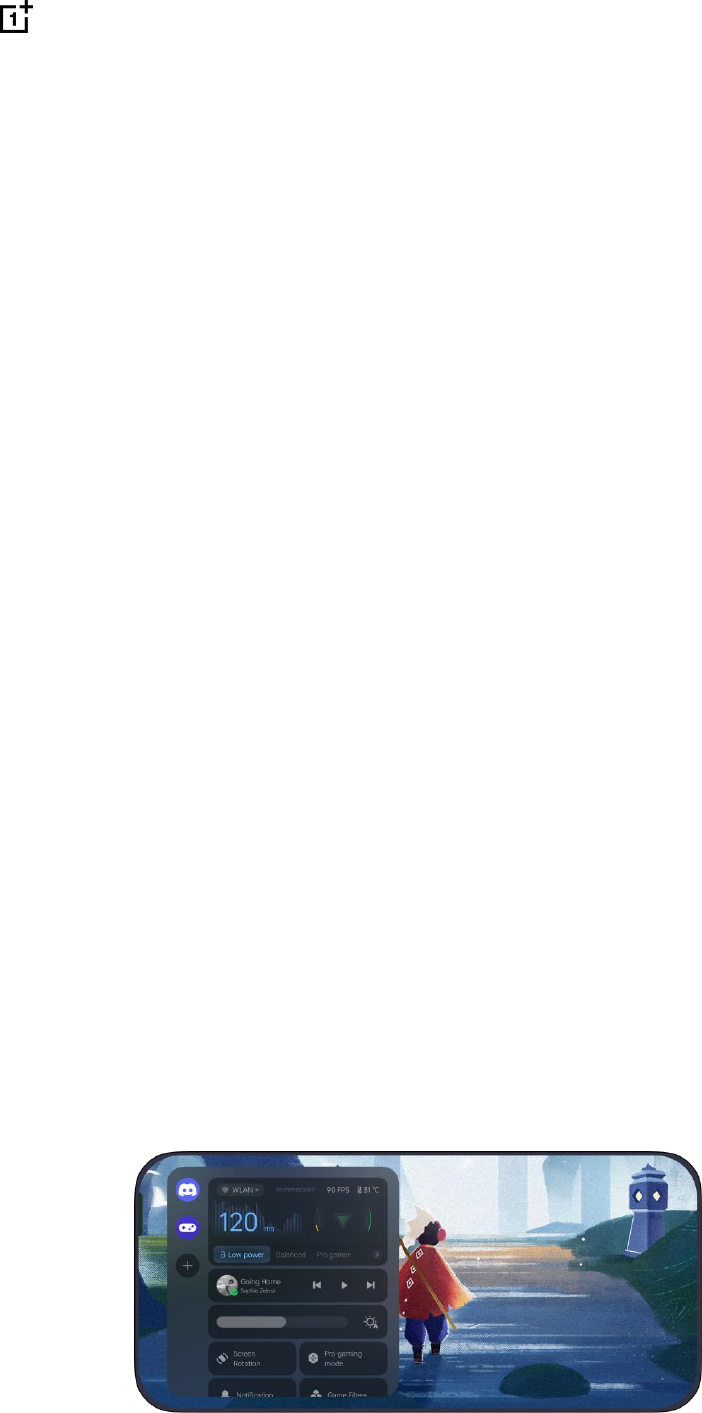
76
performance and power consumption, which is suitable for less
performance-demanding games.
Low power mode: This mode limits hardware performance and
reduces graphic quality in exchange for extended battery life. This
mode is recommended when your phone is low on power.
★ Operation path
Start a game, swipe from the upper-left corner to the right to bring up
Game Assistant and select a game performance mode as needed.
Game Assistant
Game Assistant is an app that enhances gaming performance and
experience. It offers game booster, game filters, voice changer, and
other in-game services. You can also use Game Assistant for:
Viewing information such as network latency, FPS, and battery
level.
Turning features such as Silent mode, blocking notifications,
taking screenshots, screen recording, and call blocker on or off.

77
★ Operation path
1. Go to "Game Center > Me > > Game Assistant" to make sure
"Game Assistant" is turned on.
2. Start the game and swipe from upper left to right to bring up
Game Assistant.
Quick startup
Quick startup allows you to start a game without waiting for the loading
process. When Quick startup is turned on, the game will be cached in
the background. Next time you start the game, you will be able to enter
it much faster.
★
Operation path
Start the game, swipe from the upper left of the screen to right to bring
up Game Assistant, and then tap "Quick startup" to turn on this feature.
When Quick startup caches a game in the local background, the
game remains offline until you start it and connect it to the internet.
Turning on Mistouch prevention in games
When you play games in landscape mode, you may accidentally trigger
system gestures like 3-Finger Screenshot in the heat of battle. Turn on
Mistouch prevention in games to disable certain gestures based on your
habits so that you won't be disrupted by a mistouch at a crucial
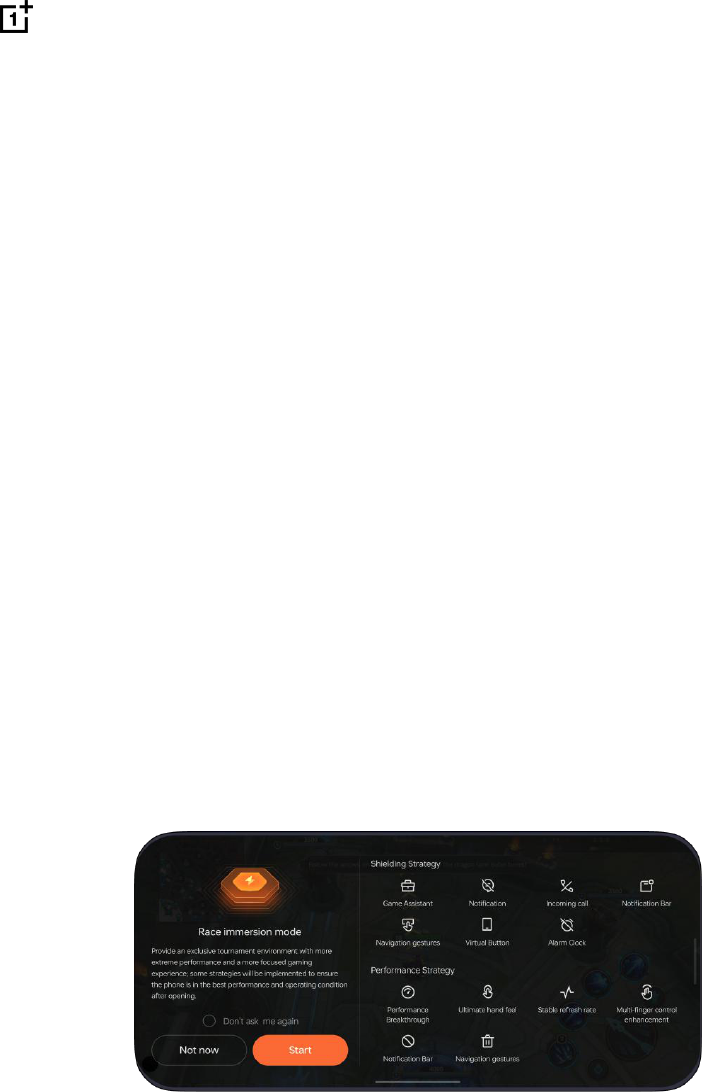
78
moment.
★ Operation path
1. Start the game, swipe from the upper left of the screen to right to
bring up Game Assistant, which will appear on the left screen. Tap
"Touch optimization" and turn on "Mistouch prevention".
2. Choose the gestures to disable based on your habits.
Turning on Championship mode
In Championship mode, alarms, notifications, and incoming calls will be
blocked and the notification bar, navigation gestures, virtual buttons,
and Game Assistant will be disabled to provide you with a more
immersive gaming experience.
★ Operation path
1. Start a game, swipe right on the upper left of the screen to bring
up Game Assistant, then tap "Championship mode" to turn on this
feature.
2. To exit "Championship mode", swipe inward from the upper left

79
corner when your phone is held horizontally.
This feature only works with certain phone models and games.
Please refer to the app content on your phone.
Using Voice changer
When you make voice calls while gaming, you can use Voice changer to
turn your voice into a cute girl's, give it an electronic flavor, or make you
sound like a certain cartoon character or celebrity.
★
Operation path
1. Start a game, swipe from left to right in the upper part of the
screen to bring up Game Assistant, then tap "Voice changer". You
can choose from all available voice effects.
2. Select your favorite voice effect and save your settings to apply it
during in-game voice calls.
3. The effect will be turned off when you exit the game.
This feature only works with certain phone models and games.
Please refer to the app content on your phone.
Turning on game filters
Game filters provide various visual styles and offer a richer gaming
experience. In addition, certain filters may help you detect hidden

80
enemies more easily, giving you a slight edge in battle.
★ Operation path
Start the game, swipe from the upper left of the screen to right to bring
up Game Assistant, then tap "Game filters" and select your favorite filter.
This feature will be automatically turned off when you exit the game.
Optimizing touch controls
You can customize your phone's touch sensitivity, responsiveness, and
other touch control settings for a better gaming experience.
★
Operation path
1. Start the game, swipe from upper-left to right to bring up Game
Assistant, and then tap "Touch optimization > Touch sensitivity".
2. Adjust the sensitivity and responsiveness settings by dragging
the control bar left and right.
Touch sensitivity: Lower sensitivity can reduce mistouches, while
higher sensitivity will make the game more responsive to your
touches.
Touch responsiveness: With lower touch responsiveness, the in-
game camera will move more smoothly when you swipe on the
screen, while higher touch responsiveness makes the in-game
camera response to your swipes more quickly.

81
Turning on 4D Vibration
4D Vibration provides more comprehensive and subtle vibration effects
in certain gaming scenarios. The percussive effects provided by 4D
Vibration a sense of rhythm and atmosphere to your combat.
★ Operation path
Start the game, swipe from upper-left to right to bring up Game
Assistant, then tap "4D Vibration" to turn it on and adjust vibration
settings as needed.
This feature is only available on some models. Please refer to the
actual device for its final functions and features.
Listening to music while gaming
When you are playing a game, you can play your own music or adjust
the music player volume without interrupting the gameplay with Game
Assistant.
★ Operation path
1. While a song is being played in the background, you can bring up
"Game Assistant" by swiping in from the upper left screen in a
game, then switch between songs, pause, or play music right in
the music player module.
2. Tap to adjust the music volume.

82
Turning on Smart dual channel network
You can boost connectivity with a mobile network when the Wi-Fi
network connection is weak. Turn on Smart dual-channel network to
reduce the Wi-Fi network's latency with the mobile network.
★ Operation path
Start a game, swipe from upper-left to right to bring up Game Assistant,
then tap "Network optimization > Select network" to turn on "Smart dual
channel network".
Floating game window
If you want to return to the Home screen or use another app while
playing a game, you can display the game in a floating window.
This way, you can keep an eye on your game while doing other things
on your device and quickly resume playing whenever you want.
★ Operation path
Start a game, swipe from the upper left of the screen to right to call up
Games, tap "Settings > Floating window", and turn on "Display floating
game window".

83
Convenience services
Taking screenshots or screen recordings in
games
To capture the best moments in a game, you can use Game Assistant to
take a "screenshot" or "record the screen".
★ Operation path
Start a game, swipe from the upper-left corner to the right to bring up
Game Assistant, select "Take a screenshot" or "record the screen", and
then turn the corresponding icon on or off as needed.
Bullet notifications in games
The Bullet Notifications feature displays WhatsApp, Messenger,
Messenger Lite, Telegram, and Messages as bullet comments in Games,
so you don't miss any important information.
How to turn on the feature
1. Start a game, swipe from upper left to right to bring up Game
Assistant, then tap "Bullet notifications".
2. Select "Icon notifications" or "Bullet notifications".
○
When "Icon notifications" is selected, incoming messages will
appear on the screen as an icon, and you can tap the icon for

84
a quick reply.
○ When "Bullet notifications" is selected, incoming messages will
be displayed as scrolling bullet comment.
3. You can customize the bullet speed, opacity, the amount of bullet
comments displayed, as well as the background color.
Locking screen orientation while in games
Even when you have turned off Auto rotate, some apps still can
recognize your phone's orientation and rotate the screen accordingly.
When playing games, you can lock the screen orientation in Game
Assistant to prevent it from rotating.
★
Operation path
Start a game, swipe from the upper-left corner to the right to bring up
Game Assistant, then tap .
Reply to messages in a floating window when
playing a game
When in a game, you can reply to chat messages in a floating window
without exiting the game.
★ Operation path
1. Start a game, swipe right from the upper-left corner to bring up
Game Assistant.

85
2. Tap the app icon from the side to open a floating window for
chatting.
3. Hold and drag the upper center of the floating window to change
its position.
Apps that can be displayed in a floating window chat are listed in
Game Assistant.
Lock screen brightness while playing games
Screen brightness may directly impact your control in a game. To
prevent auto brightness from interfering with your gameplay, you can
lock screen brightness while playing games.
★
Operation path
1. Start the game, swipe from the upper-left corner to the right to
bring up Game Assistant, then tap "Brightness". Slide left and
right to adjust screen brightness.
2. Tap the Brightness lock icon to lock or unlock screen brightness.
Blocking notifications while playing games
You can block banner notifications while playing games to prevent
interruptions.
★ Operation path
Start a game, swipe from the upper-left corner to the right to bring up

86
Game Assistant, select "Block notifications", then tap the corresponding
icon to turn it on or off as needed.
Call blocker during gameplay
If you don't want to be disturbed by incoming calls during gameplay,
turn on "Call blocker".
★ Operation path
Start the game, swipe from upper-left to right to bring up Game
Assistant, select "Call blocker", then tap the corresponding icon to turn it
on or off as needed.
Use default data SIM only when gaming
When you are playing games with two SIM cards in your phone, network
latency may become higher. You can temporarily disable the non-
default data SIM when gaming to improve internet connection stability.
★
Operation path
Start a game, swipe from left to right in the upper part of the screen to
bring up Game Assistant, and tap "Network optimization > Select
network". Turn on "Use default data SIM only" when you need it.
When this feature is turned on, the non-default data SIM will not be
able to receive calls.

87
Multi-device connection
Multi-Screen Connect
Multi-Screen Connect
Multi-Screen Connect allows you to seamlessly link up your phone with
your PC or tablet and quickly transfer files and data between the
devices. After your devices are connected via "Multi-Screen Connect",
you can use the following features:
Miracast: Cast your phone screen to a PC or tablet so that you
can view the phone files and control the phone on a larger screen.
Cross-device file transfer: Drag and drop files between your
phone and PC or tablet to quickly transfer files.
Cross-device file editing: Open and edit a file from your phone
directly on your PC. The edited file will be automatically saved to
your phone.
App relay between tablet and phone: Start an app on your phone
and pick up where you left off on your tablet.
Sync clipboards: Share the clipboard between your phone and PC
or tablet. Content copied on one device can be directly pasted on
another device.

88
Sync media: Photos, videos, screenshots, and screen recordings
taken on your phone can be synced and saved to your PC or
tablet in real time.
Sync notifications: Notifications received on your phone can be
synced to your PC or tablet so you can reply directly from that
device.
Cross-device calls: Make and receive voice calls on your PC, and
switch between PC and phone audio output during your call.
For details of the devices that support this feature, please refer to
the official website (connect.oppo.com).
Turning on Auto connect for devices with the same
account
If you have multiple devices, just sign in to the same account on these
devices, and you can quickly establish a connection via "Auto connect",
which makes it easier for you to cast screens and transfer files between
devices.
★ Operation path
Go to "Settings > Connection & sharing > Multi-Screen Connect" and
turn on "Auto connect". Your phone will automatically discover and
connect to devices signed in to the same account.

89
This feature is available only for Oxygen 13.1 and later versions.
Connect your phone and tablet
After your phone and tablet are connected via Multi-Screen Connect,
you can easily transfer files between them or control your phone directly
from your tablet.
★ Operation path
1. Pull down the status bar twice to fully expand Quick Settings,
then turn on "Multi-Screen Connect". You can also go to "Settings
> Connection & sharing > Multi-Screen Connect" and turn on
"Multi-Screen Connect".
2. Turn on "Multi-Screen Connect" in the same way on your tablet.
Hold your phone near your tablet and follow the onscreen
instructions to connect.
3. Once a connection is established, a window of your phone screen
will appear on your tablet and you can directly control your phone
from the tablet.
4. To close the screencast window, tap the Close button and select
"Disconnect".
If your phone and tablet are signed in to the same account, you can
also use "Auto connect" to quickly establish a connection. For

90
details, please refer to Turning on Auto connect for devices with the
same account 88.
Transferring files between your phone and tablet
After your phone and tablet are connected via Multi-Screen Connect,
you can easily drag and drop files between them.
★ Operation path
Transferring from your phone to your tablet: In the phone screen
window on your tablet, select the files you want to send, touch
and hold until the Drag icon appears on the screen, then drag the
file directly out of the phone window.
Transferring from your tablet to your phone: In the Photos app or
any folder on your tablet, select the files you want to send, touch
and hold until the Drag icon appears on the screen, then drag the
file directly to the phone window.
You can view received files in "Files > Multi-Screen Connect" on your
phone or tablet.
Synchronizing clipboard between your phone and tablet
After your phone and tablet are connected via Multi-Screen Connect,
you can copy, cut, and paste text between the tablet and the phone
window, just like using the same device.

91
★ Operation path
Go to "Settings > Connection & sharing > Multi-Screen Connect >
Content sync" and make sure that "Sync clipboards" is turned on.
Syncing phone photos and videos to tablets
After your phone and tablet are connected via Multi-Screen Connect,
when you use the phone to take photos, videos, screenshots, or screen
recordings, they will be automatically saved to your tablet, so you don't
need to share them manually.
★
Operation path
1. On your phone, go to "Settings > Connection & sharing > Multi-
Screen Connect > Content sync" and make sure that "Sync
media" is turned on.
2. Take a photo, video, screenshot, or screen recording on your
phone.
3. You will receive a notification on the tablet. Tap this notification
and tap "Save".
4. Go to Photos on the tablet to view the image or video that was
just saved.
App relay between your phone and tablet
You can start a task with an app on your phone, then switch over to the

92
same app on your tablet and continue the task on the tablet.
For example, if you halfway through an article on WeChat, when you
tap to open WeChat on the tablet, the same article will appear, and
synced to the last page you read.
★ Operation path
1. Sign in to the same account on your phone and tablet to
automatically establish a connection.
2. On your phone, go to "Settings > Connection & sharing > Multi-
Screen Connect" and make sure that "App relay" is turned on.
This feature requires both devices to be running Oxygen 13.1 or
later versions and both devices must be signed in to the same
account.
Only certain apps support App relay. Please refer to your phone
for details.
Sharing mobile connection, calls, and texts with your
tablet
After your phone and tablet are connected, You can directly use your
phone's mobile network to connect to the internet, and make and
receive calls and texts on your tablet.
★ Operation path

93
1. Sign in to the same account on your phone and tablet to
automatically establish a connection.
2. Go to "Settings > Connection & sharing > Multi-Screen Connect >
Communication sharing" and turn on "Mobile data sharing",
"Calling sharing", or "Messaging sharing" as needed.
On the tablet, you can directly use your phone's mobile network and
data to make calls, send SMS messages, or browse internet content.
Multi-screen connection between a phone and a
laptop computer
★ Operation path
1. Visit https://connect.oppo.com on your PC to download and install
"Multi-Screen Connect".
2. Pull down the status bar twice to open and expand Quick Settings,
then turn on "Multi-Screen Connect". You can also go to "Settings
> Connection & sharing" and turn on "Multi-Screen Connect".
3. When your phone is near your PC, a pop-up will be displayed on
your phone. Follow the instructions to connect.
You can also tap "Scan to connect" in the lower-right corner of
"Multi-Screen Connect" window on your PC. On your phone, open
Multi-Screen Connect and tap in the lower-right corner to scan
the QR code generated on your PC to connect.
94
Once the connection is established, a window of your phone screen will
appear on your PC. You can directly control your phone with the
keyboard and mouse of your PC.
Tap at the top of the phone window to set features such as Hide
when snapped to side, Sync notifications, etc.
To disconnect, tap " > Disconnect" at the top of the phone window
on your PC, or pull down the status bar and tap "Disconnect" in
"OPSynergy".
"Multi-Screen Connect" now works with most laptop models. If the
connection is unsuccessful, please check whether your laptop supports
this feature.
Transferring files between a phone and a laptop
computer
Transferring images and videos from a phone to a PC: In the
phone window on the PC screen, open "Photos", right-click the
image or video you want to send (you can select multiple images
and videos), and then press and hold the left mouse button. Wait
for the Drag icon to appear, and then drag the files to your PC.
Transferring files from a phone to a PC: In the phone window on
the PC, open "My Files", right-click the file you want to send (you
can select multiple files), and then press and hold the left mouse

95
button. Wait for the Drag icon to appear, and then drag the files
to your PC.
Transferring files from a PC to a phone: On your PC, select the file
you want to send and drag it directly to the phone window on the
PC. You can also right-click the file you want to send, then select
"Send to my phone via Multi-Screen Connect" in the pop-up
shortcut menu.
You can view received files in "My Files > Multi-Screen Connect"
on your phone.
Opening phone files and apps on laptops
Once your phone and PC are connected, your phone screen will appear
on your PC. You can control your phone with the keyboard and mouse of
your PC.
Opening apps: Left-click an app icon to directly open the app.
Right-click an app icon to open quick tools for the app. Click the
text box to enter text directly with the keyboard.
Opening multiple phone windows: You can create up to 3 phone
windows on your PC. On a phone window, open a supported app
(such as Messages) and click "Open in new window" at the top of
the window to create a new window on the PC desktop.
Edit phone files with PC software: Right-click a file and use

96
software on your PC to open and edit this file. Click Save, and the
edited file will be automatically saved to your phone.
Sharing the clipboard: Copy a piece of text on your PC, then right-
click and paste it to the input area in the phone window. You can
also copy a piece of text from the phone window and paste it to
your PC.
Connecting your phone to your Windows PC
Once you connect your phone to your Windows PC, you can view
notifications, answer calls, view photos, and use apps right from your
PC.
★
Operation path
1. On your phone, swipe down from the top of the screen to show
Quick Settings, swipe down again to expand it, and tap "Link to
Windows". Alternatively, go to "Settings > Connection & sharing >
Link to Windows".
2. When you use this feature for the first time, you need to tap "Link
your phone and PC" on your phone. On your Windows PC, open
the "Phone Link" app. You can also go to
www.aka.ms/linkphoneqr in your browser and follow the
instructions to show a QR code.
3. On your phone, tap "Continue", then scan the QR code on your PC

97
with your phone. Follow the onscreen instructions to sign in,
connect the devices, and grant the necessary permissions.
4. Once the devices are connected, you can send SMS messages,
view photos, use phone apps, and make calls on your PC.
5. After the initial setup, you can use this feature as long as "Link to
Windows" on your phone is turned on and "Phone Link" is running
on your Windows PC.
Screencast
Casting the phone screen to TV
★ Operation path
1. Connect your phone and the TV to the same Wi-Fi network.
2. Turn on the screencast feature on a TV. Different manufacturers
use different names. Phrases to look for include Screencast,
Screen mirroring, Multi-screen interactions, and Miracast. Please
refer to your TV manual.
3. On your phone, pull down the status bar twice to open and
expand Quick Settings, then turn on "Screencast".
You can also go to "Settings > Connection & sharing > Screencast
> Search for display devices".
4. In the search results, tap the target TV to establish a connection.

98
Using other apps on the phone while casting
When you are casting an app from your phone to a TV, you can also use
other apps on your phone at the same time.
★ Operation path
1. Cast your phone to a TV. Refer to Casting the phone screen to TV
97for more details.
2. Open the app you wish to cast on your phone and tap the
Screencast icon in the status bar. From there, tap "Screencast
modes" and select "Cast app screen only".
If you see "Aspect ratio" on the bottom of the screen when you
cast an app, it means the app can display in full screen on a TV.
Tap "Aspect ratio" and select "Adapt to TV" to display the app in
full screen on the TV.
3. Return to the Home screen on your phone to use other apps while
casting.
To cast video apps in full screen to a TV, the TV must support
HappyCast, Miracast, or OPPO Screencast.
Hiding notifications and calls while casting
When you cast your phone screen to your TV, the TV displays everything
on your phone screen by default. To ensure that private information,

99
such as notifications and incoming calls, is not visible to others, you can
choose not to display notifications and calls while casting.
★ Operation path
1. To cast your phone screen to a TV, please refer to Casting the
phone screen to TV 97.
2. Tap the Screencast icon in the status bar and turn on "Hide
notifications" to hide private information such as notifications and
incoming calls from large screens.
Turning on Screen-off casting
When you cast your phone screen to a TV, you can turn on "Screen-off
casting" to save phone power.
★ Operation path
1. To cast your phone screen to a TV, please refer to Casting the
phone screen to TV 97.
2. Tap the Screencast icon on the status bar and turn on "Screen-off
casting". Now you can turn your phone screen off without
interrupting screen casting.
Connecting printers
Wireless printing
Wireless printing is a built-in printing feature that allows you to print

100
documents right from your phone. To use this feature, simply connect
your phone and printer to the same Wi-Fi network.
You can select a printer and configure settings such as number of
copies, orientation, page range, and paper size. This feature supports
common image file formats and PDF file. You can initiate the printing
task via a variety of printing services such as your printer's native
connection service.
Adding a printer
With wireless printing, you can connect a printer to your phone so that
you can print documents right from your phone. Here are a few ways to
add a printer.
★ Operation path
Adding a printer via IP address
Go to "Settings > Connection & sharing > Print > Default Print Service". In
the upper-right corner, tap " > Search by IP address", enter the IP
address, and tap "Add" to finish.
Adding a printer via Wi-Fi
Go to "Settings > Connection & sharing > Print > Default Print Service". In
the upper-right corner, tap " > Search for Wi-Fi Direct devices".
Select from the available devices, and tap "Connect" to finish.
Adding a printer via Search for printers

101
Go to "Settings > Connection & sharing > Print > Default Print Service".
This will show a list of printers, you can choose one to connect it to your
device.
Installing third-party printing services
If your phone has been connected to the same Wi-Fi network as the
printer and "Default Print Service" is turned on, but you can't find the
printer, it is possible that the default printing service does not support
this printer model. You need to download the compatible third-party
printing service plug-in or app to connect to the printer.
★
Operation path
Go to "Settings > Connection & sharing > Print" and tap "Add print
service". Select the required printing service, download and install it,
then reconnect to the printer.
Printing files
You can print documents directly from your phone by simply connecting
the phone and the printer to the same Wi-Fi network.
★
Operation path
Printing a document
1. Go to "My Files", or "Photos" touch and hold the file or photo that
you want to print, and tap "Send > Print" in the lower-left corner.

102
2. Choose "Printer" and connect to a printer, then preview the file
and configure printing settings.
3. Tap "Print" to start.
Privacy and security
Privacy password
Turning on the privacy password
The privacy password is solely used to access privacy-related features.
After this feature is turned on, you can use it for verification in privacy
features such as App lock, Hide apps, and Private Safe.
★ Operation path
Go to "Settings > Password & security > Privacy password" and follow
the prompts to set a password and enter your answers to the security
questions.
Hide apps
Hiding apps from prying eyes
You can hide apps that you don't want others to see, including app
icons and notifications. Hidden apps won't appear in recent tasks.

103
★ Operation path
1. Go to "Settings > Privacy > Privacy > Hide Apps".
2. Turn on the switch next to the app you want to hide and follow
the prompts to set the access code. Note that the access code
should begin and end with #.
If you need to access a hidden app, open the dial pad in "Phone " and
enter the access code.
If you need to change the access code, please tap " > Change
access code" in the upper-right corner and enter the new access code.

104
Private space
Adding files to Private Safe
Private Safe can hide your photos, videos, audio, notes, documents, and
other files from Photos, My Files, Notes, and other apps. You can only
access Private Safe after entering the privacy password.
To use this feature, you should first set a privacy password. Please
refer to Turning on the privacy password 102.
★
Operation path
1. Go to "Settings > Privacy > Privacy > Private Safe".
2. Enter the privacy password following the prompts and enable file
types that you want to add, such as "Images and videos".
3. Tap , select the images and videos you want to hide, and tap
"Set as private".
You can also select the files from the app and set them as private. For
example, in "My Files", touch and hold to select multiple files and choose
" > Set as private".
Viewing files in Private Safe
You can view files in Private Safe in a variety of ways.
★ Operation path

105
Go to "Settings > Privacy > Privacy > Private Safe" and enter the privacy
password.
In "Private Safe", touch and hold a file to select it, and then set it as
public or delete it.
You can also access Private Safe from "My Files" or "Photos". Touch and
hold the toolbar at the bottom to bring up the "Enter privacy password"
interface. Enter the password to view the files, images, and videos in
Private Safe.
App Lock
Locking important apps using App Lock
You can lock important apps by enabling the App Lock feature, and
locked apps can only be accessed using the privacy password. With App
Lock, you don't need to worry about others accessing important apps
without your authorization when they use your phone.
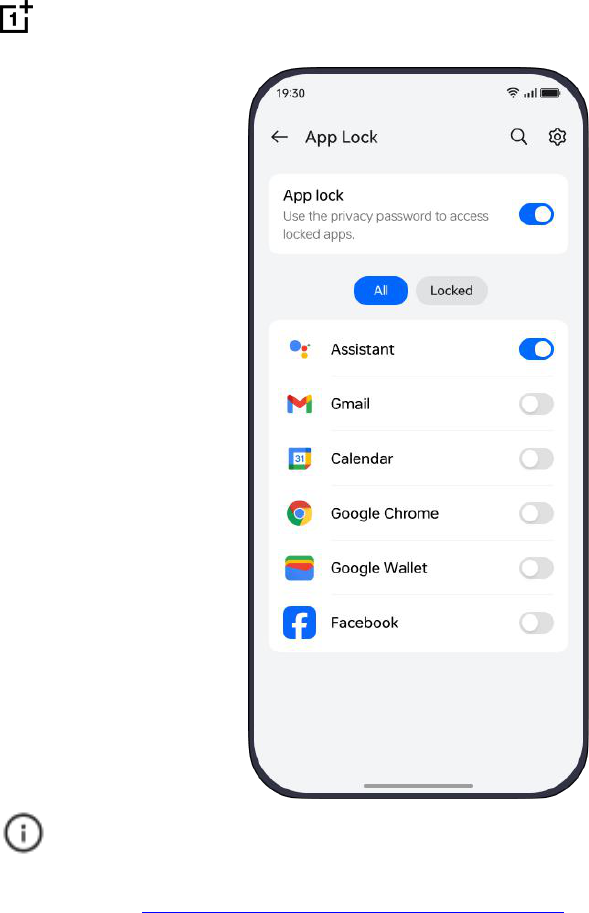
106
To use this feature, you should first set a privacy password. Please
refer to Turning on the privacy password 102.
★ Operation path
1. Go to "Settings > Privacy > Privacy > App Lock".
2. Enter your privacy password, turn on "App Lock", and choose the
apps you want to lock.

107
System Cloner
System clone, your private space
System Cloner lets you create a system clone in which the apps and
data exist separately from the main system.
The system clone can be accessed with a fingerprint or password,
providing a safe and convenient standalone system that not only
protects your privacy but also helps you separate your work from your
personal life.
Creating and entering a system clone
Create a system clone
Go to "Settings > Permissions & privacy > Privacy > System Cloner > Get
started". Enter your Lock screen password and set a password for the
system clone. Then a system clone is created.
Enter a system clone
After a system clone is created, you can enter the system clone using
the following two methods.
When unlocking your phone, enter the password that you set for
the clone to enter the system clone quickly.
Or, in the main system, go to "Settings > Permissions & privacy >
Privacy > System Cloner". Tap "Enter system clone". Then enter

108
the system clone password.
If your phone is restarted, you need to first enter the main system
password to enter the main system, and then enter the system
clone using either of the above methods.
Transfer apps and data between the main
system and a system clone
You can use the following methods to transfer data between a system
clone and the main system.
★ Operation path
After entering a system clone, go to "Settings > Permissions & privacy >
Privacy > System Cloner". You can perform the following operations on
the data of the system clone:
Clone apps
With the "Clone apps" function, you can clone the apps that have
already been installed in the main system instead of downloading
them again.
When you clone an app, the app data will not be cloned.
Import data
Enter the Lock screen password of the main system and select
the data that you want to transfer (such as contacts, images,

109
videos, audio, and document files). Tap "Import" to copy the data
to the system clone.
Export data
Enter the Lock screen password of the system clone, and go to
"Settings > Permissions & privacy > Privacy > System Cloner >
Export data". Select the data that you want to transfer (such as
contacts, images, videos, audio, and document files). Tap "Export"
to copy the data to the main system.
Sharing notifications between a system clone
and the main system
You can share notifications between a system clone and the main
system so as to avoid missing messages. In this case, whichever system
you are using, you can view all the notifications. You can share
notifications between a system clone and the main system using the
following methods.
★
Operation path
After entering a system clone, go to "Settings > Permissions &
privacy > Privacy > System Cloner", where you can manage
notifications sent to the system clone and the main system. Turn
on "Receive notifications sent to system clone", so as to receive
notifications sent to the system clone when you are using the

110
main system.
Turn on "Receive notifications sent to main system", then you can
receive notifications sent to the main system when you are using
the system clone.
You need to enter the system clone to change settings for sharing
notifications between the main system and the system clone.
Hiding access to a system clone
★
Operation path
1. After entering a system clone, go to "Settings > Permissions &
privacy > Privacy > System Cloner > Hide access to system clone".
2. Turn on "Hide access to system clone" and tap "Hide".
Once this function is turned on, the access to the system clone in the
main system will be hidden. You can only enter the system clone via the
Lock screen by using the password or fingerprint you set for the clone.
If you forget the password after the access is hidden, you will be
unable to enter the system clone or delete its data.
Deleting system clone
★ Operation path
After entering the main system, go to "Settings > Permissions &
111
privacy > Privacy > System Cloner", and tap in the upper-right
corner. Follow the instructions on the screen and then enter the
Lock screen password to delete the system clone.
After entering a system clone, go to "Settings > Permissions &
privacy > Privacy > System Cloner", and tap in the upper-right
corner. Follow the instructions on the screen and enter the clone
password to delete the system clone. Before deleting the clone,
you can choose to export the clone data.
Deleting the system clone will also delete all its data. This action
cannot be undone, so please proceed with caution.
Permission manager
Managing app permissions
Apps may require certain permissions to provide you with services.
These may include:
Access to camera, microphone, etc.
Access to Phone, SMS, Calendar, and more apps
Access to your phone's Location, Contacts, App list, internet
browsing records, and more
Access to images, documents, audio files, or other files on your
phone

112
Allow apps to send you Lock screen notifications, banner
notifications, and more
However, some apps may request more permissions than they need,
putting your privacy and information security at risk. You can check
permissions granted to each app and keep only the essentials.
★ Operation path
Go to "Settings > Security & Privacy > Privacy > Permission manager".
Tap any permission and follow the prompts to adjust settings.
Managing app access to photos and videos with
the photo selector
Some apps read photos and videos on your phone. To stop apps from
reading all files saved on Photos, you can manage apps' access to
photos and videos with the photo selector. Whenever an app needs
access to Photos, you can manage what photos and videos this app has
access to with the photo selector.
The photo selector only works with apps targeting Android 13 or
later versions.
You also need to set the app's access to photos and videos to
"Ask every time" to use the photo selector when the app
requires access to Photos.

113
★ Operation path
1. Go to "Settings > Security & Privacy > Privacy > Permission
manager". Under "Permission manager", tap "Photos and videos",
find the apps you wish to manage, and tap "Ask every time".
(If the app doesn't have an "Ask every time" option, that
means it doesn't currently support this feature.)
2. Every time the app requires access to photos or videos, a pop-up
will be prompted to ask for permission. Tap "Select photos and
videos" to allow access to individual photos and videos.
Modifying special app permissions
Apps may require permissions to access data or files, such as
permissions to read your notifications, manage files stored on your
device, or display over other apps, to provide you with applicable
services.
However, some apps may request more permissions than they need,
putting your privacy and information security at risk. You can check
permissions granted to each app and keep only the essentials.
★ Operation path
1. Go to "Settings > Apps > Special app access".
2. Modify app permissions as needed.

114
Turning on Location Services
Some apps may need to use Location Services to provide services based
on your current location. You can turn Location Services on or off as
necessary.
★ Operation path
Go to "Settings > Location" and turn on "Location Services".
You can also turn on "Wi-Fi scanning" and "Bluetooth scanning" for
more accurate location-based services.
System security
Managing other system security settings
★ Operation path
Go to "Settings > Password & security > System security" to change
settings for other modules.
Tap "Device admin apps" to manage devices.
Tap "Credential storage" to view user credentials that are
currently stored on the device and other trusted certificates.
Tap "Trusted agents" to view trusted agents running on the
device.
Tap "App pinning" and once you pin an app, you won't be able to

115
use other apps or features. App pinning is available only when
you are using button navigation.
Allowing app installations that are not from Play
Store
To install apps not from Play Store on your phone or pad, you need to
allow app installations from alternative sources.
★ Operation path
Go to "Settings > Security & privacy > More security & privacy >
Installation sources" allow alternative sources to install apps.
Power-off verification
When this feature is turned on, you will need to enter the Lock screen
password before powering off your phone. If you lose your phone,
others will not be able to shut it down to prevent you from locating your
phone using features such as Find My.
★
Operation path
Go to "Settings > Security & privacy > More security & privacy" and turn
on "Require password to power off".
Viewing blocked pseudo base stations
This feature blocks fraudulent messages and ads from pseudo base
stations. Pseudo base stations are cellular base stations that are

116
employed for malicious and usually illegal purposes such as sending
fraudulent messages and ads.
★ Operation path
Go to "Settings > Security & privacy > More security & privacy > Pseudo
base station blocking" to view pseudo base station blocking history.
Find My Device
Turn on the Find My Device feature, so you can locate your phone
remotely. If you lose your phone, you can also use this feature to wipe
your phone and prevent privacy leaks, thus ensuring the security of your
data.
★
Operation path
1. Go to "Settings > Security and privacy > Device finders > Find My
Device".
2. You will be able to use "Find My Device" once we have verified
your Google account.
3. You can also follow the prompts to use the app or website to find
your device.

117
Frequently used apps
Contacts
Creating and managing contacts
★ Operation path
1. Open the "Phone" app and go to the "Contacts" tab. Tap "Create
new contact".
2. You can now set a profile picture for the contact and enter the
contact's first name, last name, phone number, company, label,
and other information. Then tap "Save".
3. On the "Contacts" tab, you can also:
○ Tap to edit a contact's information;
○ Tap the star icon to set a contact as a favorite contact; and
○ Tap to delete or share a contact, add a contact to your
Home screen, set a ringtone for a contact, block a number, or
perform other operations.

118
Clock
Setting and editing an alarm
★ Operation path
1. Go to "Clock > Alarm" and tap to set an alarm.
2. Follow the prompts to set its ringtone and vibration, snooze
duration, and number of snoozes, and then tap .
Tap an existing alarm to edit it. Touch and hold an alarm to delete it.
Turning off or snoozing an alarm
If you want to sleep for a few more minutes after an alarm rings, you
can tap the Power button or the "Snooze" button. The alarm will ring
again later.
Tap "Stop" to turn it off.
★
Operation path
Go to "Clock > Alarm > > Settings" to set up "Ring duration" and
"Stop alarm with". You can also turn on or off "Notify before ringing".
Using Timer or Stopwatch
You can use the timer to count down from a specified time and use the
stopwatch to measure the duration of an event.
119
★ Operation path
Go to "Clock > Timer", set the duration of time, tap to start the
timer, and tap to stop it.
Go to "Clock > Stopwatch", tap to start the stopwatch, and
tap to stop it.
Viewing the time in cities worldwide
You can use Clock to view the local time in different time zones around
the world.
★
Operation path
Go to "Clock > World clock", tap to enter the name of a city, or select
one from the list of cities to view its local time.
Displaying two clocks
When you are outside your usual time zone, you can turn on Dual clock
to display the time of your usual residence and current location.
★ Operation path
1. Go to "Clock > > Settings > Date & time > Dual clock" to turn
on "Dual clock".
2. Follow the prompts to add your "Usual residence".
3. Tap "Display dual clock on" to show dual clock on the "Lock

120
screen", "Home screen clock widget", or "Lock screen & Home
screen clock widget".
Compass
Using Compass
The Compass app shows your current location, the direction your phone
is pointing, latitude, and your latitude and longitude.
Calibrating Compass
Calibrate "Compass" before you use it for the first time. To calibrate
Compass, find an open area away from interference and move the
phone following the onscreen instructions.
Finding your bearings
• Hold the phone horizontally to get accurate latitude, longitude, and
directions.
• Check the direction: The direction displayed directly below the
compass in the mobile phone interface (such as east, north, northeast,
southeast, etc.) is the direction of the mobile phone.

121
App management
Using App Cloner to separate your work and
personal life
App Cloner lets you use two accounts of one app on one phone, one for
the original app and the other for the cloned app.
★ Operation path
Go to "Settings > Apps > App Cloner" and select apps for which you
want to enable this feature.
When App Cloner is turned on for an app, an app clone that runs
independently of the original app will be added to the Home screen.
Some apps or phone models do not support App Cloner.
Managing auto-launch apps
Some apps will start automatically in the background, using up system
memory and consuming battery power. You can block these apps from
auto-launching as needed and check the system's latest blocking
records.
★ Operation path
Go to "Settings > Apps > Auto launch" to turn it on or off for different
apps.

122
Setting the default app
If you have more than one document editor, you can set a default app
to open any document.
★ Operation path
1. Go to "Settings > Apps > Default apps".
2. You can choose the default app for opening "TXT", "PDF", "Word",
"Excel", and "PPT" files respectively according to your habits. Or
you can tap "Download more apps" to download more apps.
We recommend that you keep the system default for Launcher,
Messages, Phone, Browser, Photos, Music, and Videos.
Viewing or modifying app permissions,
notifications, and more
You can make changes to app settings through "Manage notifications",
"Permissions", and "Battery usage".
★
Operation path
1. On the Home screen, touch and hold the app whose settings you
want to modify and tap "App info".
2. Follow the prompts to modify app settings. For example, you can
stop or uninstall the app, view or modify its permissions, or
change the notification style.

123
3. Tap "Manage notifications", "Permissions", and "Battery usage" to
set up the app.
4. Tap "Data usage" to view the mobile data used.
5. Tap "Storage usage" to view app storage usage and free up
space.
Uninstalling apps
You can use the following methods to uninstall a single app or uninstall
multiple apps at once.
★
Operation path
Uninstall a single app
○
Touch and hold the app icon on the Home screen, tap
"Uninstall", and then follow the prompts.
○ You can also go to "Settings > Apps > App management". Tap
on the app that you want to uninstall, and then tap "App info".
Then tap "Uninstall" to uninstall the app.
Uninstall multiple apps
○ When your Home screen is in Standard mode, touch and hold
the Home screen or pinch in to enter Edit mode. Select the
icons of the apps that you want to uninstall, and tap
"Uninstall". The selected apps will all be uninstalled.
○
When your Home screen is in Drawer mode, swipe up on the

124
Home screen to enter the app drawer. Tap "Manage" in the
upper-right corner, and tap "Select" in the menu. Select the
icons of the apps that you want to uninstall, and tap
"Uninstall". The selected apps will be batch uninstalled.
Uninstalling apps will clear app data. It is recommended to back
up data before uninstalling.
Some system apps cannot be uninstalled.
Recovering system apps
If you accidentally uninstalled a system app, you can get it back in the
following ways.
★
Operation path
1. Go to "Settings > Apps > Recover system apps", and select the
app that you want to recover, and tap "Install".
2. Tap "Go now" to go to "App Market", and download and install
the app.
Turning on the Display over other apps
permission
Floating windows, also known as Picture-in-picture, allow you to watch
a video in a small window while using other phone functions at the
same time.

125
★ Operation path
1. Go to "Settings > Apps > Special app access > Display over other
apps".
2. Select the apps for which you want to enable this feature and
turn on "Display over other apps".
This permission allows an app to appear on top of other apps. This
may affect how other apps are displayed.
Notes
Recording ideas on the fly with Notes
Notes helps you keep track of important information or capture fleeting
ideas with Doodle. Create to-dos and set reminders, and you will find it
easier to organize your tasks and get them done.
Creating notes
Use the Notes app to record, edit, manage, and view notes to help you
quickly capture ideas and inspiration as they come to you.
★
Operation path
1. Go to "Notes > Notes" and tap in the lower-right corner.
2. Enter text and tap in the upper-right corner.
3. You can also:
126
Change the font: Tap to adjust the font size, font type, font
color, etc.
Insert image: Tap and select "Take photo" or "Photos" to insert
photos or images into your note.
Others: Tap to set the skin, set the note as private, set a
reminder, pin the note, add the note to the Home screen, or delete
the note.
Organizing notes
You can hide or delete your notes or pin a note to the top based on your
needs. You can also move your notes to your notebooks to classify and
organize them.
★ Operation path
• Pin to top: In the list of all notes, touch and hold the note that you want
to pin to the top, then tap "Pin" to move it to the top of the list.
• Hide a note: In the list of all notes, touch and hold the note that you
want to hide, then tap "Hide" to hide it in your hidden notebook. To view
your hidden notes, tap "All notes > Hidden notes", then enter your
privacy password.
• Move a note: In the list of all notes, touch and hold the note that you
want to move, tap "Move", and select a notebook that you want to
move the note to. You can also tap "New notebook" to create a new

127
notebook and move the note into it. To view notes stored in different
notebooks, simply tap "All notes".
• Delete a note: In the list of all notes, touch and hold the note that you
want to delete, and tap "Delete". You can tap "All notes > Recently
deleted" to view the notes deleted in the past 30 days.
When you use the hidden notes function for the first time, you will
be required to set a privacy password and the answer to the
security question.
Doodle
With Doodle, you can write or draw within a note to make it richer and
more vivid.
★ Operation path
1. Go to "Notes > Notes" and tap in the lower-right corner.
2. Tap to start doodling. You use the built-in Color palette,
Ballpoint pen, Pen, Pencil, Marker, Lasso tool, and Eraser when
you draw or write in your note.
Creating to-dos
Put what you plan to do on your to-do list and set a specific time to
remind you to work on it.
★ Operation path
128
1. Go to "Notes > To-dos" and tap in the lower-right corner.
2. Enter a to-do.
3. Tap to set the reminder time and method. For important matters,
you can turn on "Alarm" and tap to complete the setup.
4. Tap again to complete the creation of a to-do.
Managing to-dos
You can hide the completed to-dos, delete to-dos, or sync your to-dos to
the cloud.
★ Operation path
1. Go to "Notes > To-dos".
2. Tap in the upper-right corner for more actions.
Edit: Tap to edit the to-dos. You can select and delete your to-dos.
Hide completed: Tap to hide your completed to-dos.
File management
Searching for files
With My Files, you can efficiently and easily find the files you need on
your phone.
★ Operation path

129
Go to "My Files", and you can:
View files by category from the Home page (for example, all
images are displayed in the same way as in the Photos app);
Tap "Recents" to switch to the "Recents" view, where the files
added in the last 30 days will be displayed in chronological order;
or
Search by file names in the search bar located at the top of the
Home page to quickly find the files.
My Files
My Files can help you effectively manage files, such as images, audio,
videos, documents, archives, and APK files on your phone.
★ Operation path
You can select the files as needed and perform the following operations:
Tap "Send" to share the files with others or other devices;
Tap "Tags" to tag the files, and you can view the files on the Tags
page after adding classification tags;
Tap "Move" to find a storage location to move the files to, and
then tap "Move here";
Tap "Delete" to delete the files; and
Tap "More" to copy or rename the files or perform other

130
operations.
Setting a file as private
When there are some important pictures, videos, audio, and document
files that you don't want others to see, you can set them as private files.
★ Operation path
1. Go to "My Files", touch and hold the file, and tap "More > Set as
private".
2. Tap "Private Safe" to view private files after verifying the
password.
Weather
Viewing weather info
Use Weather to check the current weather and weather forecast for
your current location or in other cities.
★
Operation path
· Go to "Weather" to view weather information about your current
location.
· To check the current day's hourly forecast, scroll down and then swipe
left or right.
· Scroll down to view the air quality, visibility, UV index, humidity, and

131
more.
· Tap "15-day weather forecast" to view more weather information on a
webpage.
Checking weather info for other cities
Checking the weather in other cities using the Weather app to better
manage your trips.
★
Operation path
1. In the "Weather" app, tap the building icon in the upper-right
corner to access the "Manage cities" screen.
2. Tap in the lower-right corner, enter the name of the city you
want to add, and tap the city.
3. In the "Weather" app, swipe left or right on the screen to check
the weather in another city.
On the "Manage cities" screen, tap " > Edit" , select the city or
cities you wish to remove, and tap to remove.
Using the Calculator
The Calculator app on your phone can handle anything from simple
addition, subtraction, multiplication, and division operations to more
complex scientific calculations like exponents, square roots, and

132
functions. It can also convert units.
★ Operation path
1. In the "Calculator" app, you can perform basic calculations such
as addition, subtraction, multiplication, and division.
2. To clear the display, tap the Clear (C) key.
3. Tap " > History" to view previous calculations.
You can also:
Tap the "scientific calculator" button in the upper-right corner to
perform advanced calculations.
Tap in the upper-right corner to start converting units.
Recorder
Recorder is an app where you can record sound and save recordings.
★ Operation path
1. Open the "Recorder" app and tap on the red button to start
recording.
2. During recording, you can tap "Mark" or "Photo mark" to mark
important positions in the recording.
3. Tap to pause the recording and to resume. To finish
recording, tap in the upper-right corner.

133
Selecting a recording mode
The Recorder app has Standard, Interview, and Meeting modes,
addressing the needs of a diverse range of use cases.
Standard mode: Records sound without much processing.
Suitable for general use.
Interview mode: Applies a noise-canceling algorithm. Best for
occasions where the voice to be recorded is near your phone,
such as for interviews.
Meeting mode: Makes voices sound louder. Best for occasions
where the voice to be recorded is far from the phone, such as in a
meeting or lecture.
★ Operation path
Go to "Recorder", tap " > Settings > Recording mode", and choose
the mode you need.
Marking moments in a recording
Once you have made a recording, you can mark key moments in the
recording. You mark with text or photos on the timeline, whichever way
you prefer.
★ Operation path
1. Go to "Recorder" and tap the file you want to mark to play it.

134
2. Tap "Mark" to mark with text. Tap "Photo mark" to mark with a
photo; you can take a photo or choose one from the Photos app.
Playing a recording
The Recorder app's main screen lists all of your recordings. Tap a
recording to play.
In Recorder, you can also:
Tap in the lower-left corner to turn on "Skip silence". Any
silence in your recordings will be skipped.
Choose "Playback speed" to speed up or slow down the audio.
Tap "Mark" or "Photo mark" to flag important moments.
Tap "Marks" to hide the list of marks and tap it again to view the
list.
Managing recordings
★
Operation path
1. On the Recorder's main screen, tap " > Edit" in the upper-right
corner to select a recording.
2. You can "Share", "Rename", "Set as ringtone", or "Delete" the file.
3. Tap a recording to view the file info. Tap to trim the recording.

135
IR Remote
Adding devices for remote control
Thanks to the infrared technology and IR Remote app, your phone can
work as an all-in-one remote control for a variety of home appliances
such as TV sets, air conditioners, set-top boxes, cameras, projectors,
light bulbs, and fans.
★
Operation path
1. Open "IR Remote" on your phone, tap in the lower-right
corner, and select the type and brand of the home appliance you
want to add.
2. For example, to pair the remote control with a TV, aim the infrared
emission hole at the top of the phone directly at the TV and follow
the prompts.
3. After successfully adding the TV, tap to start using your phone
as the remote control.
The list of IR Remote devices will show all added devices. Tap on a
device name to control that device.
This feature is only available on some models. Please refer to the
actual device for its final functions and features.

136
Setting up IR Remote
★ Operation path
Open "IR Remote" and tap " > Settings" to turn on or off "Button
sound" or "Button vibration".
You may also turn on "Obtain remote control data online" to support
more device models.
This feature is only available on some models. Please refer to the
actual device for its final functions and features.
System settings
The Search function in Settings
Go to "Settings". Tap the search box and enter the setting item that you
want to view. Select and tap the setting item from the drop-down
content to quickly enter the setting item.
Wi-Fi
Connecting to Wi-Fi
Wi-Fi is short for Wireless Fidelity. You can connect to Wi-Fi in a variety
of ways and access the internet without consuming mobile data.

137
★ Operation path
1. Go to "Settings > Wi-Fi".
2. You can connect through any of the following methods:
○ On the list of available networks, tap the network you need to
connect to, enter the password when prompted, or open the
browser and enter the account password for authentication.
Please contact the Wi-Fi provider for the account name and
password.
○
If you do not find the network you want to connect to on the
list of available networks, tap "Add network" and enter the
network name to connect.
○
If someone shares a Wi-Fi QR code with you, you can tap in
the upper-right corner of Wi-Fi settings and scan the code to
connect.
After you have connected to a Wi-Fi network once, whenever your
phone enters the network range again, it will automatically connect to it
without asking you to enter the password again.
If you don't want to auto connect to a Wi-Fi network, tap on the right
side of the Wi-Fi network and turn off "Auto connect".
Sharing Wi-Fi through a QR code
You can share the accounts and passwords of Wi-Fi networks you have

138
saved with others. They can connect to a Wi-Fi network by simply
scanning a QR code.
★ Operation path
Go to "Settings > Wi-Fi" and tap beside the Wi-Fi network you want
to share, then tap "Share" to generate a QR code.
Introduction to Wi-Fi Assistant
Wi-Fi Assistant provides you with a variety of network acceleration
services, such as automatically switching to a better Wi-Fi network or a
mobile network when the Wi-Fi network is poor or using both Wi-Fi and
mobile networks simultaneously. These services can significantly
improve your network experience.
Using dual channel network acceleration
In scenarios such as grabbing red packets or playing games, turn on
Dual channel network acceleration to use both mobile data and Wi-Fi to
give you an edge.
★
Operation path
Go to "Settings > Wi-Fi > Wi-Fi assistant > Dual channel network
acceleration", turn on "Dual channel network acceleration", and switch
on this feature for the apps that need it.
Using this feature may consume more mobile data. We recommend that

139
you turn it on only when needed.
Dual Wi-Fi acceleration
Dual Wi-Fi acceleration allows your phone to simultaneously use two
Wi-Fi networks.
★ Operation path
Go to " Settings > Wi-Fi > Wi-Fi assistant" and turn on "Dual Wi-Fi
acceleration".
Auto switch to mobile network
Turn on "Auto switch to mobile network", so your phone can
automatically switch to the mobile network when the Wi-Fi network
quality is poor to avoid network connection interruption.
★
Operation path
Go to "Settings > Wi-Fi > Wi-Fi assistant" and turn on "Auto switch to
mobile network".
Auto connect to the best Wi-Fi
When there are multiple Wi-Fi networks around you and your phone has
connected to these networks before, you can turn on "Auto connect to
the best Wi-Fi". Your phone will automatically detect the quality of these
Wi-Fi networks. When the quality of the current network is poor, the

140
phone will automatically switch to the best network.
★ Operation path
Go to "Settings > Wi-Fi > Wi-Fi assistant" and turn on "Auto connect to
the best Wi-Fi".
Mobile network
Setting SIM card name and number
When using two SIM cards, you can supplement information such as the
SIM card name and number for easier use.
★ Operation path
Go to "Settings > Mobile network", tap one SIM card, and enter the SIM
info & settings page. You can:
Tap "SIM card name" to enter a custom name.
Tap "SIM card number" to enter the phone number.
Turn "Data Roaming" on or off as needed.
SIM card management
Setting a default calling SIM and data SIM
When you use two SIM cards, you can set the default calling SIM and
data SIM based on the data plans provided by these cards.

141
★ Operation path
Go to "Settings > Mobile network " and tap "Default calling SIM" and
"Default data SIM" respectively and follow the prompts to change
settings.
Setting up Dual-SIM call forwarding
When using two SIM cards, you can turn on "Dual-SIM call forwarding"
so as not to miss important calls when one card cannot be connected.
★ Operation path
Go to "Settings > Mobile network > More settings > Dual-SIM call
forwarding" and adjust the call forwarding settings for SIM 1 and SIM 2
as needed.
One SIM for making calls, one SIM for internet access
When using two SIM cards, you can set them up so that while you are
making a call with one SIM, the other card will be used to access the
internet, making sure that you can always access the internet.
★ Operation path
Go to "Settings > Mobile network > More settings" and turn on "Use
mobile data during calls".

142
Data usage
Checking phone data usage
The system will help you calculate your phone's daily and monthly data
usage as well as how much data each app consumes, so that you can
better control and manage data consumption.
★ Operation path
Go to "Settings > Mobile network > Data usage" to view data usage.
Tap "Data usage by app" to view how much data each app
consumes.
Tap an app name to turn on "Disable mobile network" as needed
or turn off features including "Allow in the background".
Go to "Data usage limit" and tap "Daily data usage limit" or
"Monthly data usage limit" to set the data usage limit and how
you are notified when this limit is exceeded.
Data saving
Data saving helps you consume less mobile data by restricting apps
from using mobile data in the background.
★ Operation path
Go to "Settings > Mobile network > Data saving" and turn on "Data

143
saving".
When this feature is on and a mobile network is being used, background
apps (such as Mail or instant messaging software) won't be able to
receive new messages. Personal hotspot and tethering will also be
turned off.
You can tap "Unrestricted apps" to decide which apps can run in the
background with internet access, so you don't miss important
information.
Managing app network permissions
Some apps consume a lot of mobile data, and you can set them to run
only over Wi-Fi.
★
Operation path
Go to "Settings > Mobile network > Data usage > Network access", tap
the name of an app, and follow the prompts to limit or deny internet
access.
ORoaming
Purchasing international data plans
When you are preparing to go abroad, you can purchase an
international data plan on your phone. You don't need to buy an
additional calling card and there are no additional fees, so you can

144
travel worry-free.
★ Operation path
1. Go to "Settings > ORoaming" to select and purchase a plan based
on your destination. There will be no additional charges.
2. When you arrive at your destination, tap in the upper-right
corner and activate your data plan on the order list.
Do not to activate your data plan before you arrive, or the billing will
start.
Bluetooth
Bluetooth connection
Establishing a connection between your phone and Bluetooth
headphones, bands, watches, tablets, etc. makes it easier to share data
between your phone and these devices.
★
Operation path
1. Turn on Bluetooth on the device that needs to be connected and
enter pairing mode. (The operation varies by device. Please refer
to the user manual of the device you want to connect for details.)
2. On your phone, go to "Settings > Bluetooth" and turn on
"Bluetooth".
3. On the Available devices list, tap the Bluetooth name of the

145
device you want to connect to and follow the prompts to
establish a connection.
You can also tap beside a paired device and tap "Disconnect" or
"Unpair". You can also set the purpose of the Bluetooth device, such as
sharing contacts, media audio, or call audio.
Connection & sharing
Turning on Airplane mode
When you are taking a plane, you may need to turn on Airplane mode,
depending on the requirements of the airline. In Airplane mode, features
that rely on the mobile network, Wi-Fi, and Bluetooth will be unavailable.
★
Operation path
You can turn on "Airplane mode" through any of the following methods:
Swipe down from the top of the screen to open Quick Settings,
then turn on "Airplane mode".
Go to "Settings > Connection & sharing" and turn on "Airplane
mode".
Accessing specific networks through a VPN
A virtual private network (VPN) creates a temporary secure channel
over a public network for encrypted transmission of specific information.

146
When you are outside your company's offices or campus, you can
access the company's internal network through a VPN to access
intranet information.
★ Operation path
Go to "Settings > Connection & sharing > VPN", tap , and add the
VPN name, type, server address, etc. as per the information given by the
VPN provider.
Personal hotspot
Sharing the network through personal hotspot
You can share your phone's mobile data with other devices through a
personal hotspot.
★
Operation path
1. Go to "Settings > Connection & sharing > Personal hotspot" and
turn on "Personal hotspot".
2. When this feature is on, nearby devices can then discover your
personal hotspot. To connect to the hotspot, enter its password.
When no devices are connected for 10 minutes, Personal hotspot
will be turned off to save power.
You can also:
Tap the QR code beside "Hotspot settings" to share your hotspot.

147
Scan this QR code using another device to quickly connect to the
hotspot.
Tap "Hotspot settings" to change the hotspot name and
password, set the network as hidden, etc. to improve security.
Tap "Connection management" to set the maximum number of
connections, limit mobile data usage, etc.
Sharing internet access through Bluetooth
You can share your phone's network with another device through
Bluetooth.
★
Operation path
1. Go to "Settings > Connection & sharing > Personal hotspot" and
turn on "Bluetooth tethering".
2. Turn on Bluetooth on the device that requires internet access and
establish a Bluetooth connection with your phone.
When the connection is established, the other device can use your
phone's mobile data to access the internet.
Sharing internet access through USB
You can share your phone's mobile data with other devices through USB.
★ Operation path
1. Use a USB cable to connect your phone with the device that

148
needs internet access and follow the prompts on both devices to
complete the relevant settings. (The specific procedure may vary
by device.)
2. Go to "Settings > Connection & sharing > Personal hotspot" and
turn on "USB tethering".
The "USB tethering" switch can be toggled only when the phone has
established a USB connection with the other device. If the "USB
tethering" switch is grayed out on your phone, connect the phone with
the other device again.
Wallpapers & style
Wallpaper
Changing the wallpaper
There are numerous beautiful system wallpapers to choose from,
including both static wallpapers and live wallpapers. You can also
download and install online wallpapers, or set your favorite pictures as
wallpapers.
★
Operation path
1. Go to "Settings > Wallpapers & style > Wallpapers", or pinch in on
the Home screen to enter the "wallpaper quick settings" page and
then tap "Wallpapers".

149
2. On the "Wallpapers" page, you can set "Lock screen wallpaper",
"Carousel wallpapers", and "Home screen & Lock screen
wallpapers".
You can also open "Photos", select a picture, and tap in the lower-
right corner. Follow the prompts to set the picture as your wallpaper.
Picking accent colors from your wallpaper
You can pick accent colors from a static wallpaper to apply these colors
to your system.
★
Operation path
1. Go to "Settings > Wallpapers & style > Colors".
2. Tap "Wallpaper colors". In the pop-up window, drag the four dots
to choose colors from the current wallpaper.
This function is not available when a live wallpaper is in use.
Using dynamic wallpapers
Dynamic wallpapers make phone backgrounds more vibrant and
interesting.
★
Operation path
Go to "Settings > Wallpapers & style > Wallpapers > Live wallpapers",
select your favorite live wallpaper, tap "Apply " and choose "Home

150
screen" or "Home & Lock screens".
Using carousel wallpapers
With carousel wallpapers, your Lock screen wallpaper will automatically
switch between different pictures.
★ Operation path
1. Go to "Settings > Wallpapers & style > Wallpapers > Carousel
wallpapers", or pinch in with two fingers on the Home screen to
enter Home screen quick settings, and then tap "Wallpapers >
Carousel wallpapers".
2. Turn on "Carousel wallpapers" to pick your favorite wallpapers
and tap "Add to my selection".
Using online wallpapers
While the system does provide a good selection of wallpapers, you can
find many more options when you look online.
★ Operation path
1. Go to "Settings > Wallpapers & style > Wallpapers", or pinch in
with two fingers on the Home screen and then tap "Wallpapers".
2. Scroll down to the "Online wallpapers" section and you will see a
list of online wallpapers to choose from. You can also tap
"Classic" to select from default classic wallpapers or tap "Artistic"

151
at the bottom of the list.
3. Tap "More wallpapers" and jump to "Theme Store" for more
wallpapers.
Theme
Changing themes
Set up a theme, which includes customizing your device's Lock screen
wallpapers, Always-on Display styles, ringtones, and icons, so you can
personalize your device all at once.
★
Operation path
Go to "Settings > Wallpapers & style > Themes", select your
favorite theme, then tap "Apply".
Open the Theme Store app and tap "Themes". Find a theme you
like and tap "Apply".
Font
Changing the font size
Change the font size to improve the visual experience.
★
Operation path
Go to "Settings > Wallpapers & style > Font" , find the "Font size"
settings, and drag the slider to adjust the font size.

152
You can enable "Adaptive font weight" to achieve the best font
display effects.
Changing icon styles
You can change the icon style according to your preference.
System icon styles include "Aquamorphic", "Material", and "Pebble", or
you can also customize the Home screen icon style however you like.
★
Operation path
1. Go to "Settings > Wallpapers & style > Icons", and enter the icon
editing page.
2. If you select from the system styles, for example "Aquamorphic",
you will be able to adjust the icon size, app name font size, and
choose whether to display the app name or not. After you have
done editing, tap "Apply".
3. If you select "Custom", you will be able to choose the "icon shape",
adjust the "content size", "icon size" and "app name font size",
and choose whether to display the app name or not. After you
have done editing, tap "Apply".
Changing system colors
★ Operation path
1. Go to "Settings > Wallpapers & style > Colors" to select a color

153
scheme for the system.
2. You can also tap "Wallpaper colors" or "Custom" and pick a color
scheme you like.
Adjusting Quick Settings icon styles
Quick Settings offers various icon styles for you to choose from.
★ Operation path
1. Go to "Settings > Wallpapers & style > Quick Settings."
2. There are six icon styles available for "Quick Settings". You can
select your favorite one.
Video ringtone settings
When you set a video as a ringtone, your phone will play the video
when you receive a call.
★
Operation path
1. Go to "Settings > Wallpapers & style > Video ringtones" to set a
video ringtone.
2. Alternatively, go to "Settings > Sound & vibration > Ringtone >
Video ringtones".
3. Choose your favorite video and tap "Apply".

154
Edge lighting
After you turn on Edge lighting, whenever you receive a notification,
edges of the screen will automatically light up with an ambient
breathing light effect, going from dark to light. This is a whole new way
of notifying you of new messages, without setting ringtones.
★ Operation path
Go to "Settings > Wallpapers & style > Edge lighting" and choose your
favorite color for notifications.
You can also turn on "Also apply to incoming calls", so the screen will
also automatically light up with an ambient effect when your phone
receives a call.
Setting fingerprint animation
The system provides a variety of fingerprint animations to make your
fingerprint icon more interesting while unlocking the screen.
★
Operation path
1. Go to "Settings > Wallpapers & style", find the "USER INTERFACE"
area, and tap "Fingerprint animation".
2. Select your favorite fingerprint animation.

155
Home screen and Lock screen
Setting up app layout
You can set up app layout to group similar Home screen icons and
widgets into one screen, which is aesthetically pleasing and easy to
operate.
★
Operation path
Go to "Settings > Home screen & Lock screen" and follow the
procedure shown below to set up your Home screen.
○ Tap "Home screen layout" to choose the layout of icons. Tap
"Apply" when you're done.
○ Turn on "Icon autofill", so once an app icon is removed or
deleted, another app icon will automatically fill its place.
○
Turn on "Icon pull-down gesture" to operate your phone with
one hand. On the Home screen, swipe up from the lower-left
or lower-right corner and hold to pull down and minimize all
icons. Slide your finger to the target icon to open the app.
○
Tap "Swipe down on Home screen" and select to access
"Global Search" or "Notification drawer" when you swipe
down on the Home screen.
Pinch in with two fingers on the Home screen to enter Editing

156
mode.
○ Tap "Widgets" to choose apps, such as Clock, Calendar, Notes,
and more.
○ Tap "Transitions" to choose your page-turning animation and
tap "Apply" when you're done.
Setting up Home screen modes
There are three types of Home screen modes.
Standard mode: This is the default Home screen mode. All
installed apps are displayed on the Home screen. Touch and hold
an app icon to show quick actions.
Drawer mode: Swipe up on the Home screen to enter the app
drawer, where you can see all installed apps. Drag an app out of
the drawer to display it on the Home screen.
Simple mode: Simple mode features a simpler Home screen layout,
larger icons, and larger fonts.
★ Operation path
Go to "Settings > Home screen & Lock screen > Home screen mode" to
select "Standard mode" or "Drawer mode".
To enter Simple mode, go to "Settings > Special features > Simple
mode".

157
Pocket mistouch prevention
Accidental screen touches can occur when your phone is in your pocket
or backpack. To prevent such unintended operations, you can turn on
Pocket mistouch prevention.
★ Operation path
Go to "Settings > Home screen & Lock screen" and turn on "Pocket
mistouch prevention".
This feature is only available on some models. Please refer to the
actual device for its final functions and features.
Display and brightness
Screen brightness and color settings
★
Operation path
Go to "Settings > Display & brightness" to adjust display settings.
Mode: Select "Light mode"/"Dark mode", or turn on "Scheduled",
which automatically switches between Light mode and Dark
mode based on the time of day.
Brightness: Drag the brightness adjustment slider to adjust screen
brightness, or turn on "Auto brightness" so that your phone will
automatically adjust the screen brightness for current light

158
conditions.
Screen color mode: Vivid mode, Natural mode, and Pro mode are
available.
Font and display size: Set the font and screen display size.
Nature Tone Display: This feature automatically adjusts screen
color temperature in response to ambient lighting to minimize eye
strain and give you a more relaxing experience.
Auto rotate: This feature automatically switches between
Landscape mode and Portrait mode based on the orientation of
your phone.
Full screen for apps: You can enable this feature for some apps to
increase the display area. There are two modes available, "Hide
front camera" and "Full screen display".
Turning on Image sharpener
The video you are watching is blurry? Improve the video quality with one
tap in Image sharpener for a better viewing experience.
★ Operation path
1. Go to "Settings > Display & brightness" to turn on "Image
sharpener".
2. Tap "Supported apps" to view apps that support by this feature.

159
This feature will increase power consumption.
Turning on Video Color Boost
Video Color Boost utilizes the SDR-to-HDR technology to bring more
vibrant colors and finer dark details to SDR videos for a better viewing
experience.
★ Operation path
1. Go to "Settings > Display & brightness" to turn on "Video Color
Boost".
2. Tap "Supported apps" to view apps where you can use this
feature.
This feature will increase power consumption.
Turning on Eye Comfort
To minimize eye discomfort from prolonged screen time, you can turn on
Eye Comfort mode to reduce the amount of blue light from the screen
and prevent eye strain.
★
Operation path
Swipe down from the top of the screen to open Quick Settings
(Swipe it down again to expand it), and tap the Eye Comfort icon
to turn on Eye Comfort mode.

160
You can also turn on "Eye Comfort" and set color temperature
and display effects based on your preferences in "Settings >
Display & brightness > Eye Comfort".
Adaptive Sleep
Adaptive Sleep keeps your screen on while you're looking at it.
★ Operation path
Go to "Settings > Display & brightness > Adaptive Sleep" and turn on
"Adaptive Sleep".
Adjusting screen resolution
Your display looks different when you change your screen resolution.
The higher the resolution, the sharper the display quality. The display
quality degrades when you lower the resolution, but the system
consumes less power, resulting in longer battery life.
★
Operation path
1. Go to "Settings > Display & brightness > Screen resolution".
2. Choose a screen resolution.
This feature is only available on some models. Please refer to the
actual device for its final functions and features.

161
Adjusting screen refresh rate
Your display looks and responds differently when you change your
screen refresh rate. A higher refresh rate gives you a smoother image
quality and control. This makes for a better gaming experience, but
higher refresh rates drain the battery faster. A standard refresh rate is
more than capable of handling your everyday use with a better battery
life performance.
★
Operation path
1. Go to "Settings > Display & brightness > Screen refresh rate". You
can choose "Auto select", "Standard", or "High".
2. If you want a higher fresh rate, choose "High", tap "App-specific
refresh rate" and customize refresh rates (60 Hz, 90 Hz, or 120 Hz)
for individual apps.
This feature may vary across different models and versions. Please
refer to the actual device for its final functions and features.
Sounds and vibration
Setting sounds and vibration
You can increase or decrease the volume of incoming calls, messages,
media, and alarm clocks, so they're not uncomfortably loud or so quiet
that you miss them.

162
★ Operation path
Go to "Settings > Sounds & vibration" to adjust the volume of media,
ringtones, notifications, and alarms.
When you want to avoid disturbing people around you, for example,
during a meeting, enable the "Silent" mode. In this mode, when you
receive a message, your phone screen will light up rather than ringing.
If you enable "Vibrate on ring" or "Vibrate on silent", your phone will
vibrate and the screen will light up when you receive a call or message.
Changing the ringtone
The phone typically uses the system's default ringtone as the alert for
new messages. However, you can change it to a more recognizable
tone.
★ Operation path
Go to "Settings > Sounds & vibration" and set up your preferred
"Ringtone", "Message tone", and "Notification tone".
You can use locally stored music, system ringtones, or those offered by
the Theme Store.
In some system versions, we have added "Aquamorphic themes" to
provide you with a series of soothing, natural ringtones.

163
Holo Audio
When multiple audio streams are playing, Holo Audio allows you to
customize the spatial location of each audio stream using Spatial Audio
technology. This delivers a new listening experience where
independently controllable audio streams play in parallel without
interfering each other and you can easily distinguish between them.
Turn on Holo Audio to listen to your favorite tunes while gaming, or
catch an episode of your favorite show while chatting with your friend
over the phone.
★
Operation path
1. Go to "Settings > Sounds & vibration > Holo Audio" and turn on
"Holo Audio".
2. You can select the "Auto" or "Custom" mode.
○ Auto: In this mode, the best spatial location is automatically
allocated to each audio stream.
○ Custom: You can tap an audio stream to customize its spatial
location.
This feature is only available on some models. Please refer to the
actual device for its final functions and features.

164
In-ear monitoring
In-ear monitoring uses headphone hardware and mobile phone
software to provide low-latency and advanced reverberation effects.
After this feature is turned on, you can use your headphones to hear
how your singing and music effects sound in real time.
★ Operation path
1. Go to "Settings > Sounds & vibration > Additional settings > In-ear
monitoring".
2. Turn on "In-ear monitoring" for supported apps.
3. If your headphones are connected to the device when launching
an app, an "In-ear monitoring" floating window will appear. There,
you can adjust settings such as the in-ear monitoring volume,
reverberation, voice changer, and equalizer.
4. If you want to record with effects such as reverberation and
changed voice, you can turn on "Keep in-ear monitoring the same
as recording".
Once you have turned on In-ear monitoring on your phone, please
don't forget to turn off in-ear monitoring provided by other apps or
external devices to ensure there are no conflicts with this function.

165
Dolby Atmos
Dolby Atmos offers you a more immersive 3D audio-visual experience.
Dolby Atmos is enabled by default in Speaker mode. You can choose to
disable it while using headphones.
In addition to the Smart mode, Dolby Atmos is also optimized for movies,
games, and music. You can choose the mode that suits you best based
on the intended use.
★
Operation path
Go to "Settings > Sounds & vibration > Dolby Atmos" and select the
scene/sound profile that suits you.
This feature is only available on some models. Please refer to the
actual device for its final functions and features.
Setting tones
★
Operation path
Go to "Settings > Sounds & vibration > More sounds" to turn on or off
system sounds as needed.
When you connect your phone to the charger, the phone will beep.
However, if you put your phone in Silent or Do Not Disturb mode,
the phone will not beep.

166
Notifications & status bar
Setting notification styles
Notifications can come in 3 forms: Lock screen notifications, banner
notifications, and app icon badges.
★ Operation path
Go to "Settings > Notifications & status bar" to complete the following
setups.
Lock screen notification: You can choose whether to allow a pull-
down notification drawer while the screen is locked, show content
and source for new notifications, or wake the screen for
notifications.
Banner notification: You can choose to allow replying to
messages in floating windows. You can also turn on "Simplify
banner notifications when using an app in full screen".
App icon badges: You can choose to display Home screen app
badges with numbers, dots, numbers-and-dots, or none.
Smart notification hiding
When you check your phone in public, such as in elevators and on
subways, you may worry that others will see your sensitive information
from your phone's notifications.

167
Turn on the Smart notification hiding feature to use the front camera to
detect faces. When it detects someone other than you is looking at the
phone, it will hide the notification content to prevent leaks.
★ Operation path
Go to "Settings > Notifications & status bar", tap "Smart notification
hiding", and enter your facial data to turn on this feature.
Additional notification drawer settings
Notification drawer lets you manage app notification permissions and
customize how app notifications are displayed.
★
Operation path
Go to "Settings > Notifications & status bar > More settings", and
turn on "Display data usage in notification drawer", "Allow
notification snoozing", "Reduce notification feedback", and
"Notification history".
You can also choose to turn on "Smart notification hiding" to hide
banner notification content and protect your privacy.
Setting up the status bar
The status bar on the top of the screen displays information such as
network, carrier, time, and battery level. You can swipe down from the
status bar to access quick switches, such as mobile data, Wi-Fi, Silent
mode, Bluetooth, and more.
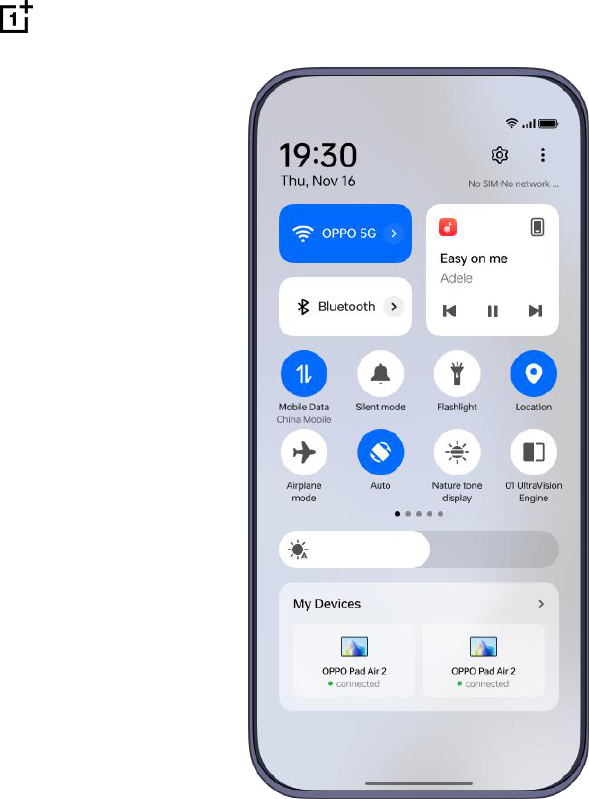
168
★ Operation path
Go to "Settings > Notifications & status bar", and you can set the
"Notification icons", "Battery style", and "Battery percentage", according
to your preference.
In the "Status bar icons" module, turn on "Real-time network speed" to
show the current internet speed, and you can select the other feature
icons you want to view in the status bar.
Do Not Disturb
You can turn on Do Not Disturb if you don't want incoming calls or

169
messages to interrupt your work or breaks. Incoming calls and
messages will be muted and there won't be any banner notifications.
★ Operation path
Swipe down from the status bar to open Quick Settings (swipe down
again to expand it) to turn on or off. Alternatively, you can go to
"Settings > Sounds & vibration > Do Not Disturb" to turn "Do Not
Disturb" on or off.
After Do Not Disturb is turned on, the icon will appear in the status
bar. You can find notifications in the notification drawer and on the Lock
screen when Do Not Disturb is on.
Scheduling Do Not Disturb
★
Operation path
1. Swipe down from the status bar to open Quick Settings, and
touch and hold to enter the "Do Not Disturb" screen. Tap
"Schedules".
Or go to "Settings > Sounds & vibration > Do Not Disturb >
Schedules".
2. Tap "Sleep" to specify a period when Do Not Disturb is on and
how the event repeats.
3. You can also tap to schedule multiple time periods for Do Not

170
Disturb.
Calls and messages in Do Not Disturb mode
When Do Not Disturb is on, ringtones and alerts for calls and messages
will sound normally for specified contacts, so you don't miss any critical
events.
★ Operation path
Go to "Settings > Sounds & vibration > Do Not Disturb" to turn on "Do
Not Disturb" or schedule it in "Schedules".
Tap "Contacts" and select contacts of allowed types. Ringtones
and alerts for calls and messages from these types of contacts
will sound normally when Do Not Disturb is on.
Tap "Apps" and select which apps are allowed to send you
notifications while Do Not Disturb is on.
Password and security
Facial recognition
Unlocking App Lock and Private Safe with your face
Your face data can be used for a number of purposes, such as unlocking
App Lock, accessing Private Safe, and verification when installing a new
app or making an SMS payment.

171
★ Operation path
1. Go to "Settings > Password & security > Face" and enter the Lock
screen password.
2. Turn on "App Lock" or "Private Safe" as needed and follow the
prompts to set or enter the privacy password.
Unlocking to enter the Home screen with your face
When you add your face for unlocking your phone, "Enter Home screen
after unlocking" is turned on by default. After you unlock your phone,
you will enter the Home screen. If you want to enter the screen before
the lock, you can turn off this feature.
★
Operation path
1. Go to "Settings > Password & security > Face" and enter your Lock
screen password.
2. Turn off "Enter Home screen after unlocking".
Do not use face unlock when your eyes are closed
Turn on this feature to prevent others from unlocking your phone with
your face while you are sleeping.
This feature is turned on by default. You can follow the path below to
confirm.
★ Operation path

172
1. Go to "Settings > Password & security > Face" and enter your
Lock screen password.
2. Make sure that "Require eyes to be open" is turned on.
Brightening the screen when unlocking with face in dim
light
Brightening the screen in dim light can improve the success rate for
facial recognition.
★ Operation path
1. Go to "Settings > Password & security > Face" and enter your Lock
screen password.
2. Turn on "Brighten screen in dim light".
Fingerprints
Using your fingerprint to access App Lock and Private
Safe
You can also use your fingerprint to access the App Lock and Private
Safe.
★ Operation path
1. Go to "Settings > Password & security > Fingerprint", and enter
your Lock screen password.

173
2. Turn on "App Lock" and "Private Safe".
Safety and emergency
Emergency SOS
As a phone manufacturer, we are highly concerned about your personal
security. In the event of a serious or life-threatening emergency, this
feature will allow you to send messages for help even when the screen
is off.
★
Operation path
Go to "Settings > Safety & emergency" and accept the terms of service
to turn on this feature.
In the event of an emergency, press and hold the Power button to
enter the power off page, where you can select Emergency SOS.
In the event of an emergency, swipe up on the Lock screen to
enter the emergency call page.
Emergency calls
Make emergency calls to get help quickly.
Press the power button 5 times in quick succession, and the emergency
contact information will appear on the screen. Select the number you
want to call.
You can also turn on "Emergency SOS". Select a number as the default

174
emergency number. When you press the Power button 5 times in quick
succession , the system will automatically call the number after 3
seconds.
★ Operation path
Go to "Settings > Safety & emergency" and turn on "Emergency SOS".
Setting emergency contacts
There are 3 emergency numbers by default: 110 (police), 119 (fire), and
120 (emergency medical).
You can add up to additional 3 emergency contacts and send them
messages that include your location in the event of an emergency.
★
Operation path
Go to "Settings > Safety & emergency > Emergency contacts".
Emergency sharing
You can turn on the Emergency sharing feature. The emergency
message with your location information will be sent to your emergency
contact.
★
Operation path
Go to "Settings > Safety & emergency > Emergency sharing", and turn
on "Auto send SMS with location".
Turn on the "Emergency Services Assistant" feature. When you call a

175
public emergency number, the system will turn on Location Services,
Mobile data, and Wi-Fi to determine your current location, regardless of
whether or not you have enabled these features on your phone.
The feature will also notify the police of your current location, phone
number, and other frequently used device information so that they can
respond swiftly to ensure your safety.
Battery
Smart charging
Smart charging is a feature designed to protect your battery. Your
device learns your charging habits and adjusts charging patterns
accordingly to slow down battery aging.
For example, when you charge your device at night, the charging will
pause when the battery level reaches 80% and resume to make sure it
reaches 100% right before you get up. This helps extend your phone's
battery life.
★
Operation path
Go to "Settings > Battery > Battery health > Smart charging" and turn on
smart charging.
This feature may vary across different models and versions. Please
refer to the actual device for its final functions and features.

176
Reverse wireless charging
Through Reverse wireless charging, you can use your phone to charge
devices (such as phones, tablets, watches, and bands) that support
wireless charging.
★ Operation path
Go to "Settings > Battery > Reverse wireless charging" and turn on
this feature. Put a device that supports wireless charging on the back of
your phone to start charging it.
When the battery level is lower than 25%, Reverse wireless charging will
be unavailable.
This feature is only available on some models. Please refer to the
actual device for its final functions and features.
Power saving mode
When you are running low on battery and have no power source nearby
for charging, you can turn on Power saving mode to conserve battery
power and extend battery life.
★
Operation path
1. Go to "Settings > Battery > Power saving mode".
2. Set the sub-features of Power saving mode:
○ If you enable "Automatically turn off Power saving mode when

177
the battery is charged to 90%", your phone will automatically
exit Power saving mode when it is charged to 90%.
○ If you enable "Turn on at specified battery level", Power saving
mode will be automatically turned on when the battery
reaches a set level.
3. By tapping "Default optimizations", you can manage specific
optimizable items.
The battery icon in the upper-right corner will be yellow when
Power saving mode is on, and it will switch back when this mode is
turned off.
Super power saving mode
Super power saving mode limits the number of apps that can be used
and strictly controls background activity to extend battery life for as
long as possible and to alleviate your low-battery anxiety.
When your phone battery drops to 10% or 5%, you will be prompted to
turn on Super power saving mode. You can also turn it on anytime you
want in Settings.
★ Operation path
Go to "Settings > Battery > Power saving mode" and turn on "Super
power saving mode".
In Super power saving mode, you will only be able to use a certain

178
number of apps (such as Phone and Messages). Tap or touch and
hold an app to enter editing mode and remove apps. Tap to add
apps.
To exit Super power saving mode, you can tap the Exit button in the
upper-left corner.
High performance mode
When playing a graphics-intensive game, you can turn on High
performance mode to get the best possible performance out of your
device.
★ Operation path
Go to "Settings > Battery > More settings" and turn on "High
performance mode".
It may increase power consumption and cause your phone to heat up.
Turn on this feature only when necessary.
Managing battery-draining apps
Go to "Settings > Battery > Battery usage details" to view your battery
usage for the last 24 hours.
Go to "Settings > Battery > More settings > App battery management"
and select apps to manage power consumption.
You can turn off "Allow foreground activity" to save battery

179
power. However, the app may not run properly and app
notifications may be delayed.
If you turn on "Allow background activity", background activity of
the app will be restricted, but this may consume more battery
power.
Saving power with one tap
The system automatically detects power consumption issues on your
phone. You can use the "Save power" feature to optimize battery usage
and extend battery life with just one tap.
★
Operation path
1. Go to "Settings > Battery" to view the current battery level and
the battery usage for the last 24 hours.
2. Tap "Battery usage details" to view how long an app has run and
how much power it has consumed.
3. Tap "Optimize battery usage > Save power" to detect power
consumption issues and extend battery life.
Sleep standby optimization
Turning on Sleep standby optimization will switch your phone to a low-
power state while you sleep, reducing the frequency of push
notifications to extend battery life.

180
★ Operation path
Go to "Settings > Battery > More settings" and turn on "Sleep standby
optimization".
Low battery alert
When your phone battery level drops below 20%, a low battery alert will
pop up. You can turn on "Power saving mode" to optimize power usage.
Digital Wellbeing & parental controls
Kids mode
Using Kids mode to help children grow
Kids mode is a dedicated space for children. It provides the following
services:
Dedicated Home screen
Add child-friendly apps to create a digital space your child will
love.
Healthy screen time habits
Set screen time limits for your child to prevent device overuse.
Eyesight protection
Monitor your child's sitting position and distance from the screen
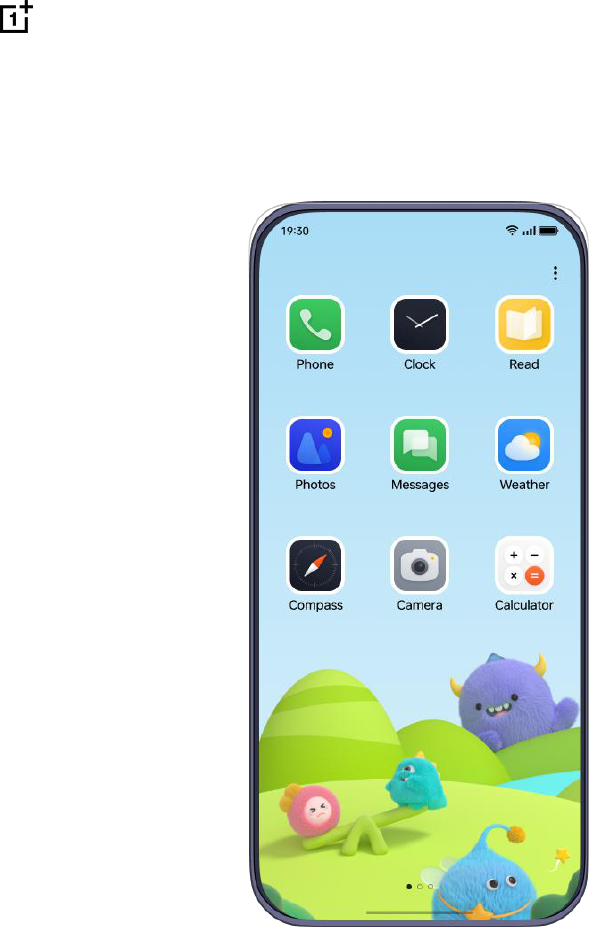
181
to help them use electronic devices appropriately and keep
nearsightedness at bay.
★ Operation path
Go to "Settings > Special features > Kids mode" and follow the prompts,
then you can choose the allowed apps, limit the screen time, and set the
network and Eye Comfort to complete the setup of Kids mode.
Parental controls in Kids mode
Parental controls can keep their kids from being addicted to mobile
games or other inappropriate apps that could negatively impact their

182
schoolwork and social lives by setting stringent limits on their phone
usage and screen time with the "Parental controls " feature.
★ Operation path
1. In Kids mode, tap " > Parental controls" in the upper-right
corner, verify the Lock screen password, and then enter the
Parental controls page.
2. You can turn on or off Wi-Fi and mobile network for Kid mode.
3. Tap "Added apps" to set apps that you allow your kids to access.
4. Tap "Time limit" to select a time period. When the allowed time
expires, Kids mode will automatically be exited and the screen will
be locked.
5. Tap "Eyesight protection" to detect the ambient light, the kid's
sitting posture, and distance, and send reminders if the kid is not
sitting correctly. You can also turn on "Eye-protecting display" to
filter blue light.
You can also turn on "Create Home screen shortcut", so you can
find the app quickly.
Turning on Zen Space
Zen Space helps you stay focused by limiting the use of apps and
minimizing distractions from notifications.

183
In Zen Space, you can enter the default Zen spaces or create new
spaces.
Deep Zen: You can only use your phone to take photos or receive calls
and make emergency calls. Deep Zen cannot be exited once started.
Light Zen: You can still use selected apps and you can exit Light Zen
anytime you like. You can also set up Light Zen spaces for work, study,
or other activities.
★
Operation path
1. Go to "Zen Space" and tap a space to customize its space name,
duration, allowed apps, and wallpaper and background sounds.
2. Tap "Start" to enter the selected space.
Additional settings
Setting languages and regions
★
Operation path
1. Go to "Settings > Additional settings > Language & region" and
view the languages and regions supported by the system.
2. Tap "Edit" to select the language you want to use and tap on
the right side to set a language as the default system language.
3. Drag a language to the top to make it your system default
language. If an app or website does not support this language,

184
the next supported language in the list will be used instead.
4. Tap "Region" to choose a region.
Setting date and time
The date and time displayed on your phone are set automatically over
the internet based on your location and can be changed manually if
necessary.
★
Operation path
Go to "Settings > Additional settings > Date & time" and then you can
set up date and time on your phone.
Tap "Time format" to display time in the 12-hour or 24-hour
format.
Turn on "Set time automatically" and "Set time zone
automatically". If there is an error, you can turn off these features
and set them manually.
Tap "Dual clock" to display one more clock of another time zone.
Using Gestures & motions
After Gestures & motions is turned on, you can swiftly operate your
phone without turning on the screen. For example, you can answer a
phone call by lifting your phone to your ear.
★ Operation path

185
Go to "Settings > Additional settings > Gestures & motions".
Turn on "Raise to wake" to automatically wake the screen when
you lift your phone.
Turn on "Lift to ear to answer calls" to automatically answer calls
when you lift your phone to your ear.
Turn on "Auto switch to receiver" to automatically switch to the
receiver when you lift your phone to your ear.
Turn on "Flip to mute incoming calls" to mute an incoming call
when you flip your phone.
Accessibility
Accessibility Menu
You can set a shortcut for Accessibility Menu and use this large
onscreen menu to control your phone. From the menu, you can lock your
screen, adjust the volume and brightness, take screenshots, and more.
★ Operation path
Go to "Settings > Additional settings > Accessibility > Accessibility Menu"
and tap "Shortcut". A green icon will appear in the lower-right corner on
the screen. Tap the icon to bring up the menu with frequently used
functions.
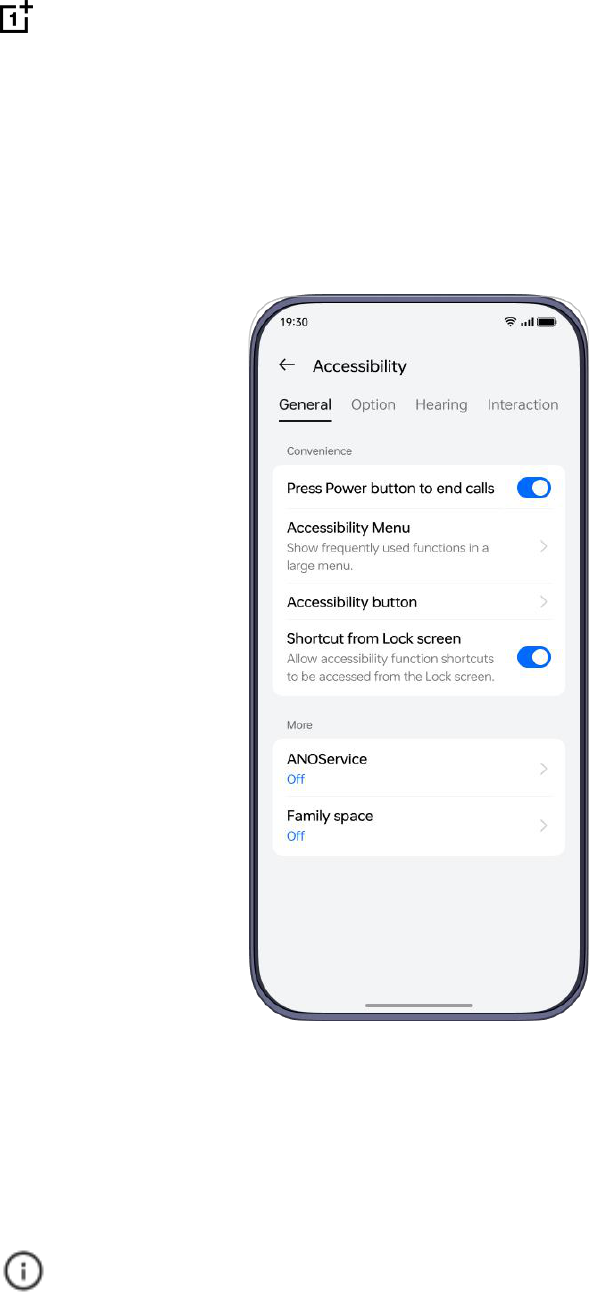
186
Pressing Power button to end calls
Turn on "Press Power button to end calls" so you can quickly end a call
by pressing the Power button.
★ Operation path
Go to "Settings > Additional settings > Accessibility > Press Power
button to end calls" and turn on this feature.
When you have an incoming call, whether "Press Power button to
end calls" is turned on or not, you can decline the call by pressing
the Power button. (Press the Power button once to turn off ring or

187
vibration, and press it a second time to decline the call.)
Turning on TalkBack
TalkBack gives spoken feedback for what you tap, select, and activate
on the screen, so that you can use your device without looking at it. It is
ideal for visually impaired people.
★ Operation path
1. Go to "Settings > Additional settings > Accessibility > Vision" and
turn on "TalkBack".
2. Once this feature is on, you can control your phone with the
following gestures:
Swipe right or left to switch between items.
Double-tap an item to activate it.
Drag with two fingers to scroll the screen.
1. Tap in the upper-right corner to customize TalkBack settings,
such as text-to-speech settings, verbosity, gestures, and more.
2. Press and hold the Volume Up and Down buttons for more than 3
seconds to turn off TalkBack.
Turning on Select to Speak
After turning on Select to Speak, you can tap text selected on the screen

188
to have it read to you.
★ Operation path
Go to "Settings > Additional settings > Accessibility > Vision > Select to
Speak" and turn on "Select to Speak". Select one or more pieces of text
and tap the Play button to hear the text read aloud.
Color vision enhancement
"Color vision enhancement" helps you to differentiate colors if you have
problems telling different colors apart. It provides multiple color
enhancement schemes for a better viewing experience.
In addition, you can take a color vision test to determine the type and
degree of your color vision deficiency and select the best color display
settings for you based on your test result.
★
Operation path
1. Go to "Settings > Additional settings > Accessibility > Vision >
Color vision enhancement" and turn on "Color vision
enhancement".
2. According to your own condition, you can select from "Grayscale",
"Red filter", "Green filter", or "Blue filter" and adjust the intensity.
3. Tap "Personalized " to complete a color vision test and the system
will automatically adjust the screen color based on the test result.

189
This feature may vary across different models and versions. Please
refer to the actual device for its final functions and features.
Turning on Magnification
By turning on Magnification, you can quickly zoom in on the screen so
that the content can be displayed more clearly.
★ Operation path
1. Go to "Settings > Additional settings > Accessibility > Vision >
Magnification", and tap "Shortcut" to turn on Magnification and
select a shortcut.
○
Accessibility button: Tap the Accessibility button on the screen.
○
Hold volume keys: Press and hold both volume buttons for 3
seconds.
○
Triple-tap screen: Tap the screen 3 times in quick succession.
2. Tap "Magnification type" and choose how to magnify.
3. On the page that needs to be magnified, use the selected
shortcut to activate Magnification. Drag with two or more fingers
to Triple-tap screen. Pinch in or out with two or more fingers to
zoom.
4. Use the selected shortcut again to turn off Magnification.

190
Color inversion
Color inversion inverts colors on your screen. For example, black text
against a white background becomes white text against a black
background. Colors in images and videos will also be inverted.
★ Operation path
1. Go to "Settings > Additional settings > Accessibility > Vision >
Color inversion" and turn on "Color inversion".
2. Tap "Shortcut". You can follow the onscreen prompts to assign
the volume buttons or the accessibility button as a shortcut to urn
on this feature.
High contrast text
Turning on High contrast text will change the text color to black or white,
making the text displayed on the device easier to read.
★
Operation path
Go to "Settings > Additional settings > Accessibility > Vision" and tap
"High contrast text" to turn on this feature.
Accessibility interaction features
People with motor impairments can improve the efficiency of their

191
phone use by using accessibility interaction features.
Accessibility interaction features allow you to control your phone or
tablet using one or more switches. Use switches to select items, scroll,
enter text, and more.
★ Operation path
Go to "Settings > Additional settings > Accessibility > Interaction"
and follow the prompts to set touch delay, switch control, response time,
and other features based on your needs.
Assistive Ball for quick actions
The Assistive Ball is a translucent ball floating on the screen. You can
drag it anywhere on the screen.
You can use the Assistive Ball for actions such as navigating between
screens or taking screenshots.
★ Operation path
1. Go to "Settings > Additional settings > Assistive Ball".
2. Turn this feature on or off using the "Assistive Ball" switch.
Assistive Ball provides two modes: gestures and menu options.
Using the Assistive Ball menu
When Assistive Ball is turned on, select "Tap menu". Tapping the
Assistive Ball will display 5 buttons for the following actions:

192
Go back
Take a screenshot
Recent tasks
Lock screen
Home screen
On the Assistive Ball settings page, you can tap a button in the Menu
section and change its action on the "Custom menu" screen that
appears.
Gesture control for Assistive Ball
When Assistive Ball is turned on, select "Gesture operations" to enable
the following actions:
★
Operation path
Tap: Go back
Double-tap: Recent tasks
Touch and hold: Home screen
You can customize gestures based on your frequency of use and
preferences.
Each gesture corresponds only to one action.

193
Customizing the Assistive Ball
You can make the following customizations to the Assistive Ball:
Drag the Assistive Ball to move it around
Adjust its opacity
Set the Assistive Ball to automatically hide itself in full screen
mode
When the Assistive Ball is hidden, swipe down from the top of the
screen to unhide it.
Air gestures
Use Air gestures to control your phone without touching it when your
hands are busy. You can wave to answer phone calls, watch short
videos, and more.
★ Operation path
1. Go to "Settings > Additional settings > Gestures & motions" and
turn on "Air gestures".
2. With Air gestures, you can answer phone calls and scroll pages.
To scroll up/down the screen in an app, you need to turn on this
feature for the app.
You can learn how to use Air gestures on the "Air gestures"

194
page.
This feature requires hardware support and is only available on
some models.
Power-on/off or restart
Turning on and off or restarting your phone
★ Operation path
Go to "Settings > Additional settings > Power Button > Press and hold
the power button", you can choose to bring up the "Power Menu" or
activate the "Voice Assistant" by pressing and holding the Power button.
If you select the Power Menu option, you can press and hold the power
button until the Power Menu pops up, and tap "Power off" or "Restart".
If your phone doesn't work and won't turn off normally, you can force
start it by pressing and holding the Power and Volume Up buttons for
more than 10 seconds.
Go to "Settings > Security & Privacy > More security & privacy >
Require password to power off". You will then need to enter your
Lock screen password whenever you power off your phone.
Setting auto power on/off
Use the Schedule power on/off feature to power your phone on and off

195
at set times, to save power and prevent interruptions while resting.
★ Operation path
Go to "Settings > Additional settings > Schedule power on/off" to set the
power on and off times.
Your phone will power on and off automatically at the specified times.
Back up and reset
Resetting phone
You can choose to reset network settings, reset all settings, erase
contacts and call logs stored on this phone (contacts stored on the SIM
card will be retained), erase SMS and MMS messages stored on this
phone (SMS messages stored on the SIM card will be retained), or erase
all data.
★ Operation path
1. Go to "Settings > Additional settings > Back up and reset > Reset
phone".
2. On the "Reset phone" page, follow the onscreen instructions to
reset settings or erase data as needed, and enter your Lock
screen password.
3. If you tap "Erase all data", your phone will be restored to factory
settings and all your data will be erased. Please act with caution.

196
Local data back-up and restoration
Local data backup
You can back up your phone data to internal storage to prevent data
loss. It is recommended to only backup small volumes of data.
★ Operation path
Go to "Settings > Additional settings > Back up & migrate > Local
backup", tap "New backup", then follow the prompts to back up your
data locally.
Local data restoration
If you have already backed up your data locally, you can choose the
corresponding backup time to restore data.
★
Operation path
Go to "Settings > Additional settings > Back up & migrate > Local
backup", select the time point that you want to restore your data to,
then tap "Start".
Turning on One-handed mode
One-handed mode allows you to touch the upper part of the large
screen more easily. You can also pull down app icons to open apps with
just one hand.
★
Operation path

197
Go to "Settings > Additional settings > One-handed mode" and turn on
"One-handed mode".
Swipe down from the bottom of the screen to enter One-handed mode.
Swipe up or tap the blank area at the top of the screen to exit.
This feature works only when Gestures is set as the system
navigation method.
Go to "Setting > Home screen Lock screen" , and turn on " Icon pull-
down gesture".
About device
Upgrading
Auto-update the system overnight
After the Auto update overnight feature is turned on, your phone will
automatically update between 2:00 AM to 5:00 AM.
★
Operation path
1. Go to "Settings > About device", and tap the Official version
widget.
2. Tap " > Auto update" in the upper-right corner, and turn on
"Auto update overnight".

198
This function is not available for major software updates. You will
need to update manually.
Updating your phone system online
System updates can fix some known issues, improve system
performance and stability, and introduce some new features. It is
recommended that you perform updates in a timely manner.
★ Operation path
1. Go to "Settings > About device".
2. Tap the version number at the top to check for updates and
download it if any update is available.
It is recommended that you use Wi-Fi to download the update.
During the update, do not touch the Power button or perform
any other operations. Please wait for the update to complete.
It is normal for your phone to heat up slightly during the update.
Once the update is complete, your phone will quickly cool back
down.
Installing the update package
In addition to OTA upgrades, you can also download and install an
update package.
199
★ Operation path
1. Download an update package from an official channel, go to
"Settings > About device", and tap the Official version widget at
the top.
2. Tap in the upper-right corner. Then tap "Local install" and
select the update package that you have downloaded for
installation and upgrade.
If the update fails, please back up your phone data and go to an
official service center for help.
Viewing device information
You can view your device name and its configuration data, including its
system version, Android version, Processor, RAM, Storage, Version
number, Baseband version, Kernel version, and more.
★
Operation path
1. Go to "Settings > About device", and tap the system version
widget at the top, so you can view the current version information
and check for updates.
2. Tap "Status" to check the phone's IP address, SIM card status,
and more.

200
RAM expansion
When your phone is running low on RAM, you can turn on RAM
expansion and use part of the storage space to expand your RAM to
improve system performance.
★ Operation path
Go to "Settings > About device > RAM > RAM expansion" and select the
size of RAM expansion. The settings will take effect after you restart
your device.
Users & accounts
Sharing your phone with multiple users
Often, when multiple users share a mobile phone, things can get messy
quickly.
And if you lend your phone to someone, you may be worried about your
privacy.
Now, you can turn on Multiple users to avoid these problems and
provide separate storage space for each user.
Creating users
You can share your phone with other users by adding new users to your
device.

201
★ Operation path
1. Go to "Settings > Users & accounts > Multiple users", and tap
"Add user > Add".
2. Enter a username, and tap the "Add" in the upper-right corner.
Wait a moment, and tap the newly created username in the user
list.
3. Tap "Enter > Switch", and complete the setup process by
following the prompts.
You can add 3 regular users and 1 guest.
Switching between multiple users
When Multiple users is turned on, you can quickly switch accounts in
Quick Settings.
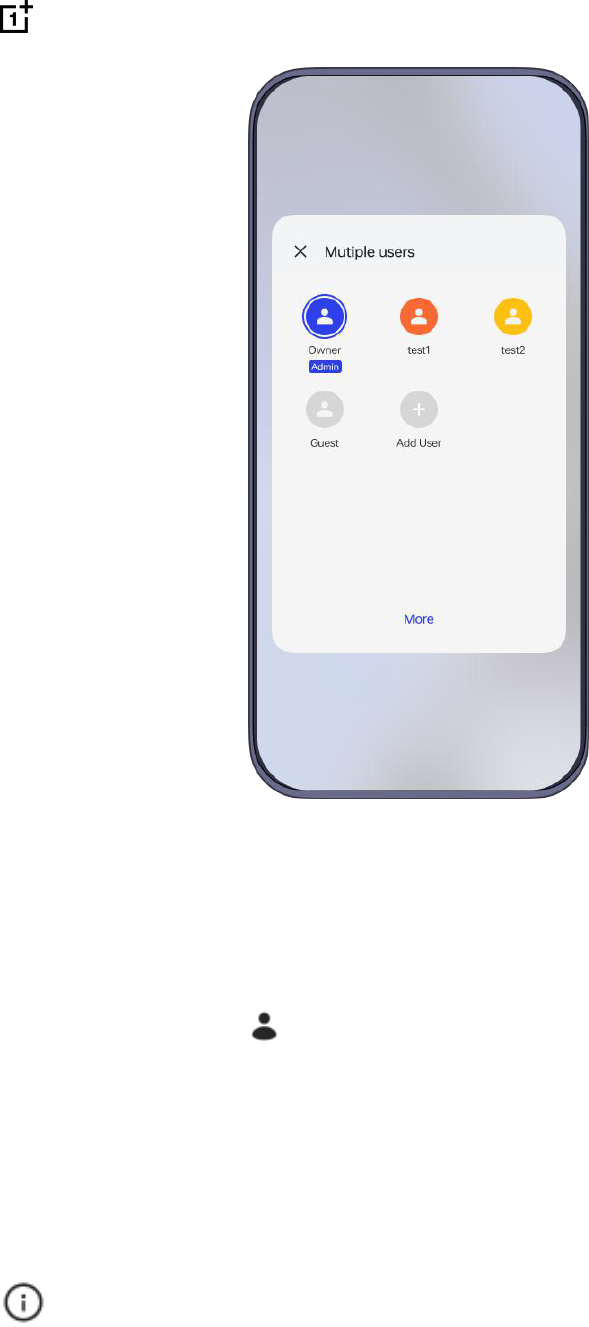
202
★ Operation path
1. When "Multiple users" is turned on, swipe down from the status
bar to open the "Quick Settings", and swipe down again to fully
expand it. Tap in the upper-right corner to enter the "Multiple
users" interface.
2. Select the icon of the user that you would like to switch to, and
tap "Switch".
You can add a maximum of 4 users.

203
Managing user permissions
When the "Multiple users" function is turned on, the device owner can
manage the permissions of other users.
★ Operation path
1. Go to "Settings > Users & accounts", and select the accounts that
you want to manage.
2. Turn on or off "Allow calls and messages" to change the
permission.
Deleting a user
You can use your device owner account to delete accounts that are no
longer needed.
★ Operation path
1. Go to "Settings > Users & accounts > Multiple users", and select
the accounts that you want to delete.
2. Tap "Delete user". The users will be deleted after double
confirmation.
When deleting users, their data will also be deleted. Please back up
the data in advance.

204
OS version is constantly updated and functions may vary across
different models and versions. This manual is provided for reference
only and does not constitute any warranty. Please refer to your actual
device for its final functions and features.
Version: 001
