2/13/2018
1/4
HTML/CSS Intro Instructions
1. Intro to tags
1.1. intro to HTML
Web pages are made with 2 computer languages: HTML defines the content
of pages and CSS defines how it looks. Your web browser reads HTML and
CSS code and displays pretty web pages on your screen.
In this intro course, you'll use HTML and CSS to create 2 web pages to add to
the Code Avengers "Wiki Jr"—a version of Wikipedia for children.
For your 1
st
task follow these steps:
1. Choose any topic you like for your 1
st
page, such as your favorite
movie, sport, invention or famous person.
2. Look at our Wiki Jr home page for some ideas of what you can
make.
3. On line 1 in the code editor, replace TYPE_TOPIC_HEADING_HERE
with your chosen topic.
4. Click to check when you are done.
1.2. adding text
The phone displays what your text in the code editor looks like as a web
page.
Now let's add some information about your topic. Since it's a page for
children, try to make the text short, simple and easy to understand.
1. Use sites like Wikipedia to get information on your topic.
2. After your heading, add at least 2 paragraphs of text.
3. Use the ENTER key to put a blank line in the code after your heading
and between each paragraph of text.
4. Can you see that page on the phone ignores blank lines in the
code?
5. Click the button when you are done.
1.3. paragraph tags <p>
The web browser ignores extra spaces in HTML code. No matter how many
spaces or new lines you put between words in your code they are shown 1
space apart on the web page.
To show sentences on separate lines, you need an HTML tag!
HTML tags are special bits of code that give structure to a web page. Each tag
begins with < and ends with >.
For example, <p> is the "paragraph tag". It adds space between paragraphs
of text.
1. In your code, put <p> at the start of at least 2 of your
paragraphs of text.
2. See what happens to the web page show on the phone.
3. Click the when you are done.
1.4. h1 headings
The main heading on the example page uses the code:
<h1>Mario Bros.</h1>
The heading code has 3 parts: a start tag <h1>, the heading text, and an end
tag </h1>. Notice that the difference between start and end tags is that end
tags begin with </.
Headings must have a start and end tag, but with paragraphs, the end tag is
optional. So the following 2 code examples do the same thing:
<p>Paragraph
<p>Paragraph2
<p>Paragraph</p>
<p>Paragraph2</p>
1. Put the tags <h1> and </h1> around your topic heading.
2. View the result on the phone.
3. Click the when you are done.
Extra info
In HTML there are lots of tags that are optional. In this course, we follow a
set of coding guidelines called the Google style guide, which recommends
leaving out optional tags.
Those who have already learnt some HTML may be interested to know that
the <html></html>, <head></head> and <body></body> start and end tags
are also optional. Your page works the same if you leave them out.
1.5. Headings
The tags <h1> </h1> are put around the main heading text on your
webpage. <h2> is used for subheadings, and <h3> is used for sub-
subheadings.
Heading tags make heading text bigger and add space above and below it, as
shown in the example below:
HTML Code <h1>main
heading</h1>
<h2>subheading</h2>
<h3>sub-subheading</h3>
Webpage Output
1. Insert the following subheading code above at least 1 of your
paragraphs: Insert <h2>YOUR_SUBHEADING</h2>
2. Change the text YOUR_SUBHEADING to a suitable subheading.
3. Click when you are done.
Extra Info
Text after a heading end tag is automatically shown on a new line on the web
page. For example:
HTML Code <h2>Heading Text</h2>First paragraph
text
Webpage Output
2. Head elements
2.1. doctype
The code <!doctype html> is put on the 1
st
line of your code.
It tells the web browser that your code is HTML.
It won't change how your page looks.
1. Put <!doctype html> at the start of line 1 of page1.html.
2. Click the page2.html tab to switch to the code for page 2, then put
<!doctype html> at the top.
3. From now on, click after you complete each task.
<h1>main
heading</h1>
<h2>Heading
Text</h2>First
2/13/2018
2/4
2.2. title element
In HTML, a heading "element" is made up of a start tag <h1>, an end tag
</h1>, and text that goes in between.
Another element is the title element, which looks like this: <title>Page
Title</title>
This code is put on line 2, after the doctype.
The title element text does not appear on the web page, but is used as the
title on the web browser tab.
1. On line 2 of page1.html, add the following code: Insert
<title>YOUR_TITLE | Wiki Jr</title>
2. Replace YOUR_TITLE with a title for your page.
3. Choose a related topic for your 2
nd
page.
4. Use the same format to add a title element on line 2 of
page2.html .
5. Click when you are done.
6. (Optional) Click the link at the top of the phone to see your web
page in a new tab.
2.3. link tag
In lesson5 you'll add pretty colors to your page using CSS code.
But for now, let's use the following HTML link tag to link to a CSS file (also
called a "stylesheet") that we created for you: Insert <link
rel="stylesheet" href="/css/wiki.css">
This tag contains 2 attributes that specify what the tag links to.
The code rel="stylesheet" tells the computer the relationship between
the current HTML page and resource it links to. In this case we are linking to
a CSS stylesheet.
The attribute href="/css/wiki.css" gives the path of the CSS file that it
links to. href stands for hypertext reference.
1. On line 3 of page1.html insert the link code in the instructions
above.
2. Add the same code on line 3 of page2.html.
2.4. tags and attributes
Let's do a quick review of a few words you've learnt in this course.
An html element is made up of a start tag, end tag, and some text in
between. In the code below, we've highlighted the start tags and end
tags:
1. <title>My Webpage</title>
2. <h1>My Webpage</h1>
3. <p>Here is a paragraph of text.
Remember that paragraph end tags (</p>) are optional. So we leave them
out.
Inside start tags, you'll sometimes see attributes that give extra information
about the element. In the code below, we've highlighted the attribute
names and attribute values: <link rel="stylesheet"
href="wiki.css">
1. Match the words with the correct code examples.
2. Click when you are done.
2.5. fixing bugs
It's really easy to make mistakes when you type code. Mistakes in your code
are often called bugs.
One common mistake is to get slashes mixed up. HTML end tags use forward
/ not backslash \.
1. Answer the 3 bug finding questions.
2. Click when you are done.
3. Images
3.1. adding images
Now let's make your pages more interesting by adding images using the
<img> tag.
The following code adds the Code Avengers logo to your page: <img
src="/images/ca-logo.png">
The <img> tag has an src attribute that tells the browser the source or
location of the image to show. The Code Avengers logo is stored in the
images folder on the Code Avengers web site.
Add the Code Avengers and Wiki Jr logos to your page by following
the steps below.
1. At the bottom of page1.html, insert the following code: Insert
<p>Powered by Code Avengers.
<img src="/images/ca-logo.png">
2. Just above the <h1> element on page1.html, insert the following
code <img src=""> and set the src attribute to:
/images/wiki-jr.png
3. For each task in this lesson, click when you are done.
3.2. image width & height
Our image is way too big!
You can change the size of an image using the <img> tag width and height
attributes.
For example, the following code resizes the Code Avengers logo to have a
width of 90 pixels:
<img width="90" src="/images/ca-logo.png">
The height is automatically adjusted so that the image stays in proportion.
1. Resize the Wiki Jr logo by setting the width attribute to at least 50
2. Resize the Code Avengers logo to a width of at least 100.
3. Click when you like the size of your image.
3.3. images from other sites
In task1 you added images stored on the Code Avengers website. For
example:
<img src="/images/ca-logo.png">
To add images from another website, set the src attribute to the full URL
(Internet address), which starts with http://.
For example, the following code displays an image from the game
MouseMaster:
<img src="https://mouse-master.com/idol.png">
To use images from other websites, you need permission from the owner.
Let's use Wikipedia, since its content is free!
1. Find an image on Wikipedia that relates to your topic.
2. To get the image's full URL, right click and select:
"Copy Image Address" on Chrome (Computer)
"Copy image URL" on Chrome (Mobile)
"Copy Image Location" on Firefox
"Copy Image Address" on Opera
"Copy" on Internet Explorer
3. After one of the paragraphs of text, add an image tag and paste the
Wikipedia image URL as the src value. If the image doesn't appear
on the phone carefully repeat the instructions.
4. Use the width attribute to make the image fit on the page.
5. Above the image, add an <h3> element that contains a short
description of the image.
Visit Creative Commons Search to find images that you can use for free
without permission.
2/13/2018
3/4
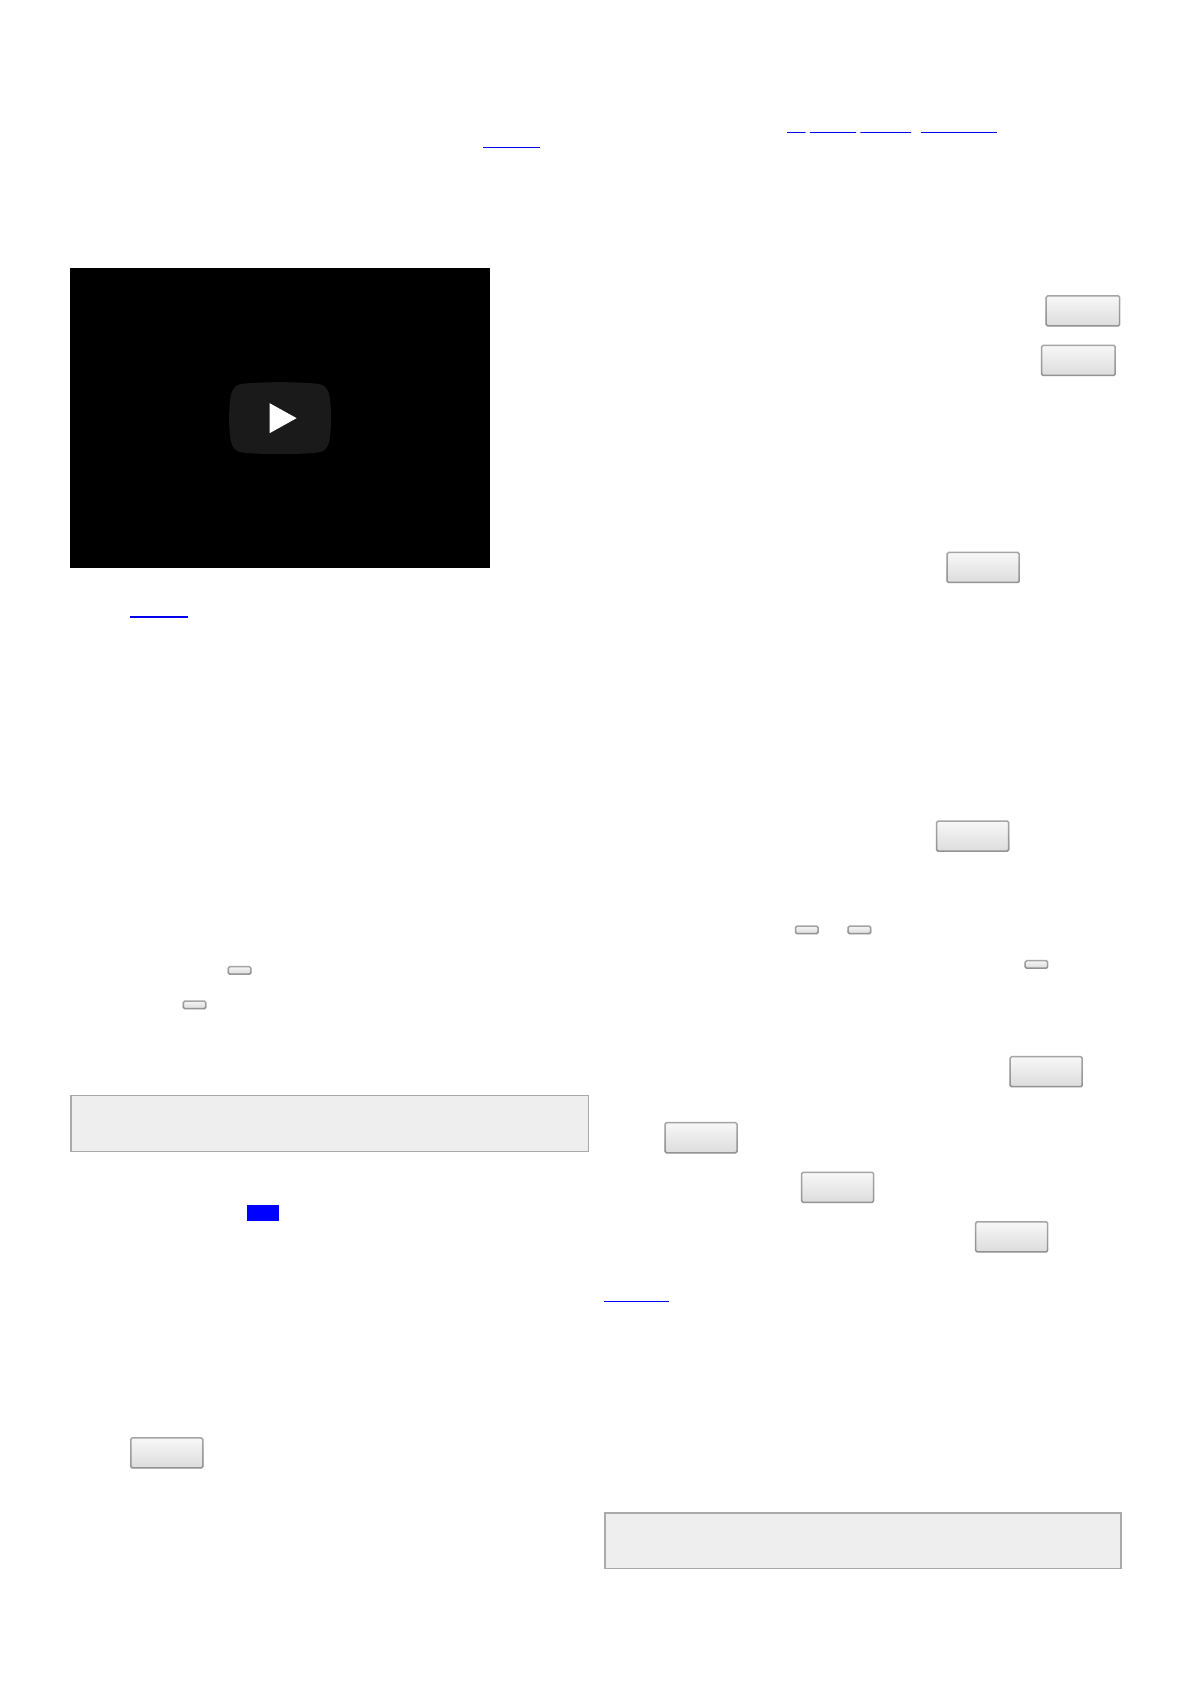
3.4. videos with the iframe element
Everyone loves videos, so let's add one to our page!
The iframe element (short for inline frame) is used to put a YouTube video
player on your page.
For example, the following code is used to add the video below: <iframe
width="280" height="200"
src="https://www.youtube.com/embed/eGokPrezut8"
frameborder="0" allowfullscreen></iframe>
Mario Bros., The Original! - NE…
1. Click here for instructions on how to get the iframe code for a
YouTube video.
2. Follow the instructions to add a video on page1.html.
3. Set the width attribute of the iframe to: 280
4. Set the height to a value between: 150 and 220
5. Use <h3> tags to add a heading above the video.
3.5. review
Your page2.html should be about a topic that relates to page1.html. In our
example, page 1 is about the game Mario Bros, and page 2 is about the
character Mario.
Now you'll gather the content for page2.html. Refer to page1.html or the
reference guide to remind you of what you have learned so far.
Complete the following for page2.html:
1. Add a <h1> heading with the title of your page.
2. Add 2 or more paragraphs <p> of text.
3. Add an image from Wikipedia.
4. Add the Wiki logo to the top of the page above the heading. The
image path is: /images/wiki-jr.png
5. Add the Code Avengers logo to the bottom of the page. The image
path is: /images/ca-logo.png
6. (Optional) Add <h2> subheadings above each paragraph.
7. (Optional) Add a description above the image using <h3> tags.
8. (Optional) Use the width attribute to make sure that the images fit
the page nicely.
4. Anchors
4.1. anchor to another website
Wikipedia articles contain blue words that you can click on to jump to
related articles. These links between articles are created with anchor tags
<a>.
Our page1.html uses an <a> tag to link the word "Nintendo" to it's
Wikipedia page. Here's the code: <a
href="http://en.wikipedia.org/wiki/Nintendo"> Nintendo </a>
The anchor tag's href attribute gives the address that your web browser
opens when the anchor text is clicked.
Complete the following on page1.html:
1. On the line after the Wiki Jr logo, insert the following code:
Insert <a href="">Wikipedia</a>
2. Set the href attribute to link to the Wikipedia page about your
topic.
3. (Optional) Link a word in one of your paragraphs to the Wikipedia
page about that topic.
4. Click when you are done
4.2. anchor to pages in the same folder
Anchors to web pages on different websites need the href set to a full
webpage address, such as: http://wikipedia.org/wiki/Mario
However, links between pages in the same folder on the same website just
need the filename.
For example, page1.html can link to page2.html using the following code: <a
href="page2.html">NAME_OF_TOPIC</a>
On page1.html:
1. On the line after the Wikipedia link, add the following anchor tag
code, and change the text to the name of your 2
nd
page: Insert
<a>NAME_OF_TOPIC</a>
2. Link the anchor to page2.html using the following code: Insert
href="page2.html"
3. (Optional) On page1.html link a suitable word or phrase in your
text to your page2.html. E.g. <p>In the game, <a
href="page2.html">Mario</a>...
4.3. anchor to pages in the same folder
When you link to web pages in different folders on the same website, the
href value starts with / followed by the folder and file name.
The following code links to our Wiki Jr index page: Insert <a
href="/wiki/index.html"> Index </a>
On page1.html, add the following:
1. Just before the Wikipedia page link, add a link to the Wiki Jr index
page with the link text: "Index"
2. Put vertical bars | between the links to the Index, Wikipedia, and
page2.html.
The | character is above the ENTER key on US keyboards, or in the bottom
left on UK keyboards.
4.4. anchor to home page
To link to your website's homepage, you can use: Insert <a
href="/">Homepage</a>
Complete the following on page1.html:
1. At the bottom, add <a> </a> tags around the text "Powered
by Code Avengers" at the bottom of the page.
2. Link the text to the Code Avengers' home page using: href="/"
4.5. anchor review
Let's do a quick review of the 4 types of links in this lesson.
1. Links to pages on other websites use the full URL. Insert <a
href="http://wikipedia.org"> Wikipedia </a>
2. Links to pages in the same folder use the file name only.
Insert <a href="page2.html"> Mario </a>
3. Links to pages in a different folder start with / followed by the
folder and file path. Insert <a href="/wiki/index.html">
Index </a>
4. To link to a website home page set href to /. Insert <a
href="/"> Homepage </a>
Click here for more information about the types of links.
For this task you'll add links to page2.html.
1. Under the Wiki Jr logo on page2.html, add a link to the Wiki Jr index
page.
2. Next to the index link, add a link to the Wikipedia page about your
page2.html topic.
3. Next to the Wikipedia link on [page2.html]], add a link to
page1.html.
4. At the bottom of page2.html, add the text "Powered by Code
Avengers" and link it to the Code Avengers home page.
5. Click when you are done.
5. Intro to CSS
2/13/2018
4/4
5.1. intro to CSS
For your final lesson in this course, you'll learn how to change colors using
CSS.
In lesson2.3 you used the following code to link to a CSS file we created:
<link rel="stylesheet" href="/css/wiki.css">
Now you'll add some of your own styling in a CSS file called: my-wiki.css
For this task do the following:
1. Below the link to /css/wiki.css on page1.html, insert the following
code: Insert <link rel="stylesheet" href="???">
2. Set link tag's href attribute by replacing ??? with: Insert my-
wiki.css
3. Repeat steps 1-2 for page2.html
The links to my-wiki.css must come after the links to /css/wiki.css, otherwise
your custom styling will not work.
5.2. background-color & color
The following code is called a CSS rule; each rule has 2 parts.
Line 1 is the selector; it selects which parts of the page are styled by that
rule. The example code selects the content of the html tag, which is the
whole page.
Lines 2‑3 are a list of CSS property names and values. The properties in the
example set the background-color and text color of the whole web page.
1. Click the my-wiki.css tab, and add the following code to that page:
Insert html {
background-color: blue;
color: yellow;
}
2. To make the text easier to read, change the background-color to:
lightBlue
3. And the text color to: navy
5.3. tag rules
A CSS rule that starts with html { sets the style of the whole web page.
A rule that starts with h2 { sets the style of level 2 headings.
A rule that starts with p { styles the paragraphs.
For this task:
1. Change the CSS selector from html to h1 to see what happens.
2. Then change the selector from h1 to p.
3. Finally change the selector back to html.
4. Click when you're done.
5.4. multiple rules
To give a different style to each element, you need to add more CSS rules.
The following example code has 2 CSS rules:
1. html {
2. color: orange;
3. }
4.
5. h2 {
6. color: green;
7. }
Lines 5‑7 set the color of the level 2 headings to green.
Lines 1‑3 set the text color for the rest of the page to orange.
Now use this color table to choose colors for your pages:
1. In the html rule, set your background-color and text color to any
colors you choose.
2. Add a rule to change the text color for h1 headings.
3. Add a rule to change the text color for h2 headings.
Use the CSS reference or hints if you are stuck.
5.5. background-image
Previously, you set the page's background color. Now you'll use an image for
the background by setting the background-image property.
The background on the example page is set by adding the following property
to the html CSS rule: Insert background-image:
url(/images/textures/light2.png);
For your final task in this course:
1. In the html CSS rule, replace the background-color property with
the background-image code above.
2. Inside the textures folder are 15 images named light1.png,
light2.png, up to light15.png. Try a few of them and choose
your favorite. (light1a.png is transparent)
3. Click support and tell us if you'd like us to link to your pages from
our Wiki Jr index.
Click here to view all the background images.
