
Dapresy Pro
Custom HTML/CSS Do-It-Yourself Guide
2
This guide introduces the basic (yet flexible) skinning possibilities available in Dapresy
Pro. This uses the standard web development technologies HTML, CSS and
JavaScript – with the option to use the JavaScript framework jQuery to create
customized project skins. This allows you to change almost everything related to the
visual design of a finished report.
Adding CSS, HTML & JavaScript to your Project
Using the Project Settings page in Project Administration (Project Administration >
Project Settings) you will be able to add Custom CSS, Custom HTML or Export Custom
HTML to be added on top of the current skin. This allows you to completely review
the skin by overriding CSS rules, as well as add new HTML elements.
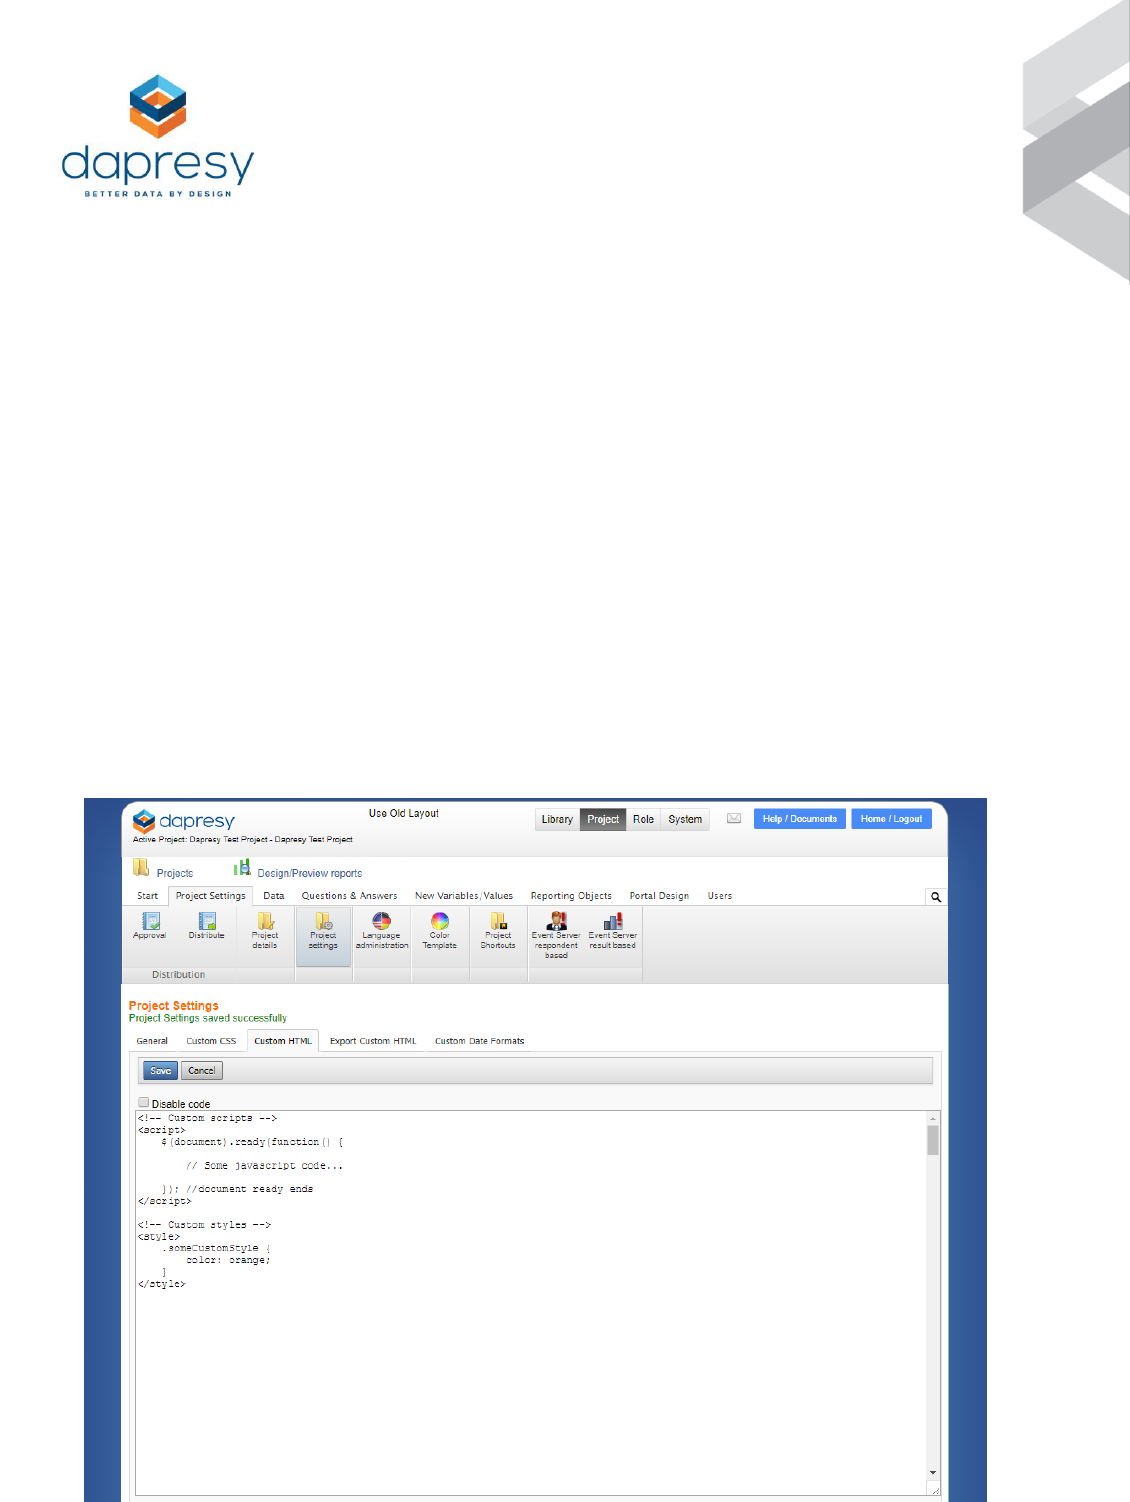
You can add the Javascript code inside the <script> tag, or add CSS code inside
the <style> tag. You’ll want to write plain HTML code without any tags inside the
Custom HTML block:
3
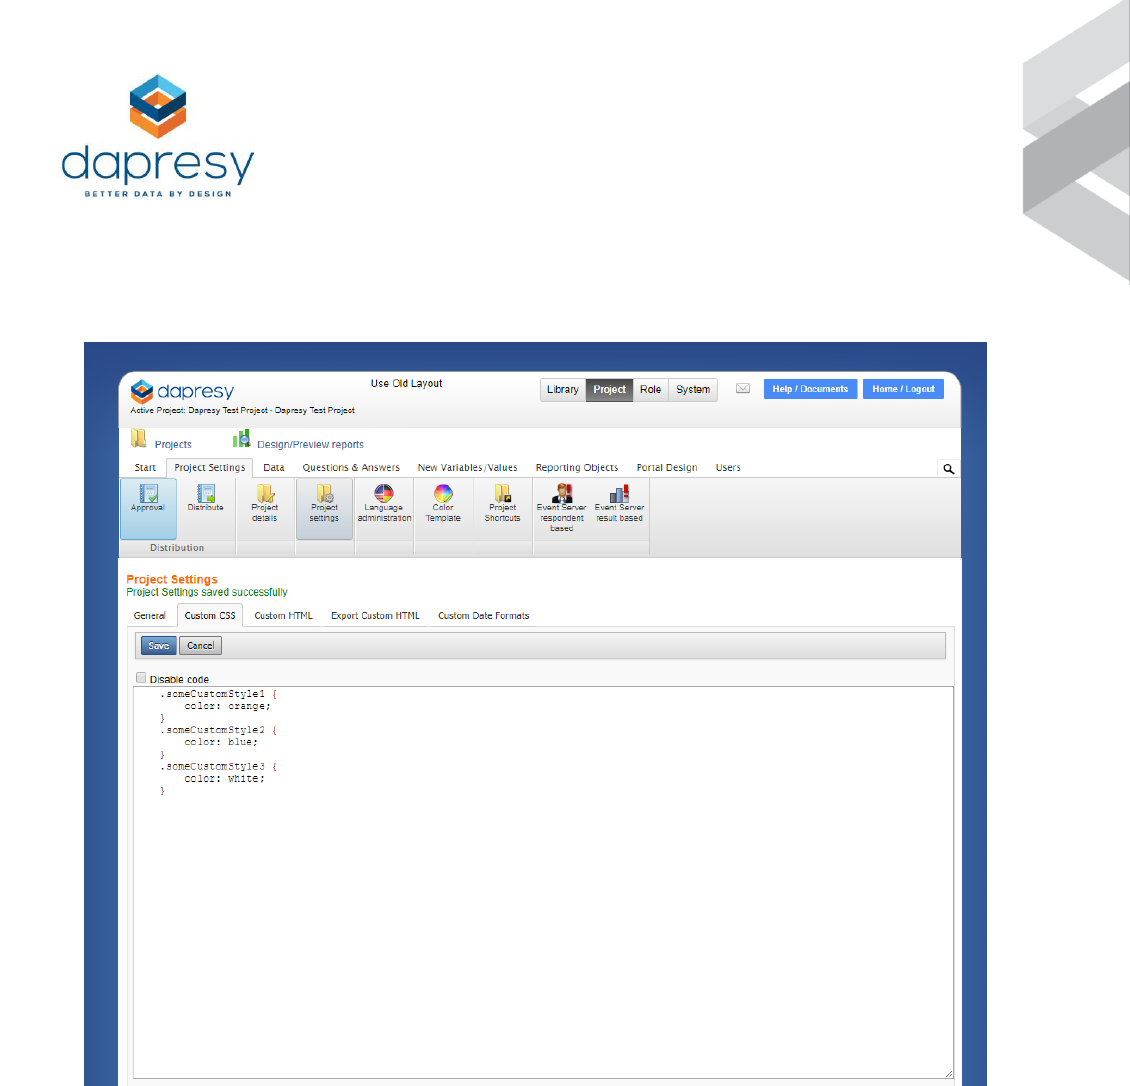
You can add plain CSS code to the Custom CSS block, without the <style> element:
NOTE:
Some browsers do not automatically show the applied CSS changes, so you will want to
refresh the page (Ctrl + F5) or clear your cache. Depending on the browser, simple refresh
often won't be enough, and you will need to clear the cache.

4
There is also an option to add Export Custom HTML, which is commonly used to
optimize the existing custom code (from the Custom HTML block) for the PPT export:
5
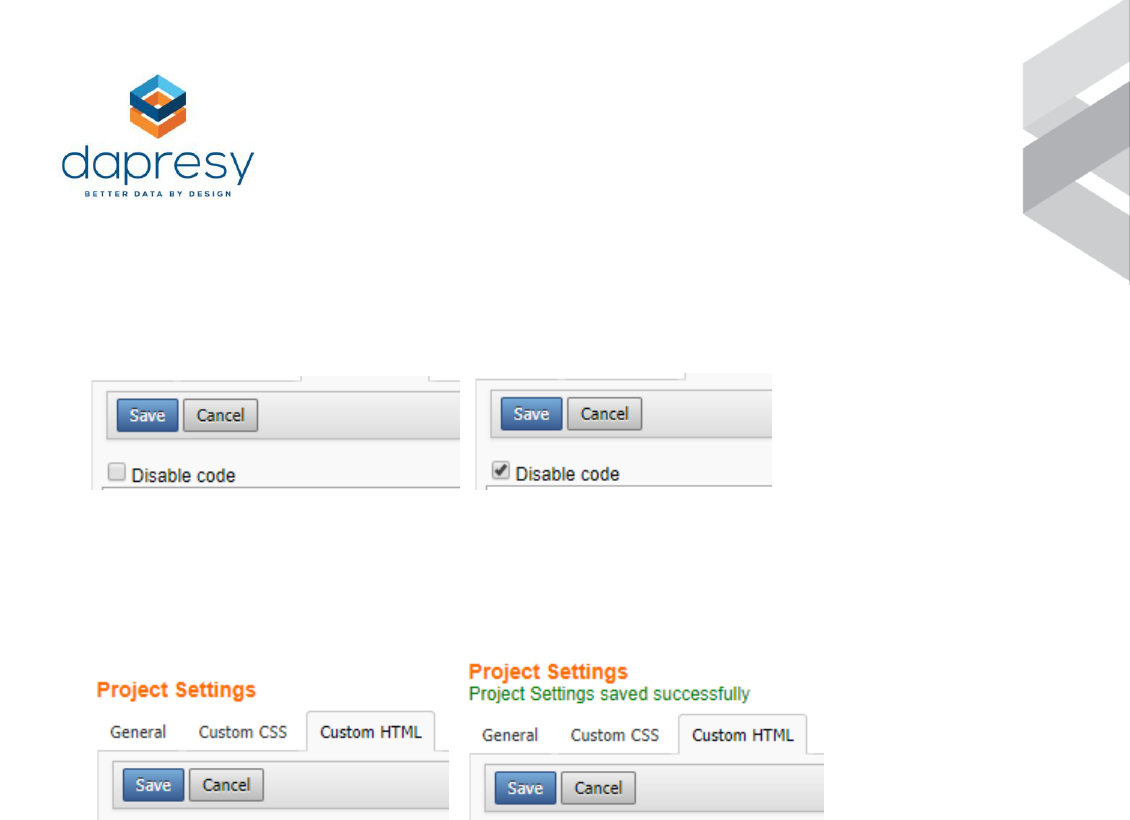
By clicking on the “Disable code” checkbox, the code in the box underneath
(“Custom HTML”, “Custom CSS” or “Export Custom HTML” code block) will be
temporary disabled, unless it’s unchecked again:
All changes in any of the code blocks will be saved only by clicking the Save button,
after which the text “Project Settings saved successfully” will appear to confirm that
the save has been successful:
6
Examples
Going for a Google Header (The HTML)
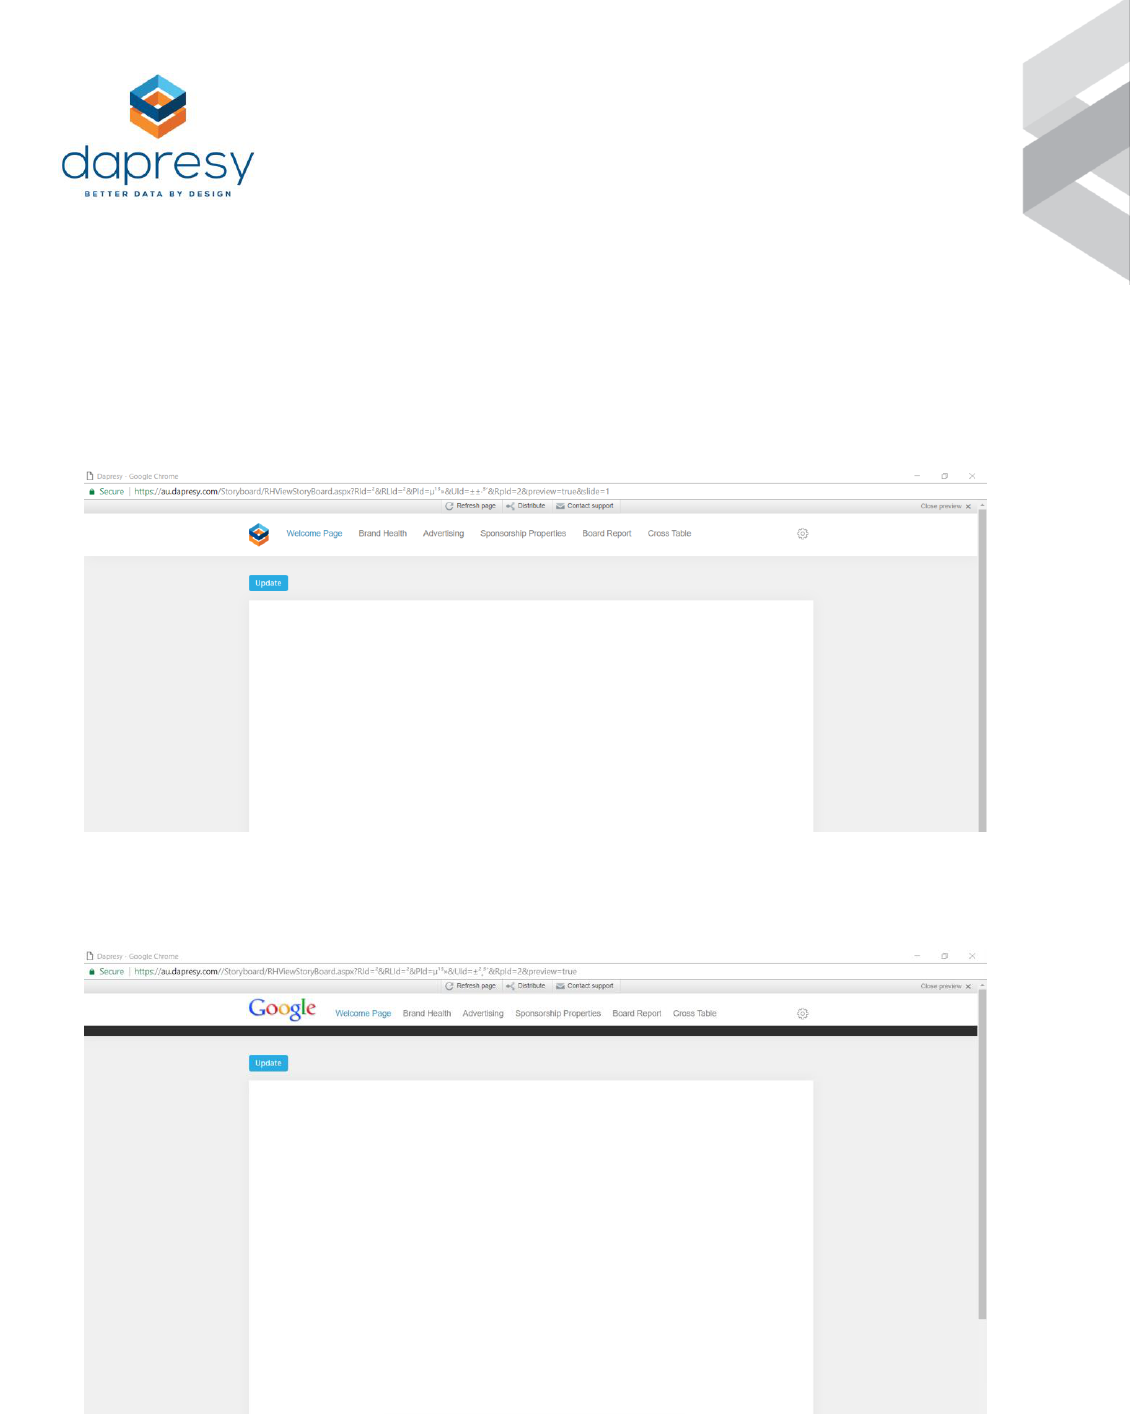
Our sample skin – before applying custom HTML:
Our sample skin – after applying custom HTML:

7
If you want to create a custom header, then you will add the following code to the
Custom HTML box and then save it.
The following are 4 elements in the custom code:
1. “display:none” creates an image element of a Google logo. It is hidden, so it
won’t display directly – we will explain further.
2. "gooFullTop" is positioned behind the menu to give the illusion that the menu is
actually the full width of the page.
3. "gooFullPageBanner" is positioned behind the logo and will be a greyish color.
This creates a feeling that the top section of the page is a header, separate
from the rest of the page.
4. A JavaScript section that will run some jQuery (show the Google logo), then
the document has finished loading all the elements.
<img id="gooLogo" style="display:none"
src="https://manager.dapresy.com/manager/App_Themes/userTemplates/Google/google_lo
go.png" />
<div id="gooFullTop"></div>
<div id="gooFullPageBanner"></div>
<script type="text/javascript">
$(document).ready(function() {
$('#gooLogo').show();
});
</script>
Image Resources
• Google Logo - used in the example above.
https://manager.dapresy.com/manager/App_Themes/userTemplates/Google/google_logo.p
ng
• Dapresy Logo - used in the example above.
https://au.dapresy.com/App_Themes/userTemplates/dapresy_v10.0/dapresy-sign.svg

8
Going for a Google Header (The CSS)
Now that you have added the necessary HTML, you also need to apply styles to
make it look how you want. First, you need to add the new elements we created
above (#gooLogo, #gooFullTop and #gooFullPageBanner).
You’ll also want to add some additional options, like moving the new elements
below the logo, and moving the "generate"-links above the tabs to the right of the
logo. You can do this by simply adding the code below to the existing code you
have in the Custom CSS box, and then saving it.
Make sure to always preview your project to ensure it looks correct. If successful, it
should look like the image “Our sample skin – after applying custom HTML”. If it does
not, then make sure that you have copied and pasted the exact code into the
correct boxes.
Each code below provides a description (in green) of what the code will do.
/* CSS Comment: Position the Google Logo at the top-left of the document. */
#gooLogo {
display: none;
margin-left: -480px;
left: 50%;
position: absolute;
top: 8px;
}
/* CSS Comment: Create an effect that the menu is 100% of the page width. */
#gooFullPageBanner {
background-color: #2d2d2d;
height: 18px;
left: 0;
position: absolute;
top: 78px !important;
width: 100%;
z-index: 0;
}

9
/* CSS Comment: Color the area above the menu and place behind (z-index:-1) the
logo that is greyish. */
#gooFullTop {
background-color: #f6f6f6;
height: 60px;
left: 0;
position: absolute;
top: 0;
width: 100%;
z-index: -1;
}
/* CSS Comment: Position the menu to make room for the logo. */
HTML #reportNav {
top: 60px;
width: auto;
}
/* CSS Comment: Increase the padding on the main menu items for usability. */
HTML #reportNav UL A {
padding-left: 10px;
padding-right: 10px;
}
/* CSS Comment: Move the "distribute", "update" links close to the top above the
menu. */
HTML #siteNav {
top: 10px;
}
/* CSS Comment: Style the distribute-link, smaller font and remove bold. */
HTML #siteNav A:link,
HTML #siteNav A:visited {
font-size: 10px;
font-weight: normal;
}
/* CSS Comment: Align the preview-link to the rest of the top-right links.*/
HTML #ctl00_pnlPreviewLinks,
HTML #pnlPreviewLinks {
float: left;
}

10
/* CSS Comment: Change the background color to a less darker color and add equally
dark borders. */
HTML #navigation {
background-color: #2d2d2d;
border-left: 1px solid #2d2d2d;
border-right: 1px solid #2d2d2d;
}
/* CSS Comment: Remove any background images, boldness or text transformation
that is applied to the tabs. */
HTML #nav A {
background-image: none;
font-weight: normal;
text-transform: none;
}
/* CSS Comment: Optimizing the navigation for the new logo by adding left padding
so it doesn't overlaps with the navigation links */
#reportNav {
padding-left: 100px;
}
/* CSS Comment: Adding background color to white on the navigation and setting
border size to 0 pixels */
HTML #navigation {
background-color: #fff;
border: 0;
}
/* CSS Comment: Hiding the existing Dapresy logo. */
img#logo {
visibility: hidden;
}
/* CSS Comment: For administrators only, hide the skin picker. */
#ctl00_ddlTheme,
#ddlTheme {
display: none;
}
11
Your Most Important Tools
Web Developer Tools
It is required to be able to see the IDs, Classes and Names of elements that you want
to apply style to.
Internet Explorer and Google Chrome come with Developer functionality – press F12
on your keyboard to see this.
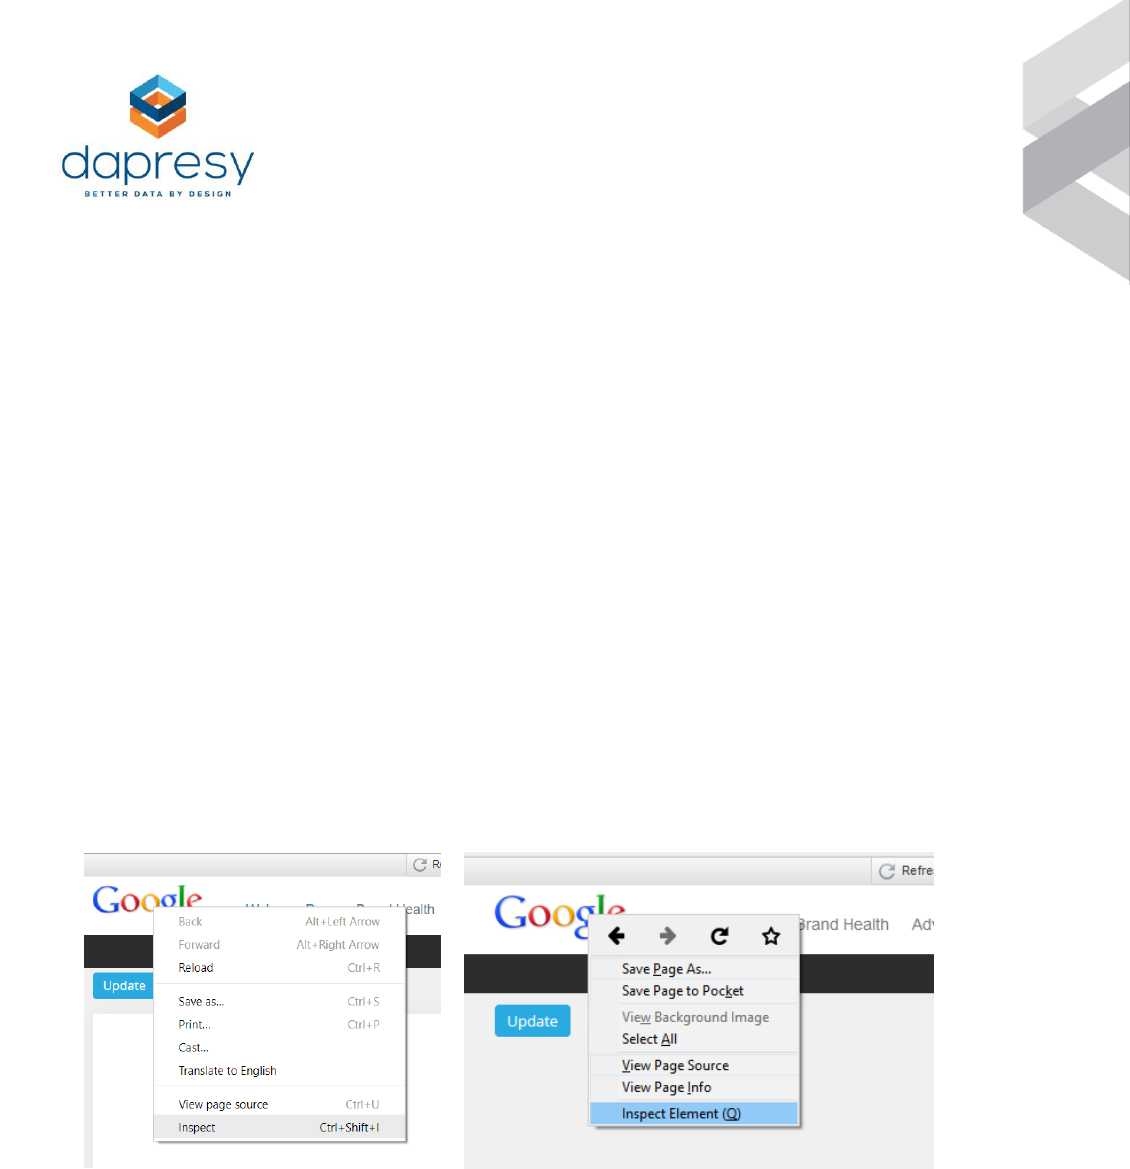
There is also an option to inspect the individual elements by Right Clicking on the
chosen element -> Inspect/Inspect Element. The Developer Tools Inspector will open
itself automatically, and the inspected element will be selected within its HTML
context. The styles for the selected element will be shown in the right panel (under
the Rules/Styles tab), so you can track all CSS changes there.
How to inspect elements in Google Chrome and Mozilla Firefox:
12
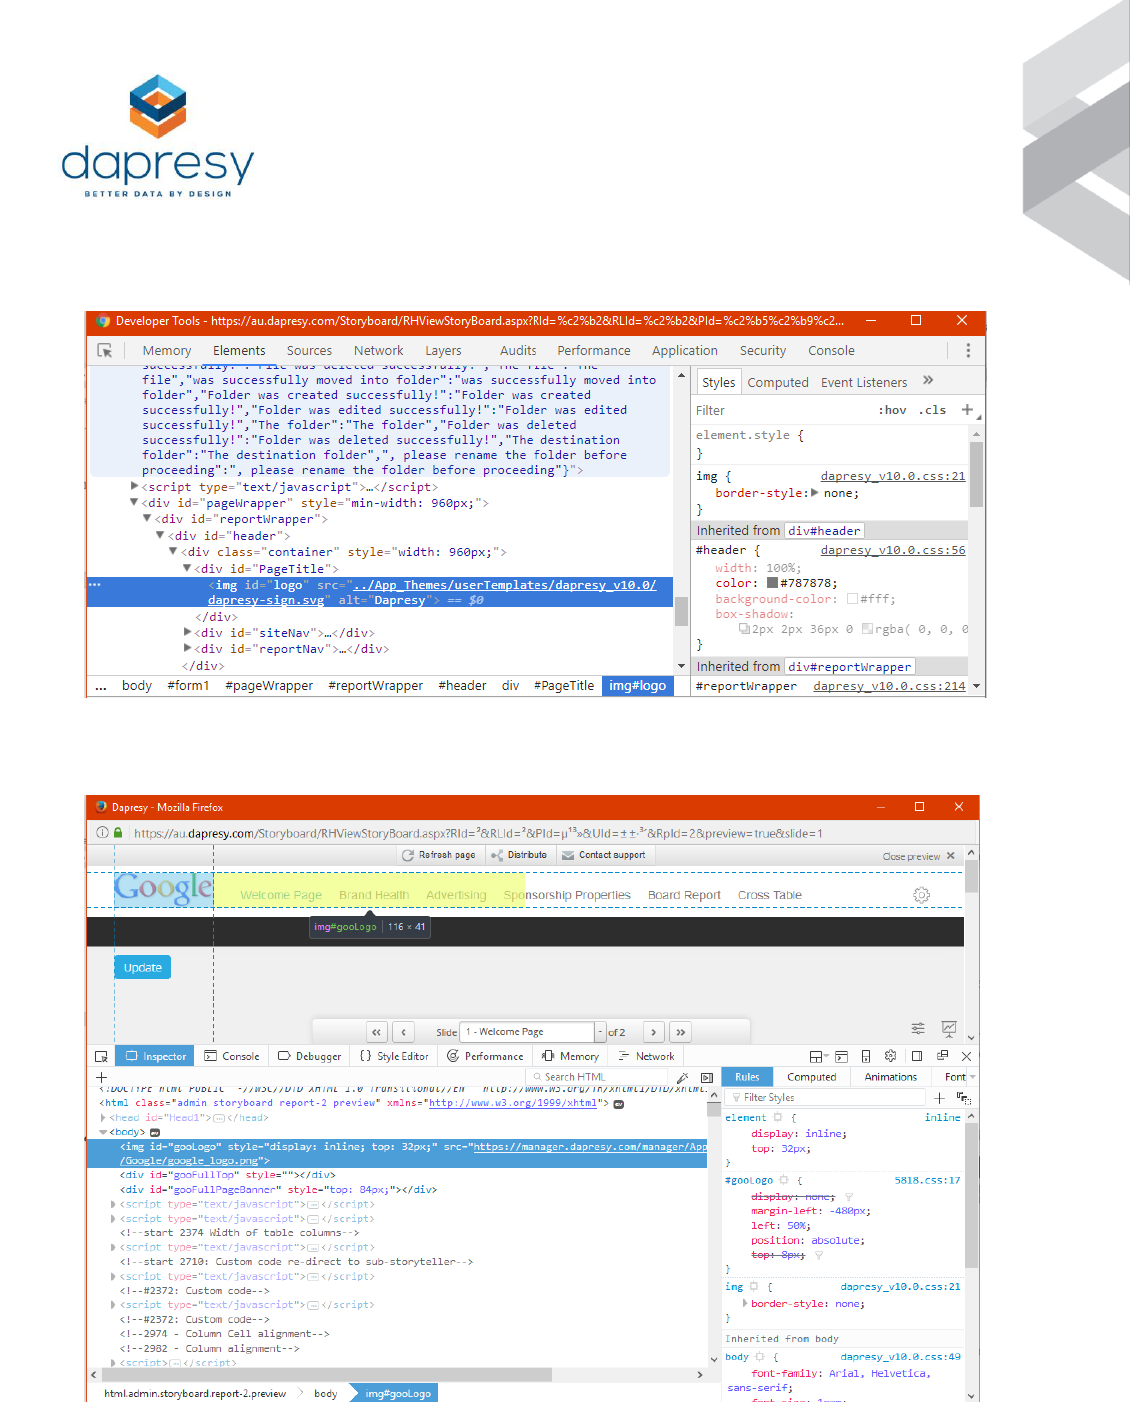
Example of the Developer Tools in Google Chrome:
Example of the Developer Tools Inspector in Mozilla Firefox:
13
Color Picker
This allows you to get the correct color RGB code in order to define a color.
http://www.colorpicker.com/
Learn More
Developer Tools
• Chrome DevTools Overview: https://developer.chrome.com/devtools
• Firefox Developer Tools: https://developer.mozilla.org/son/docs/Tools
HTML
• HTML Tutorial: http://www.w3schools.com/html/
CSS
• CSS Tutorial: http://www.w3schools.com/css/
• CSS Pseudo Classes (:hover, :link, :visited, :active):
http://www.w3schools.com/css/css_pseudo_classes.asp
JavaScript
• JavaScript Tutorial: http://www.w3schools.com/js/
• jQuery API: http://api.jquery.com/

14
Common Problem Areas
CSS is case sensitive
When writing your CSS, make sure that you are using the correct name of the
element or class that you are trying to select, otherwise your style rules will not be
applied.
Images and other rich media
Dapresy Pro must be used over https, as opposed to plain http, as a security
precaution. This means that any images or other rich media must be served via
https, failing to do so will generate an error in the browser, invalidating the Secure
HTTP channel by serving them unencrypted content.
To solve this, you can either upload your rich media content to your own server, and
include it via a https-link, or send it to a Dapresy team member so that we can host
the content.
Please note that this only applies to images and other files that are displayed or
included directly in the page, as opposed to images and other files from external
sources.
Browsers Compatibility
There are many different browsers on the market, though the most popular are
Google’s Chrome, Mozilla’s Firefox, Microsoft’s Internet Explorer (IE)/Edge and
Apple’s Safari. Together these account for around 95-98% of the global market.
However, Internet Explorer is also fragmented into different versions (IE6, IE7, IE8, IE9,
IE10 and IE11) which are by now replaced with Microsoft Edge as the default
browser in Windows 10 (2015). If you want to allow users to accept and interact with
iPads or other tablets, you also need to add target Apple’s Mobile Safari and/or
different versions of the Android Internet Browser.
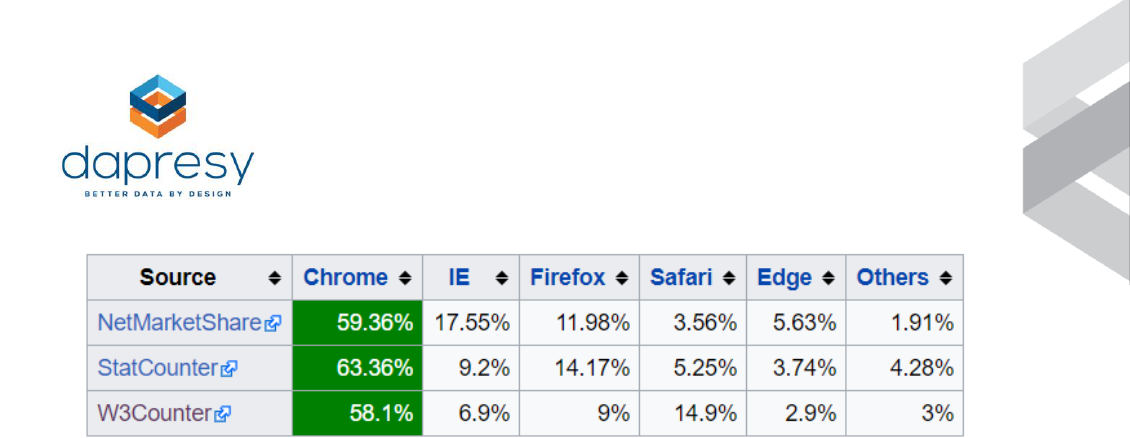
Below is the usage share of desktop browsers for May 2017:
15
All of the varied browsers and versions have slightly different behavior when it comes
to HTML and CSS, as they use different rendering engines in the applications, and
some lack JavaScript functionality that you might want to use. This requires you to
know your target market, and knowing what browsers your end-users are going to
use. You will need to make sure that your skin looks acceptable in every browser.
jQuery will allow you to write cross browser compatible JavaScript fast, without the
need to worry about different Internet Browser versions.
